Creating a user in ProPlanner is done through the user management screen (Management > Users and Permissions > Users) and in different steps:
- Filling in the user's information
- Assigning roles to the user
- Inviting the user
Filling in the user's information
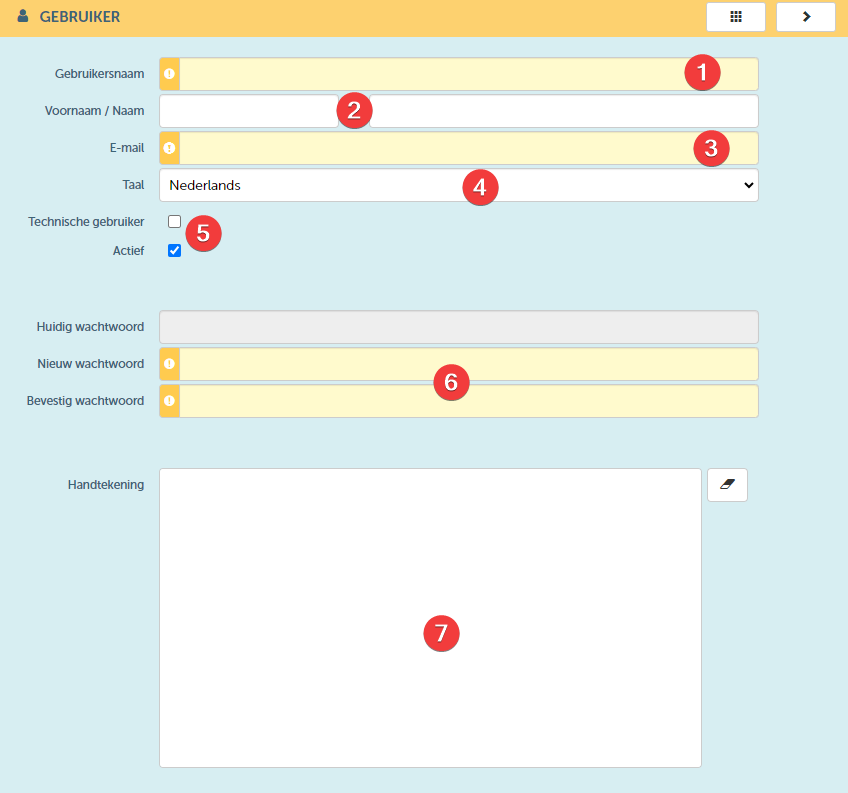
When creating a new user, the following information must/can be filled in:
| No. | Description | Required? | Comments |
| 1 | Enter the username for the user you wish to create. We recommend using the user's email address for this purpose. Please note: The user will need to sign in to ProPlanner with this username. Furthermore, this name will also be used within ProPlanner to refer to this user. Therefore, it is important that it is unique within ProPlanner. | Yes | This name cannot be changed after saving the user. |
| 2 | Enter the first and last name of the user here | No | |
| 3 | Enter the email address of the user here. The user will receive emails from ProPlanner at this email address (such as emails regarding password (re)setting). | Yes | This email address can be changed at any time. |
| 4 | Specify the user's language here. This is also the language in which ProPlanner will open when this user logs in. | Yes | The user can always change this language. |
| 5 | By means of these checkboxes you can indicate whether it is a technical user (i.e. a user required to grant access to an external system to ProPlanner) You can also deactivate an existing user's access to ProPlanner by checking the "Active" checkbox. | Check or uncheck | |
| 6 | Here you can set a temporary password for the user. When inviting the user (see further), they will receive an email to change this password. | Yes | |
| 7 | Here the user can fill in their signature. This will be shown on the check-out and check-in documents. | No |
Assigning roles to the user
Through the "Roles" tile, you can grant permissions to the user being created. These permissions are assigned at 3 different levels. It is important to know that we use a pyramid structure for permissions within ProPlanner. This means that you can expand someone's permissions at a lower level, but you cannot shrink them.
For example: If you give a user admin rights at the highest level, this user will have admin rights at all levels (even if you indicate something different). However, if you only give him basic rights at the highest level, it is possible to still give him admin rights at a lower level.
We therefore recommend creating each user as a basic user at the highest level (i.e. General role) and then expand his rights as desired at the enterprise group or pool level.
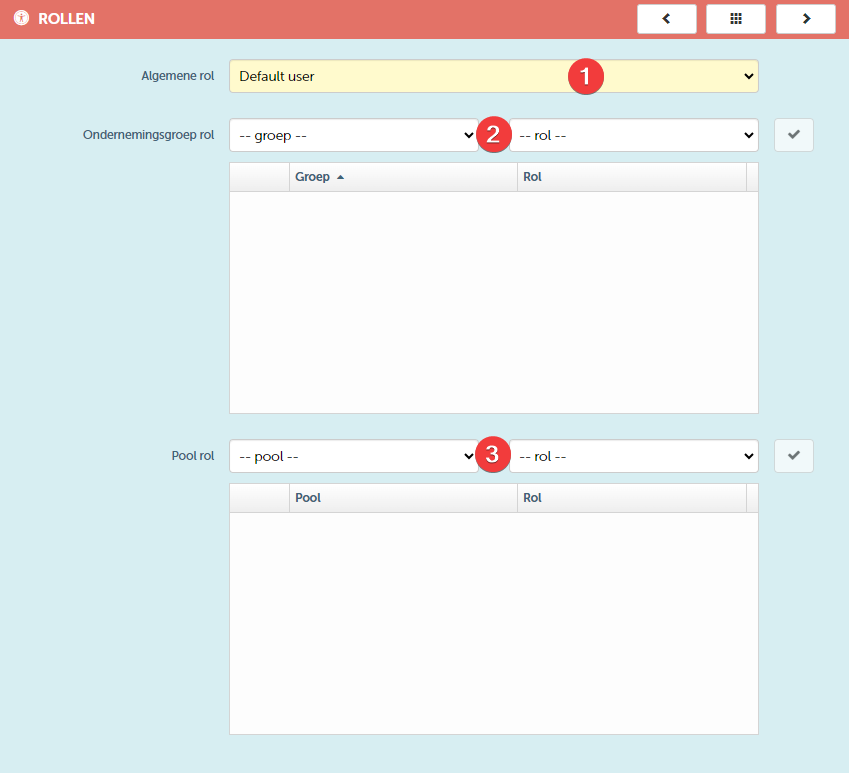
| No | Description | Required |
| 1 | Specify the general role the user should have. As already mentioned, we recommend always selecting the role of basic user here. | Yes |
| 2 | Here you can determine the role the user should have within each business group. Please note that you cannot reduce this role for the underlying pools, only expand it. | Yes |
| 3 | Here you can determine for the underlying pools whether the assigned rights at the enterprise group level should be expanded for a specific pool. | No |
Inviting the user
After setting everything up correctly, you can create the new user by saving their details (via the 'Save' or 'Save and close' button (1). Only after the user has been saved, the 'Invite user' button (2) will be activated.

When you click on it, the respective user will receive an email to change their password. This email looks as follows: