Insurance profiles are usually created based on the category of the resource. For example, there may be a specific profile for a passenger car, van, bicycle, and so on. This is important because each profile uses different excesses and insured amounts.
Example:
- For a bicycle, the excess for theft is lower than for a car.
- For a bicycle, there is no risk of glass breakage or interior damage, which is the case for a car.
An insurance profile consists of:
- The desired excesses, each with a specific amount.
- Additional terms and conditions.
- Optional: extra insurance options for upselling.
How do you create an insurance profile?
Go to Management > Insurance policies > Insurance profiles and press '+' to create a new insurance profile

The following input screen will then appear:
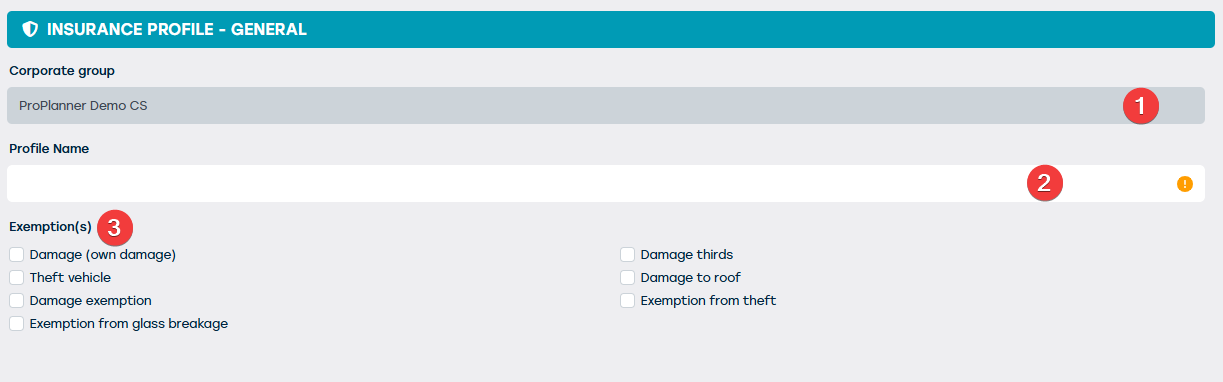
| NR | DESCRIPTION | REQUIRED | Remark |
| 1 | The company group you are logged in under appears here | ALREADY DEFINED | Not editable. For this, you must log in under the desired group. |
| 2 | Here you can enter the desired name of the insurance profile | YES | This name appears on the resource sheet and the contract screen. |
| 3 | Select the desired excesses to be included in this profile | NO |
Go to the tile ‘Options’.
Here you set the deductible for the excesses you have established. This set forms an option. There must be at least one option (usually the standard option).
Standard option
- Determine the deductible per excess.
- Set a total amount for this option. In the standard option, it is assumed that this amount is included in the rental price, with no extra cost to the renter.
Extra options (upselling)
- Offer options where the deductible is lowered (for renters who want more security).
- Consider an option where the deductible is fully bought out for a higher premium.
- You can also increase risks for young drivers or offer specific options for business vs. private clients.
Set the options like this:
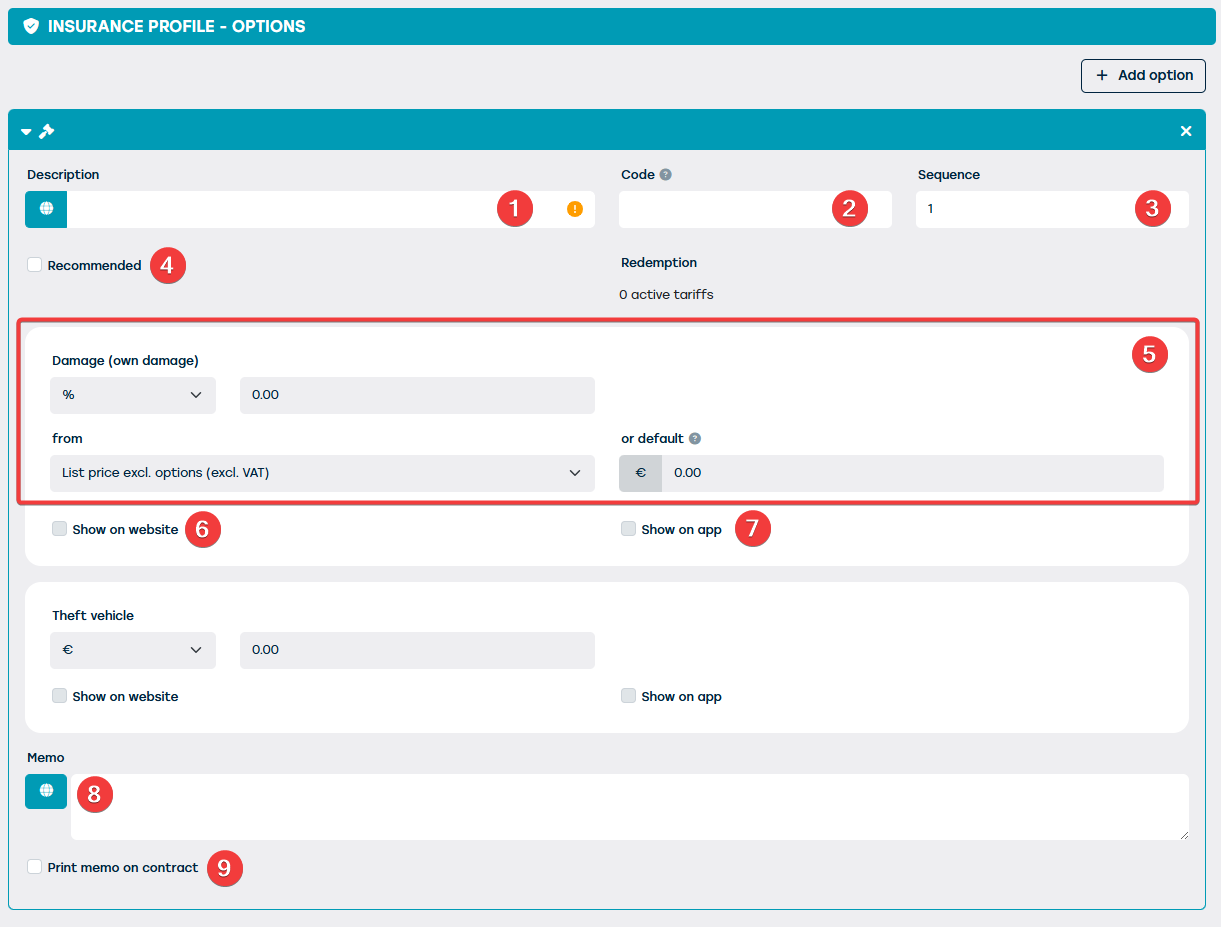
| NR | DESCRIPTION | REQUIRED | Remark |
| 1 | Name of the option (e.g. standard, reduced risk). | YES | This name can be shown in the price line on the contract and translated using the globe icon. |
| 2 | Code for automatic selection when changing the profile | NO | When changed, the same option is selected, if available. |
| 3 | Order of excesses on documents. | NO | |
| 4 | Mark as ‘recommended’ on the website. | NO | |
| 5 | Set amount per excess (fixed amount or percentage). | NO | Percentage is calculated based on the selected option. It is also recommended to always enter a standard amount as a fallback. |
| 6 | Show option on website. | NO | Only possible when using the webplugin or web integration |
| 7 | Show option in app | NO | Only possible when using GoPlanner |
| 9 | Memo field for extra info. | NO | |
| 10 | The entered text in the memo field can be printed on the contract | NO |
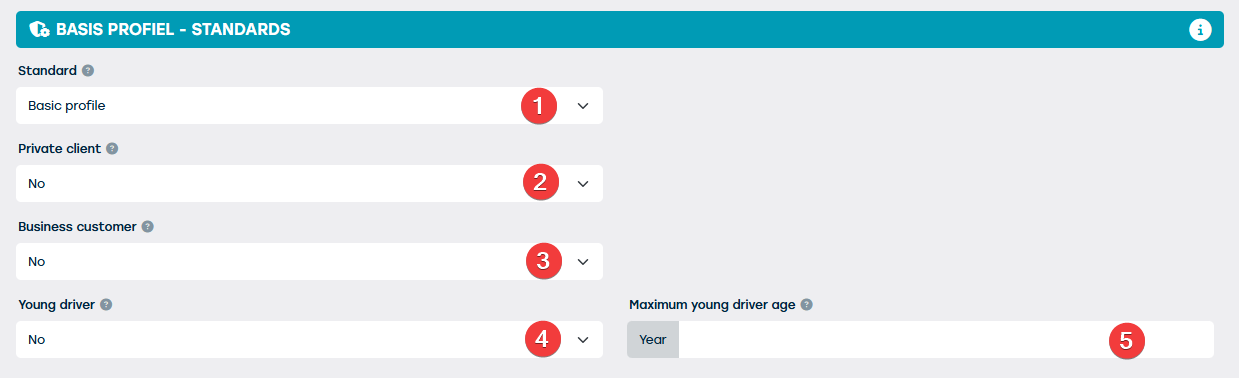
Go to the tile 'Standards'
In Standards, you determine which option is suggested by default based on:
- Age of the driver (young driver receives a specific option).
- Type of customer (business or private).
- If no specific option is set, the general standard option is applied.
Summary:
- First, the driver is checked.
- Then the main client.
- If there is no match, the system chooses the standard option.