In this video:
In this video, we’ll show you how to assign roles to a user in ProPlanner.
Before we begin, make sure you have the rights to manage users. Typically, this is done by a fleet manager or administrator at the company group level.
In this example, a new user has just been created via the JLR gateway and will be using ProPlanner for daily operations. At this point, the user doesn’t yet have the necessary rights to perform their tasks, so we need to assign the correct role.
To assign roles to the user, start by going to Manage and then click on 'Users' located under user and rights.
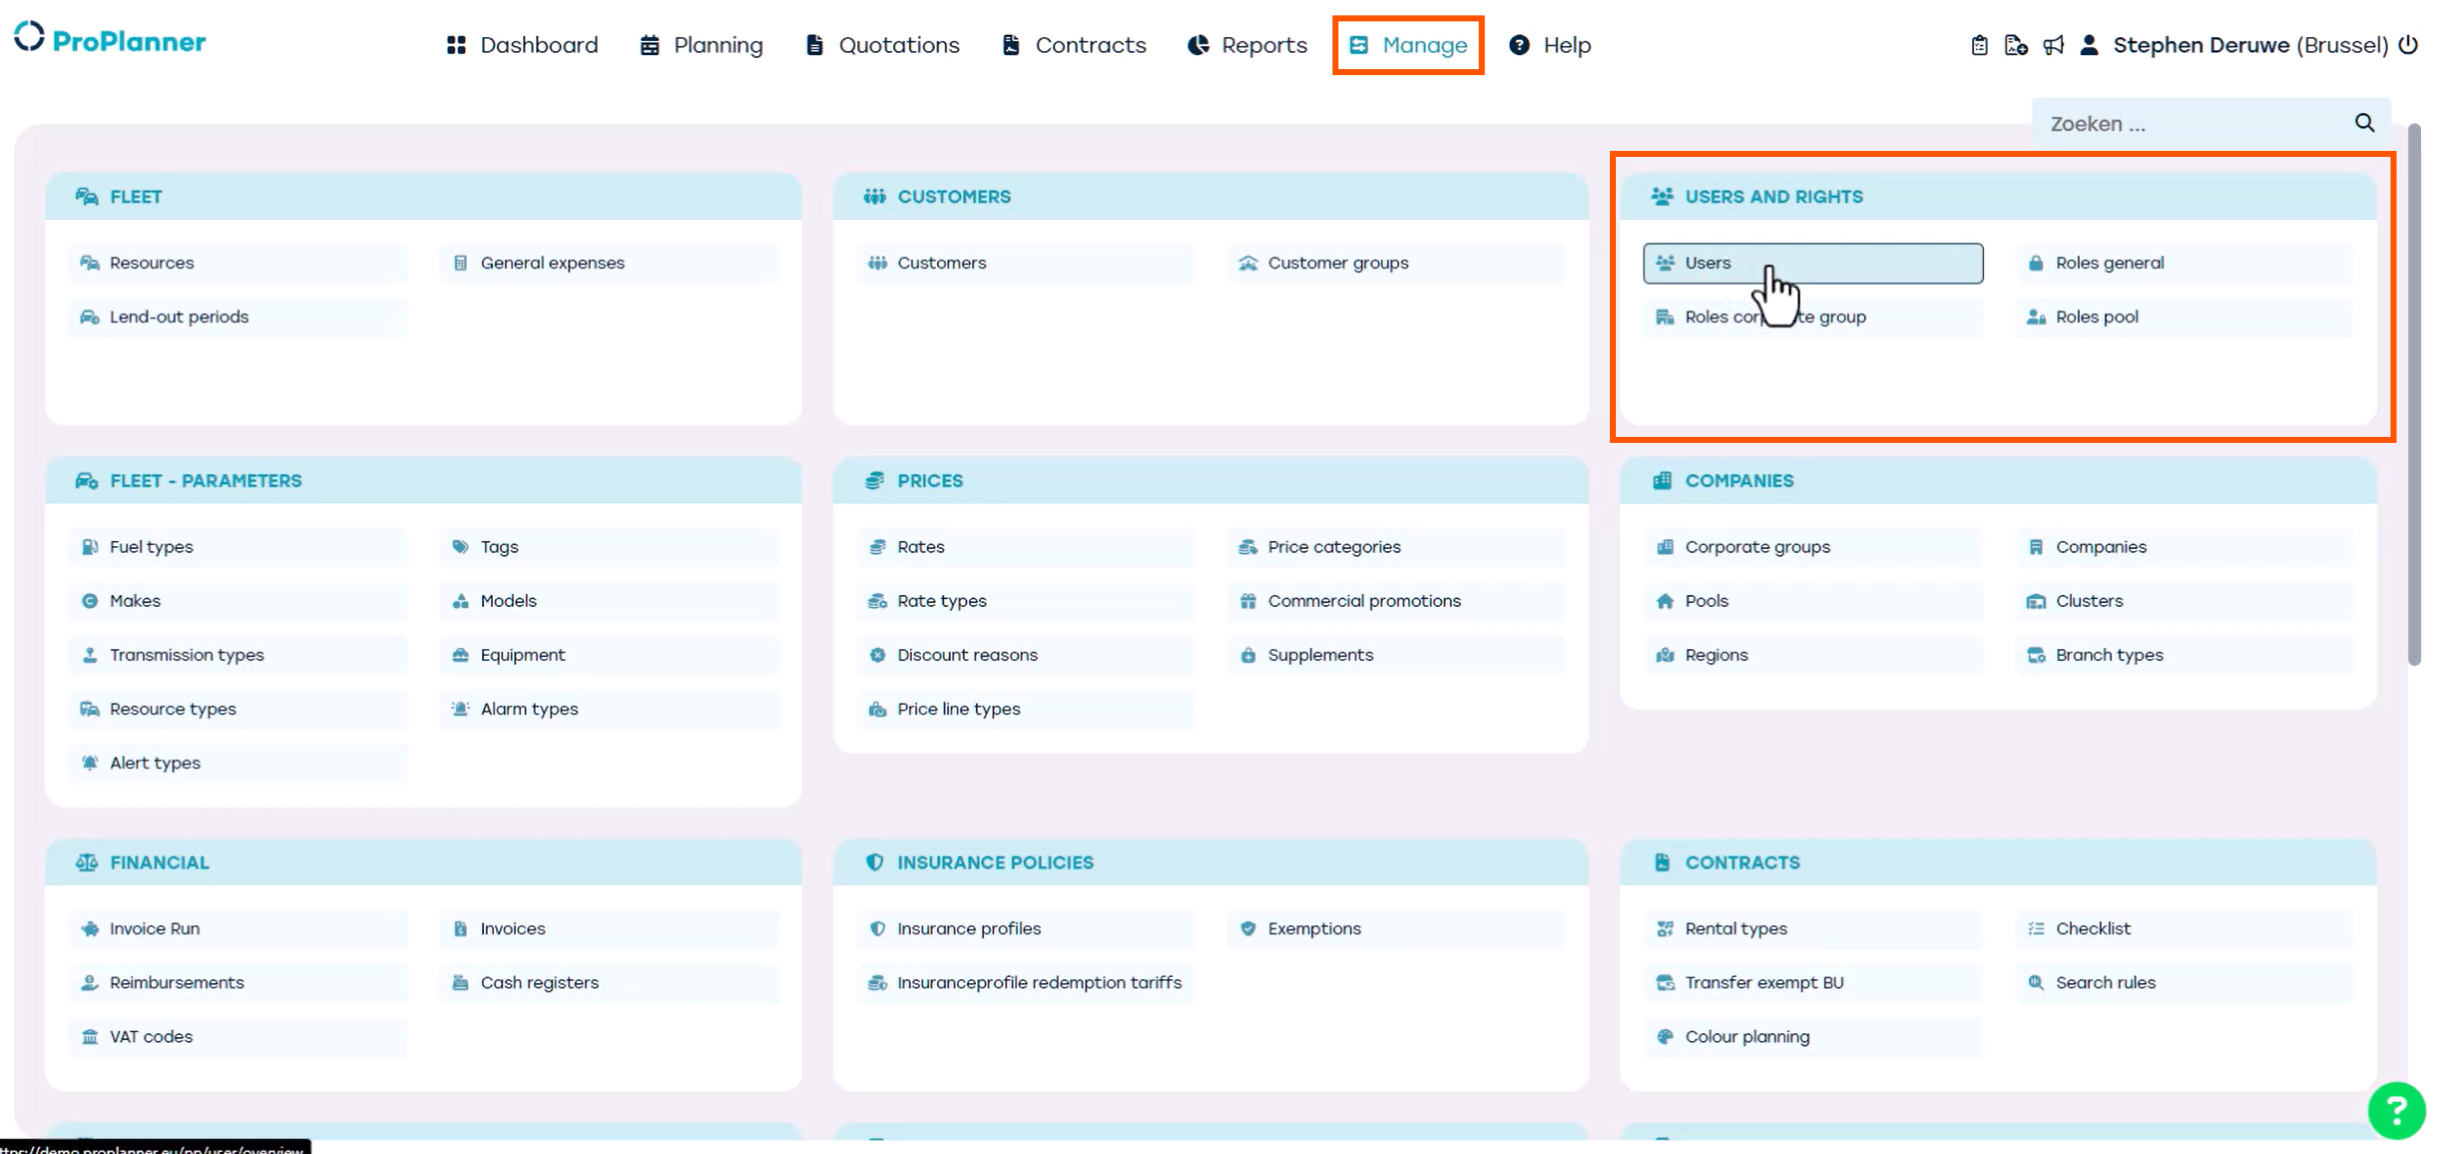
In the left-hand column, you can search for the new user by username, email address, or name. Then, click the pencil icon or double-click the user you want to assign roles to.

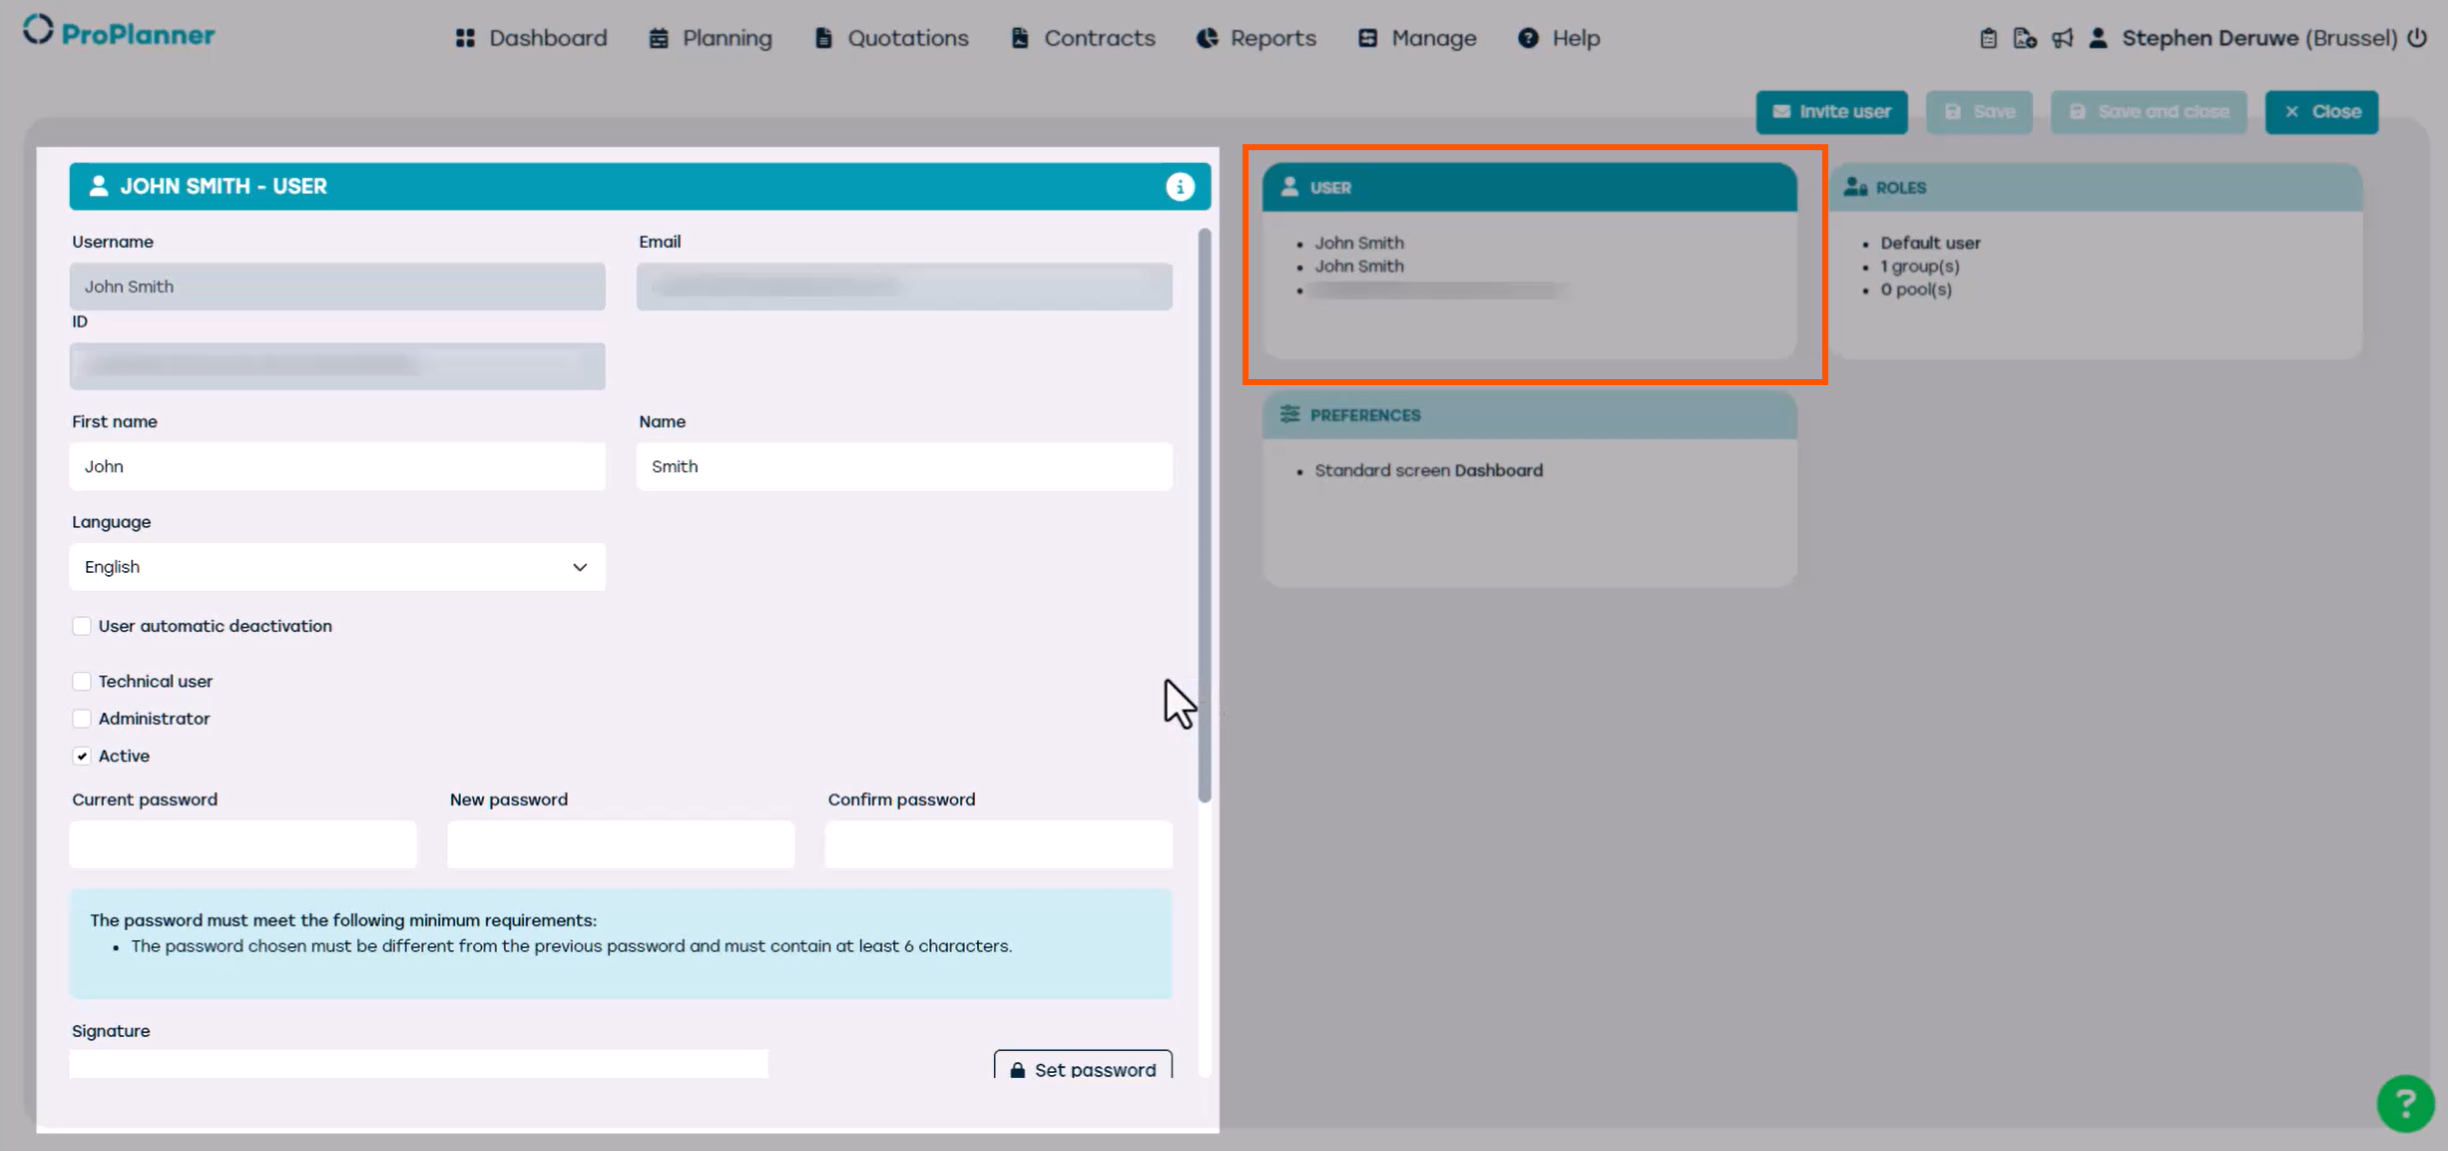
Let’s start by taking a closer look at the user tile.
Here, we enter the main information for our new user. Since the user has already been created, most of these fields will already be filled in.
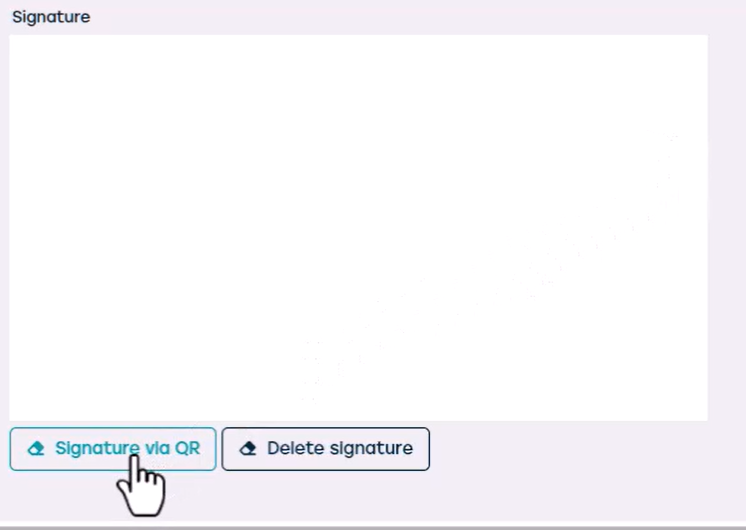
We strongly recommend that the new user adds their own signature. This signature will be automatically included in important documents, such as check-out and check-in forms.
Here’s how to do it:
Click on “Signature via QR”.
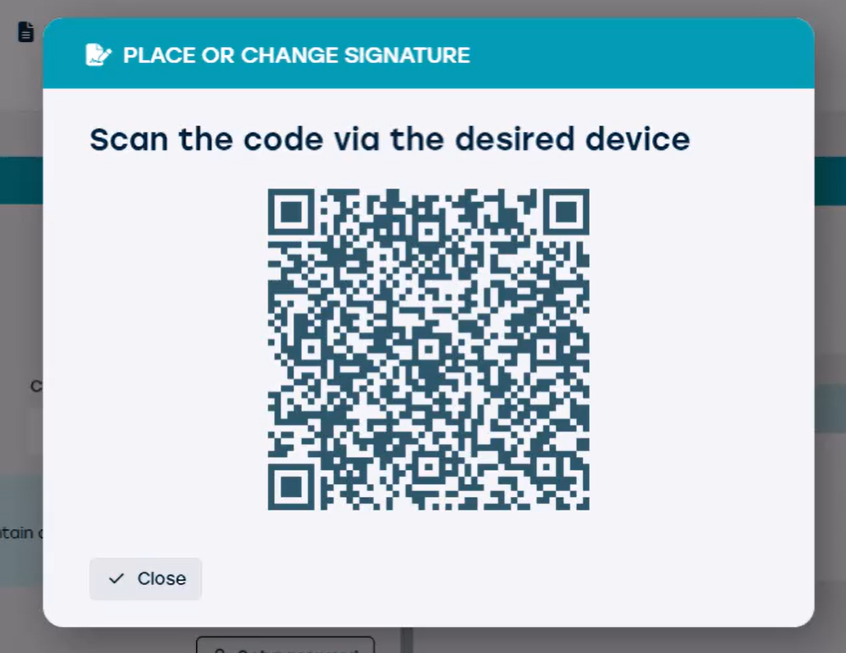
A QR code will appear on your screen.a0Scan the QR code with your mobile device.a0Follow the instructions on your phone to create and save your signature.a0Once completed, the signature will be linked to the account and used in relevant documents.
Now, let’s look at the Roles tile.
You will notice there are 3 level of roles in ProPlanner.
- General role: These are broad rights across the whole environment.
- Corporate group role: This refers to rights that are assigned to one or more company groups, including their associated pools
- Pool role: This gives rights within one or more specific pools.
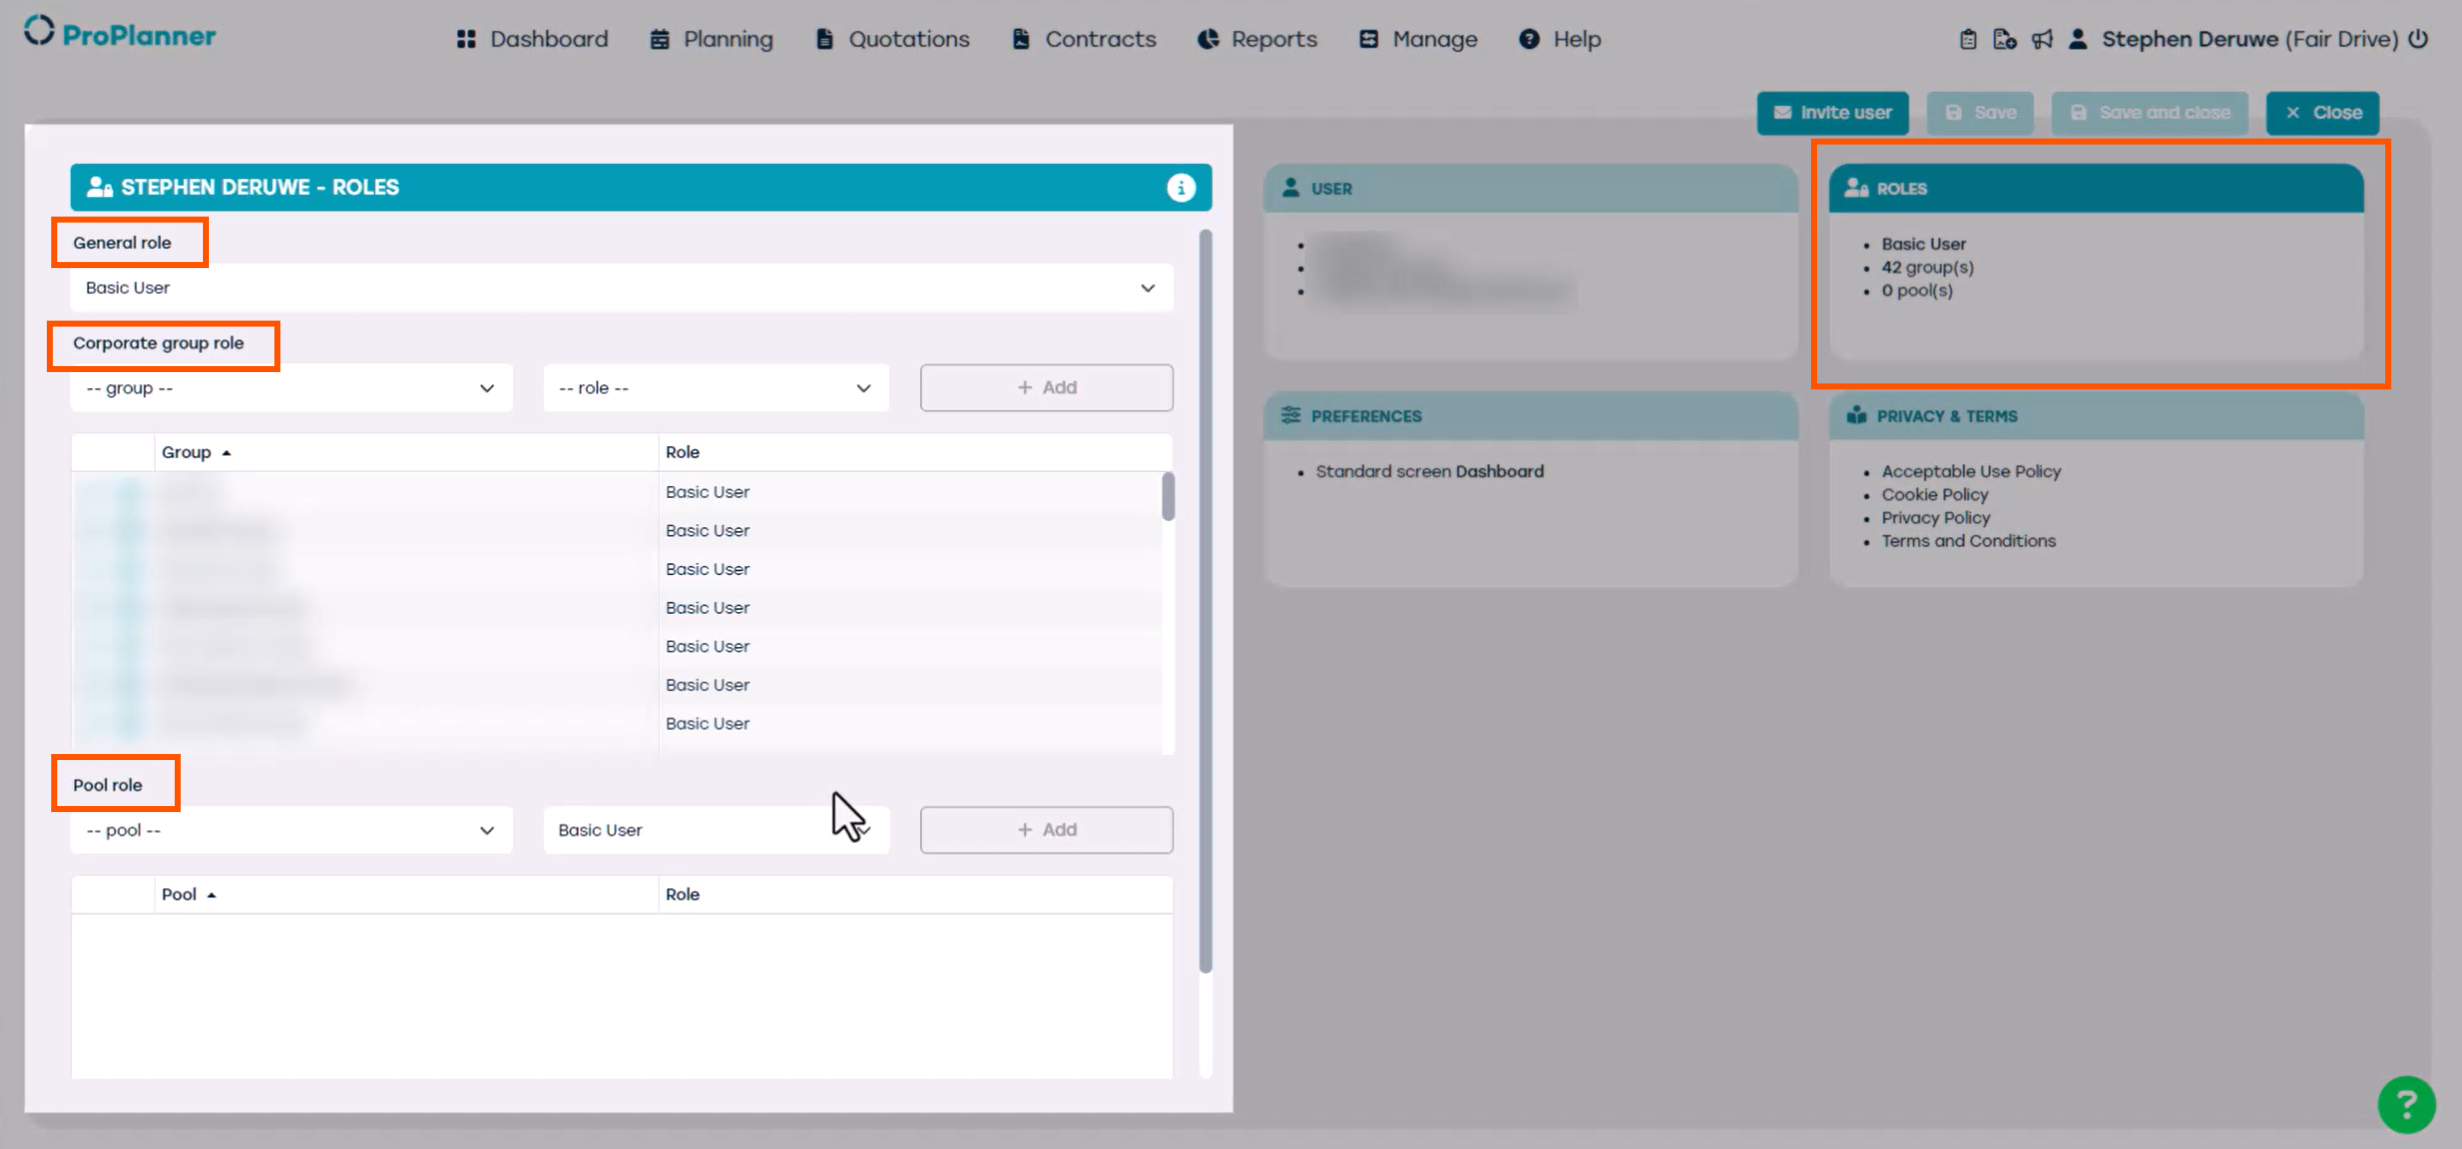
We’ll be focusing on the Pool Role level, as these roles are essential for performing daily tasks in ProPlanner. Within the Pool level, there are several role types available under the Pool Group Role but in this video we will go over the two most commonly used roles.
The Basic user
This role allows users to view contracts, perform check-outs and check-ins, report damages, create customers, and access other essential features needed for daily use of ProPlanner within a specific pool.
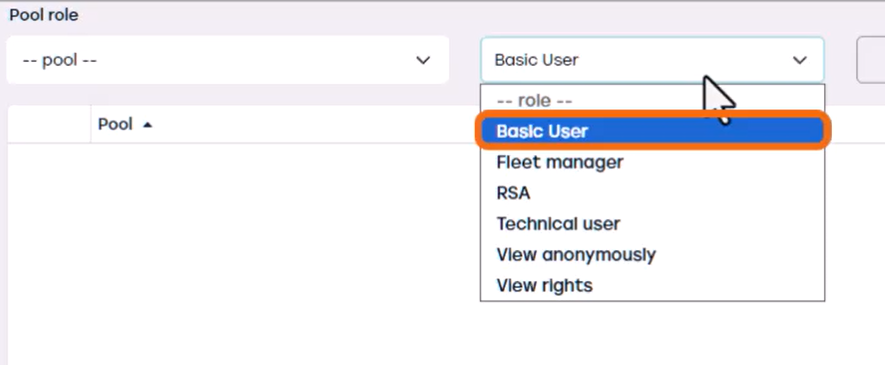
Now let's discuss The Fleet manager role
A fleet manager has the same capabilities as a basic user, such as handling day-to-day operations, but also has the ability to manage resources, including adding, editing, or deactivating them, within the specific pool for which they have fleet manager rights.
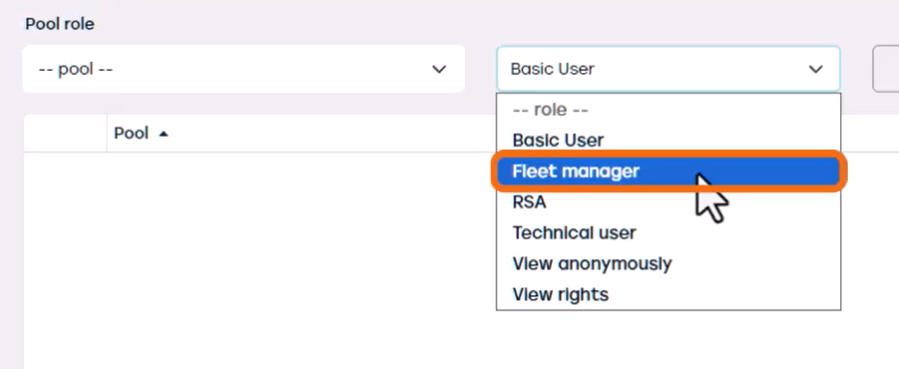
The other roles are mainly intended for integration and configuration purposes, which won’t be covered in this video.
In our example, we wanted to give a new basic user the ability to perform daily tasks in ProPlanner so we assign the Basic User role under Pool roles for each pool the user needs access to.
To assign the basic user role to the user, select the appropriate pool, choose the Basic User role from the dropdown menu, and then click Add.
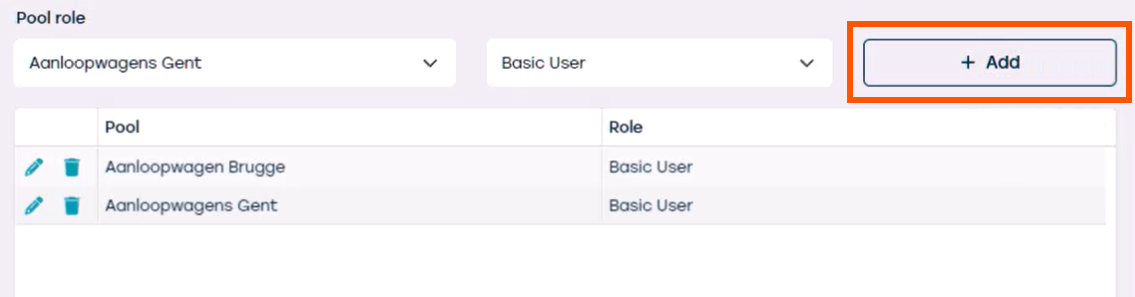
That’s it! We’ve now assigned the correct roles for all the pools the user requires access to.
Finally, let’s open the Preferences tile. Here you’ll find several options, but we’ll focus on the essential ones.
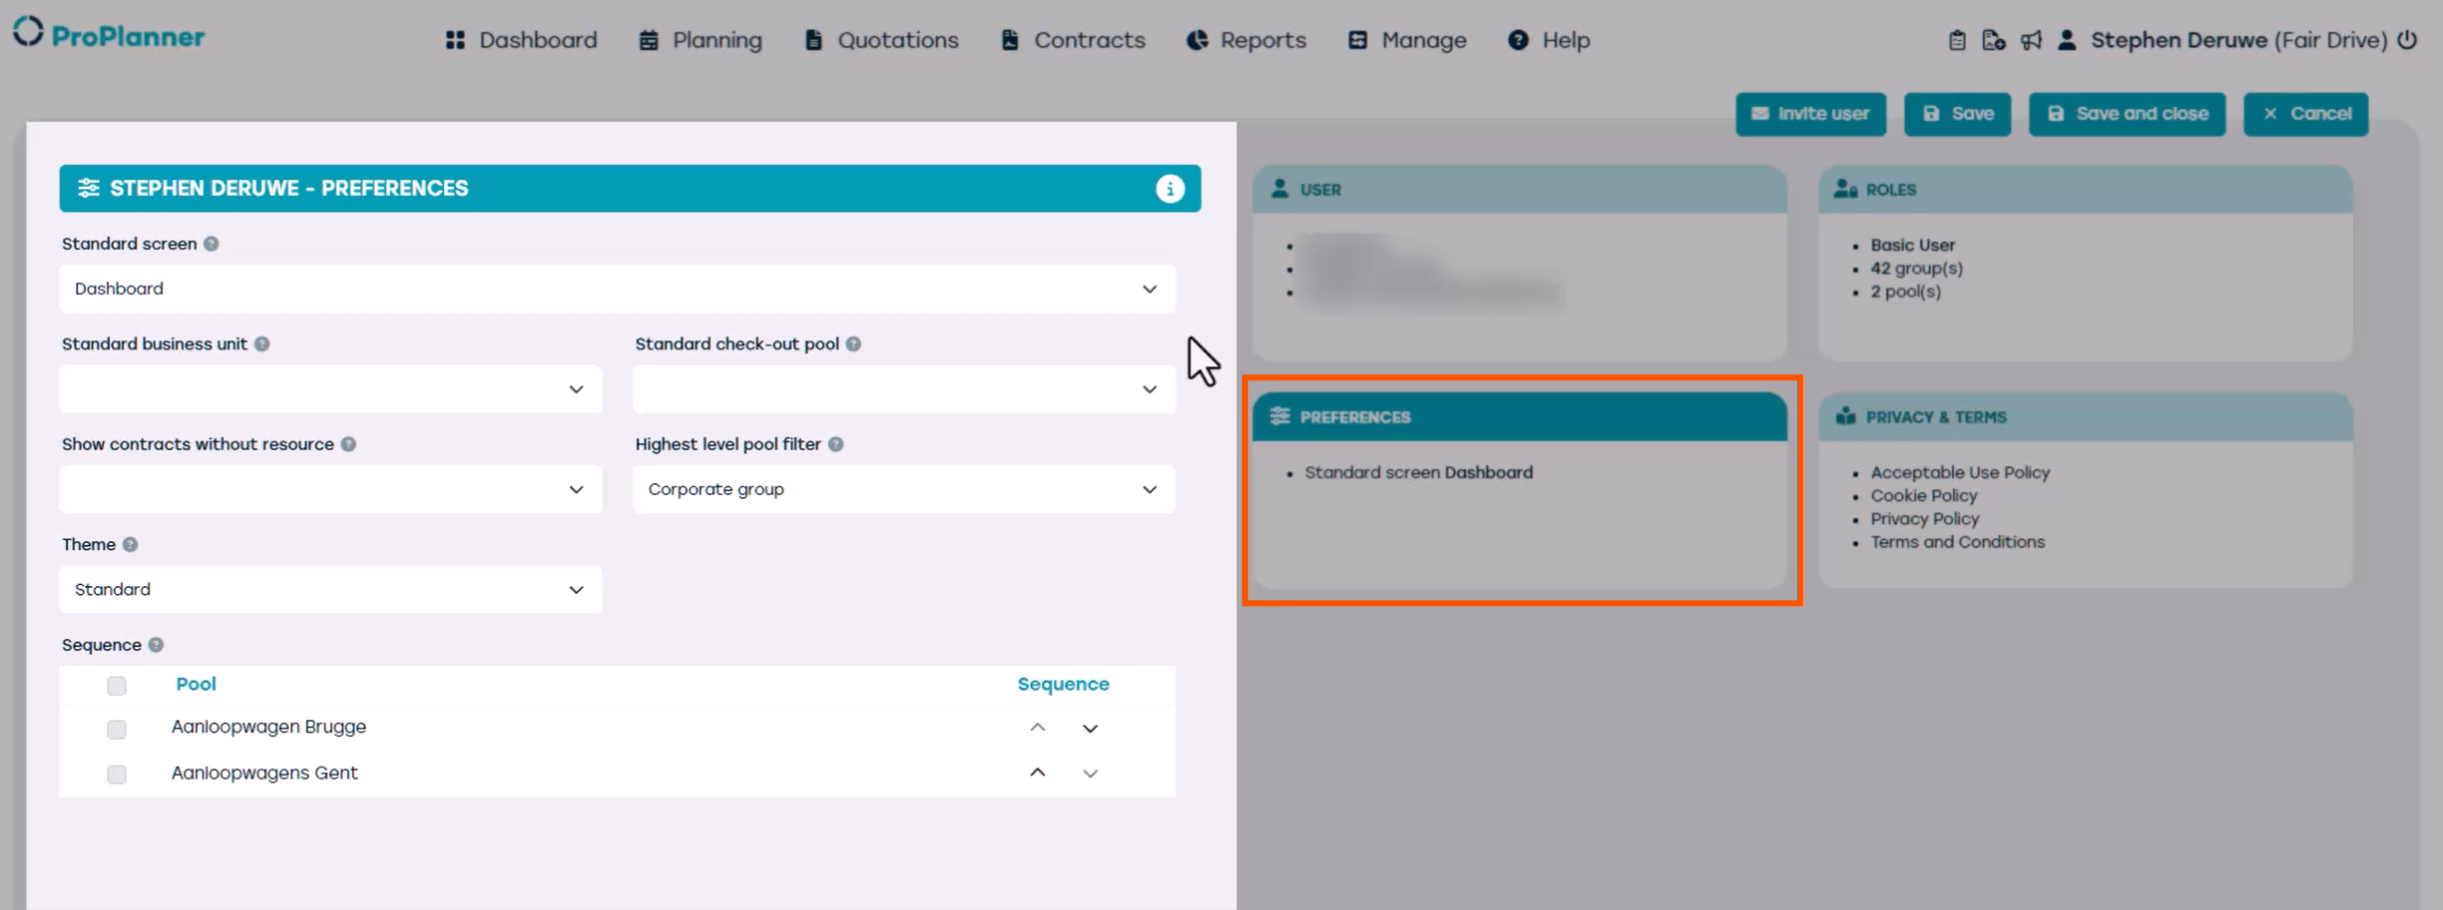
Here, you can set options for:
- The Default screen – dashboard or planning screen, we recommend keeping it on the dashboard screen, so you don’t miss out on any important information when you login to ProPlanner.
- The ProPlanner theme, which lets you select either a dark or light theme.
- The Sequence option allows you to set the order in which pools appear in the planning view. When a pool or all pools are selected, they will always be shown by default when you open the planning screen.a0
- You can also choose your preferred default business unit, which will be selected automatically each time you log in to ProPlanner. In most cases, we recommend leaving these settings for the user to adjust themselves after their first login.
When everything is filled in, click Save to save the changes that we made to the user.
The user now has the rights to view the pools they’ve been assigned to and perform basic actions, such as viewing contracts and completing check-outs and check-ins, using both the desktop version and the tablet application.