In this video:
A resource can be many things. Most often, it’s a vehicle, but it could also be a bicycle, a commercial plate, accessories, or even a person!
Now let's add a new resource in ProPlanner. Go to Manage, then Fleet, and look for Resources.
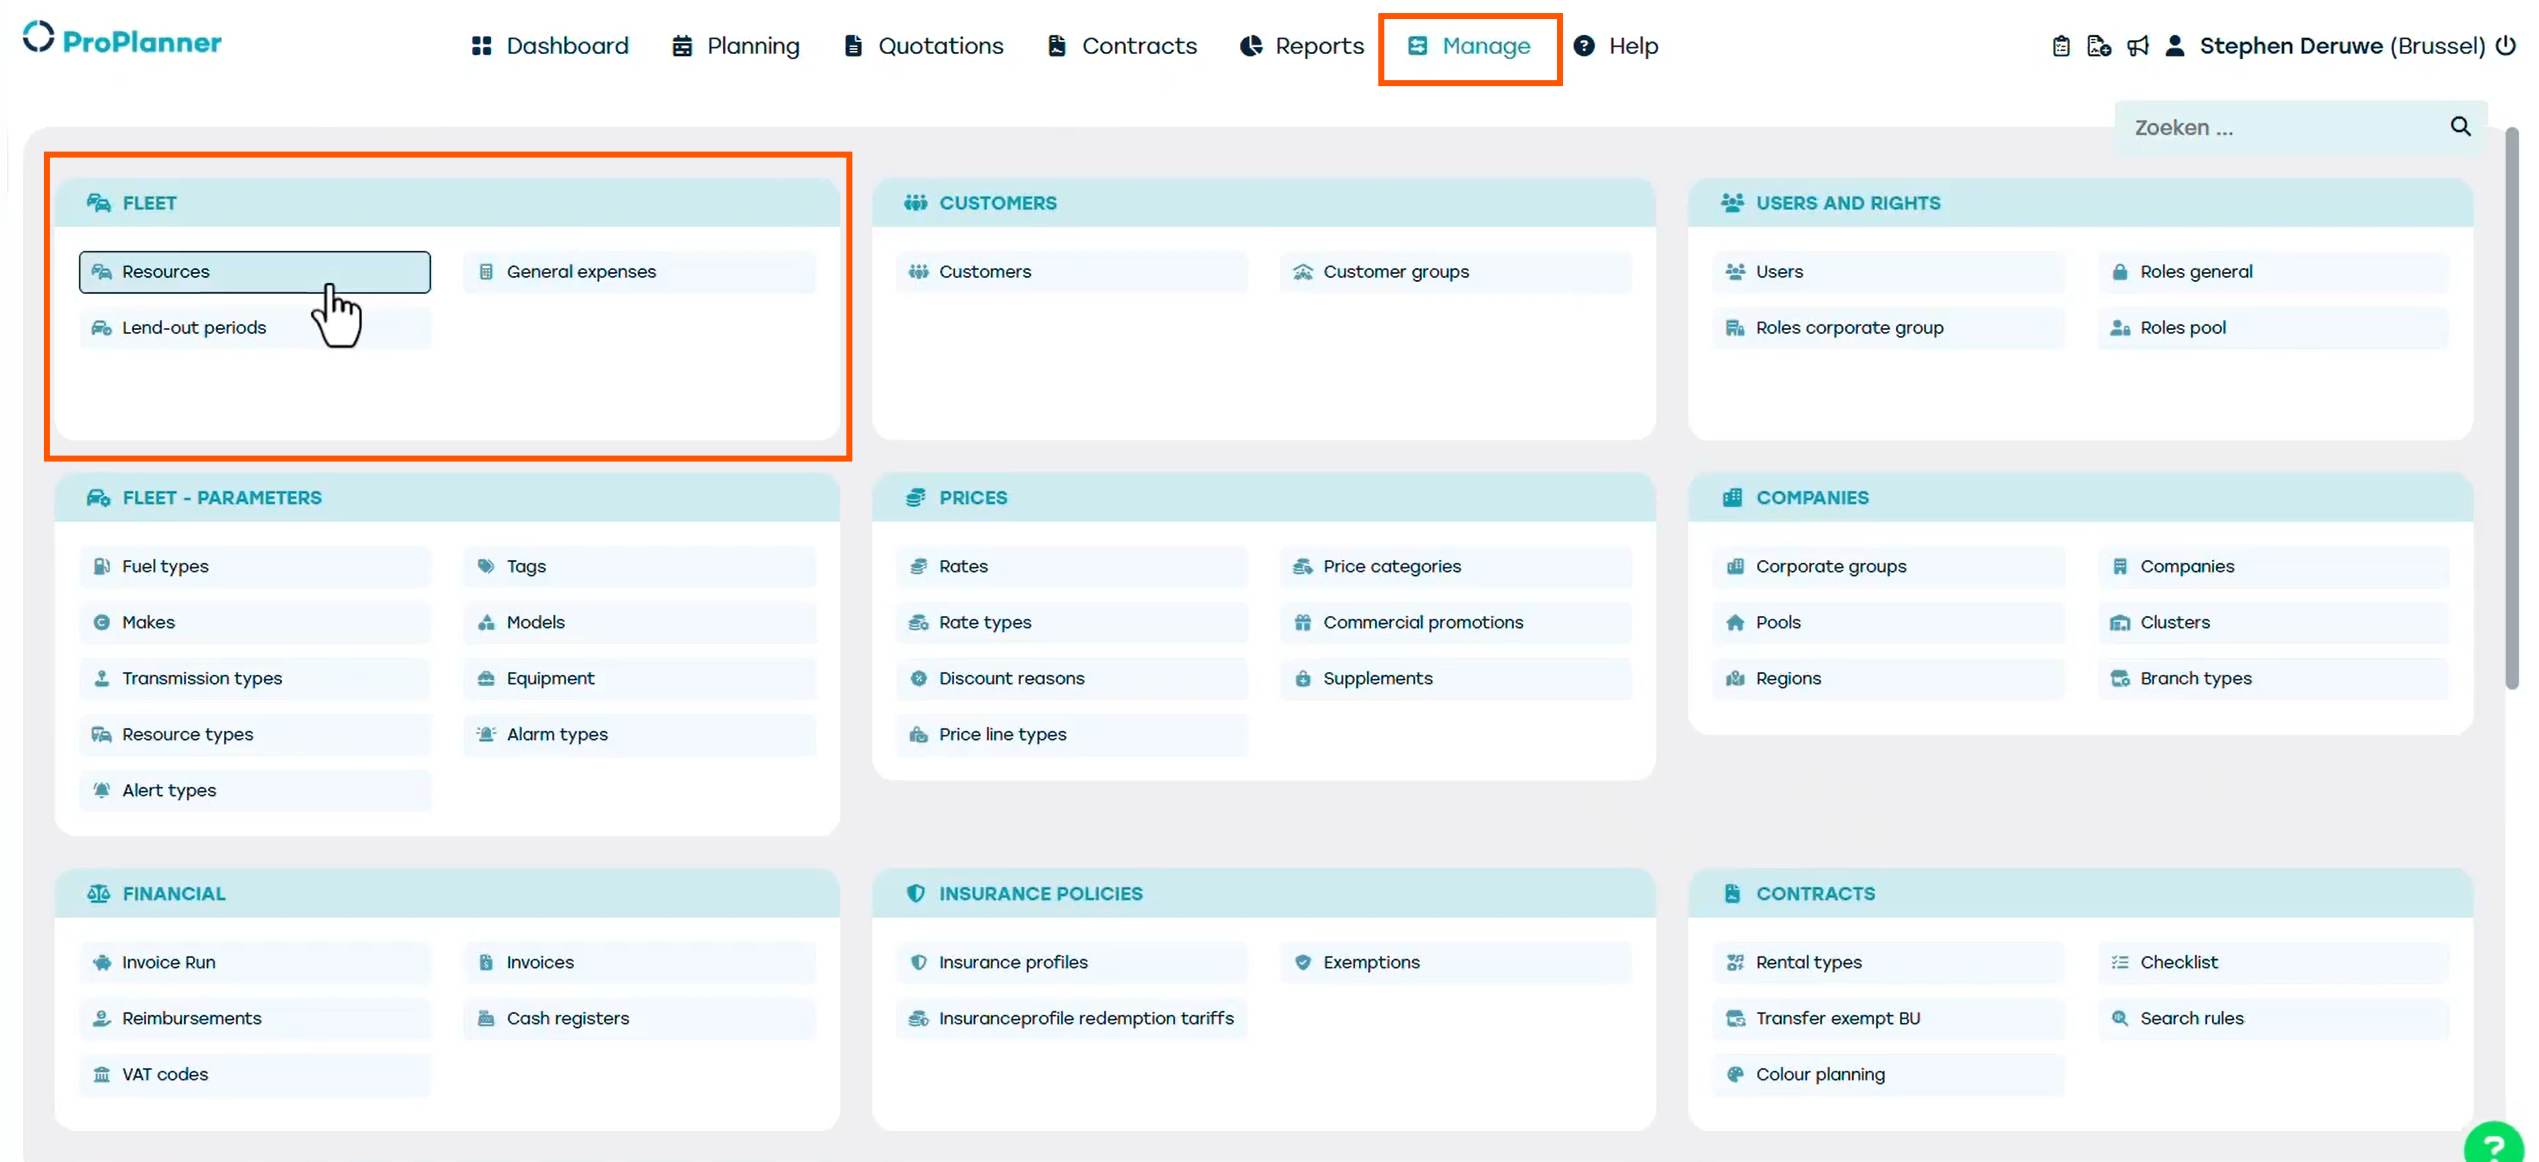
Here, you will see a list of all the existing resources.
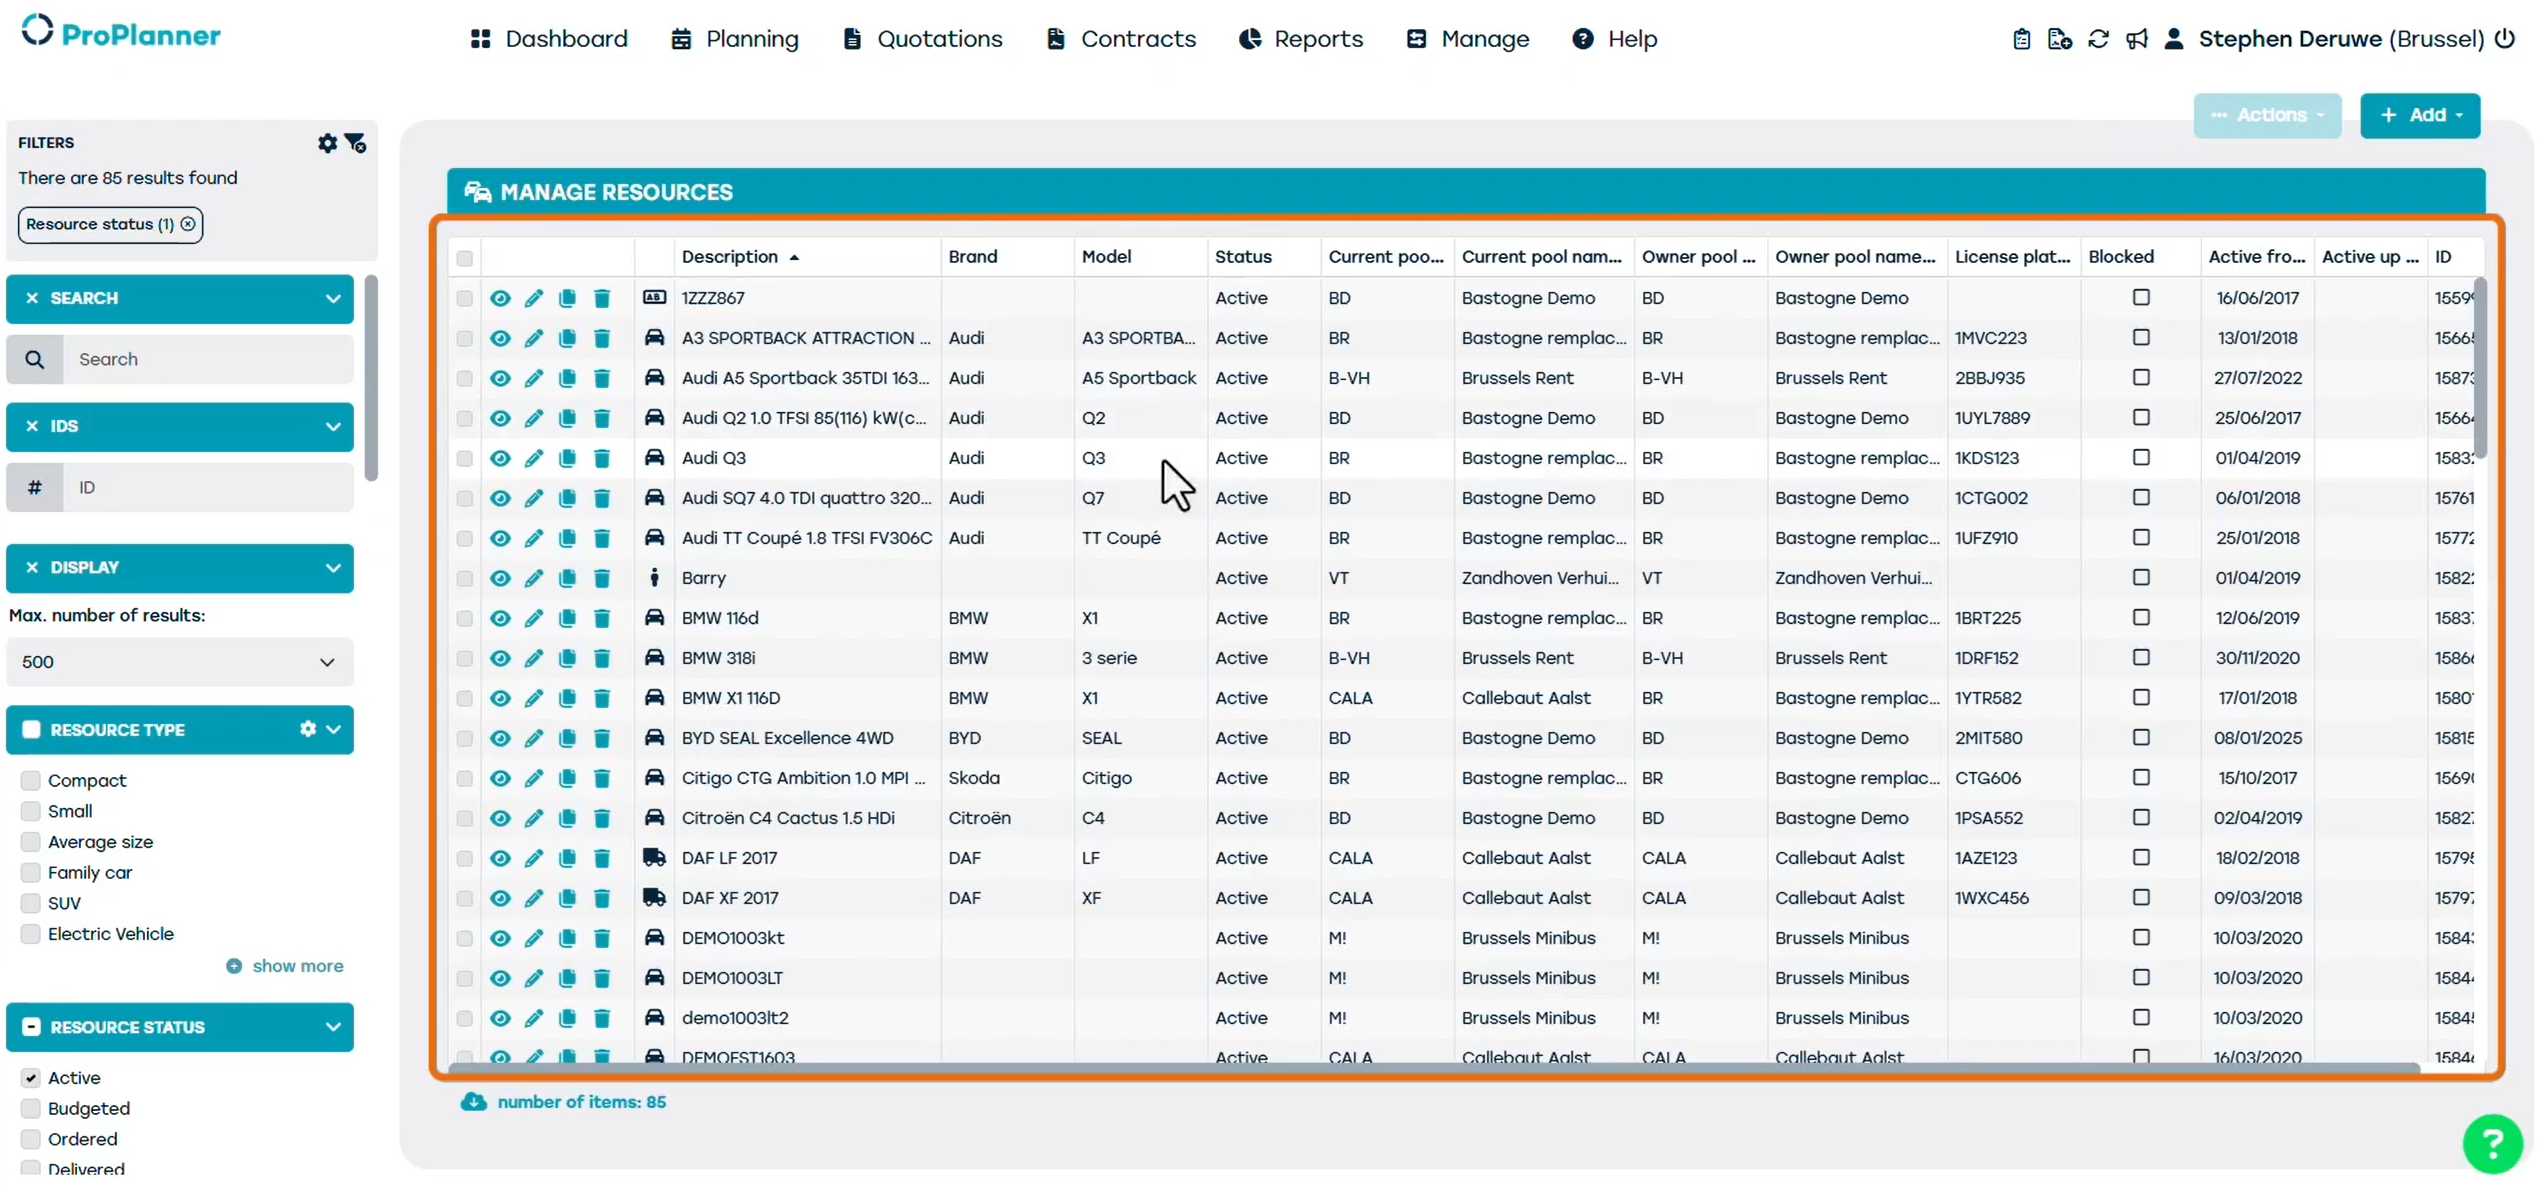
To add a resource click add and then click “Create JLR”
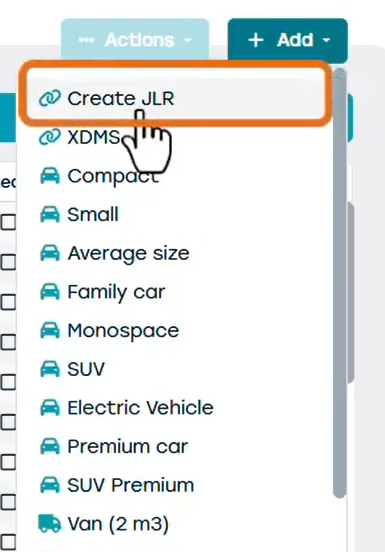
The create JLR option is an integration with a DMS such as vista or another VIN database. This allows some of the resource data to be automatically retrieved and pre-filled in.
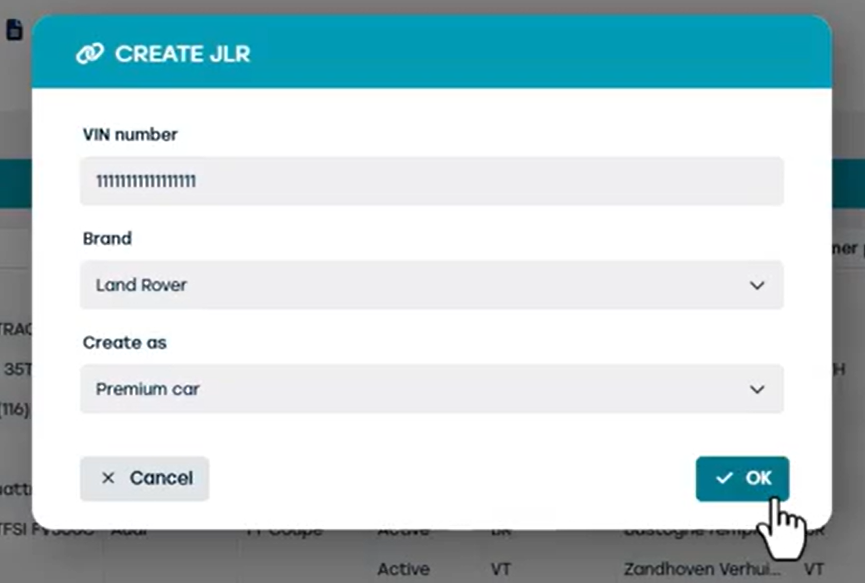
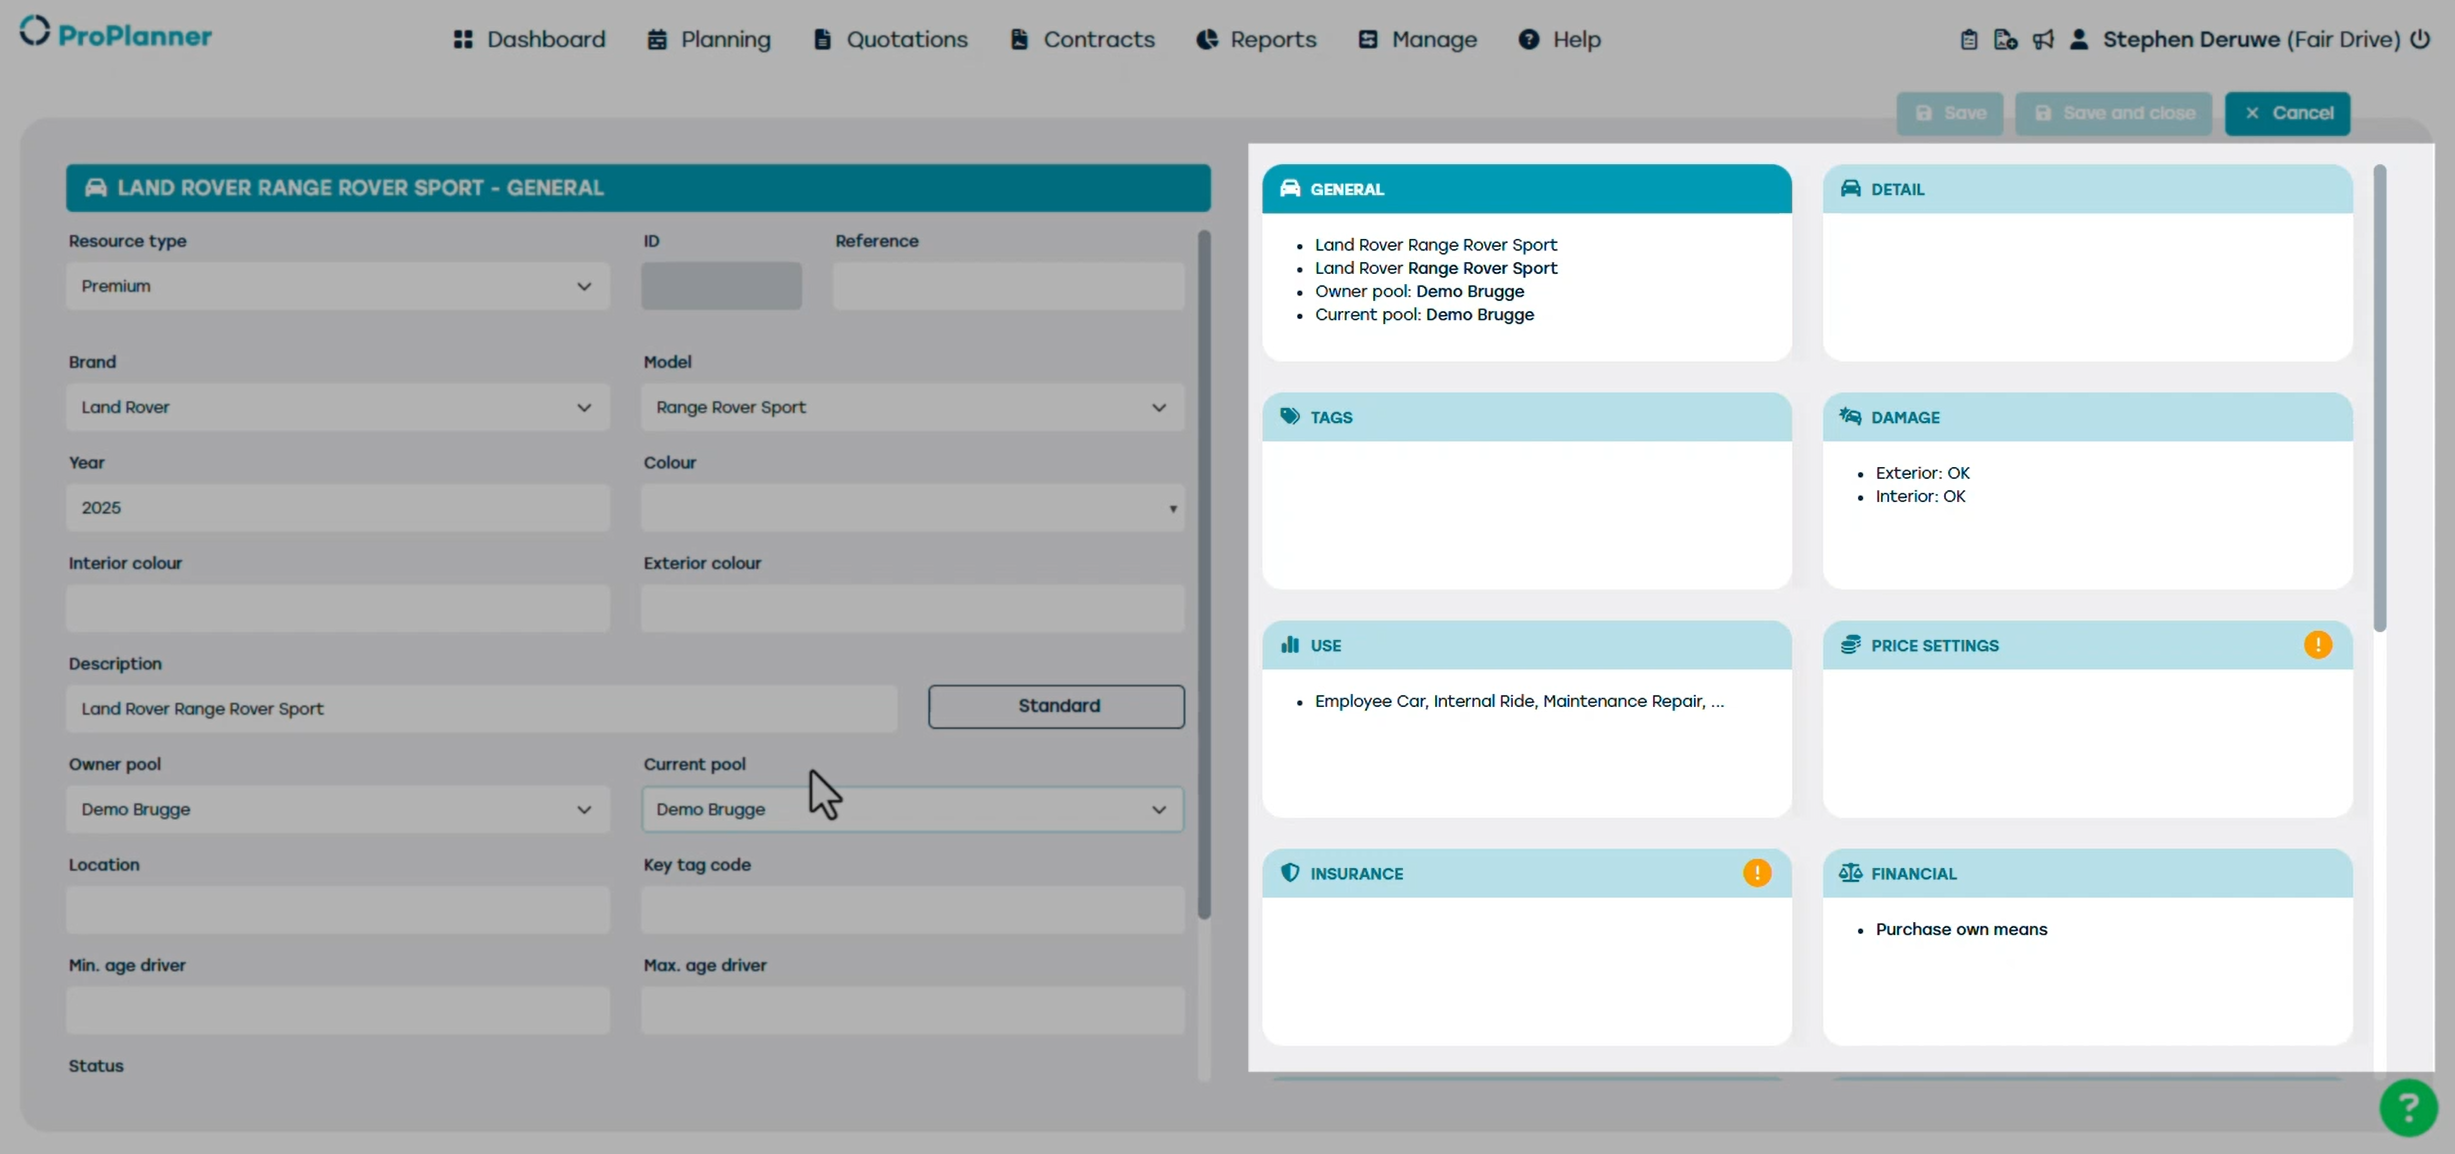
To add a resource simply enter the VIN number. This will then automatically prefill the brand, and the resource category. Click OK to import the resource into ProPlanner. This opens a new screen where you can enter additional details about the resource. On the right side of the screen, you’ll see the different tiles related to the resource. For now, only the General tile is visible. On the left side, you’ll find the detailed view, showing the information of the currently selected tile.
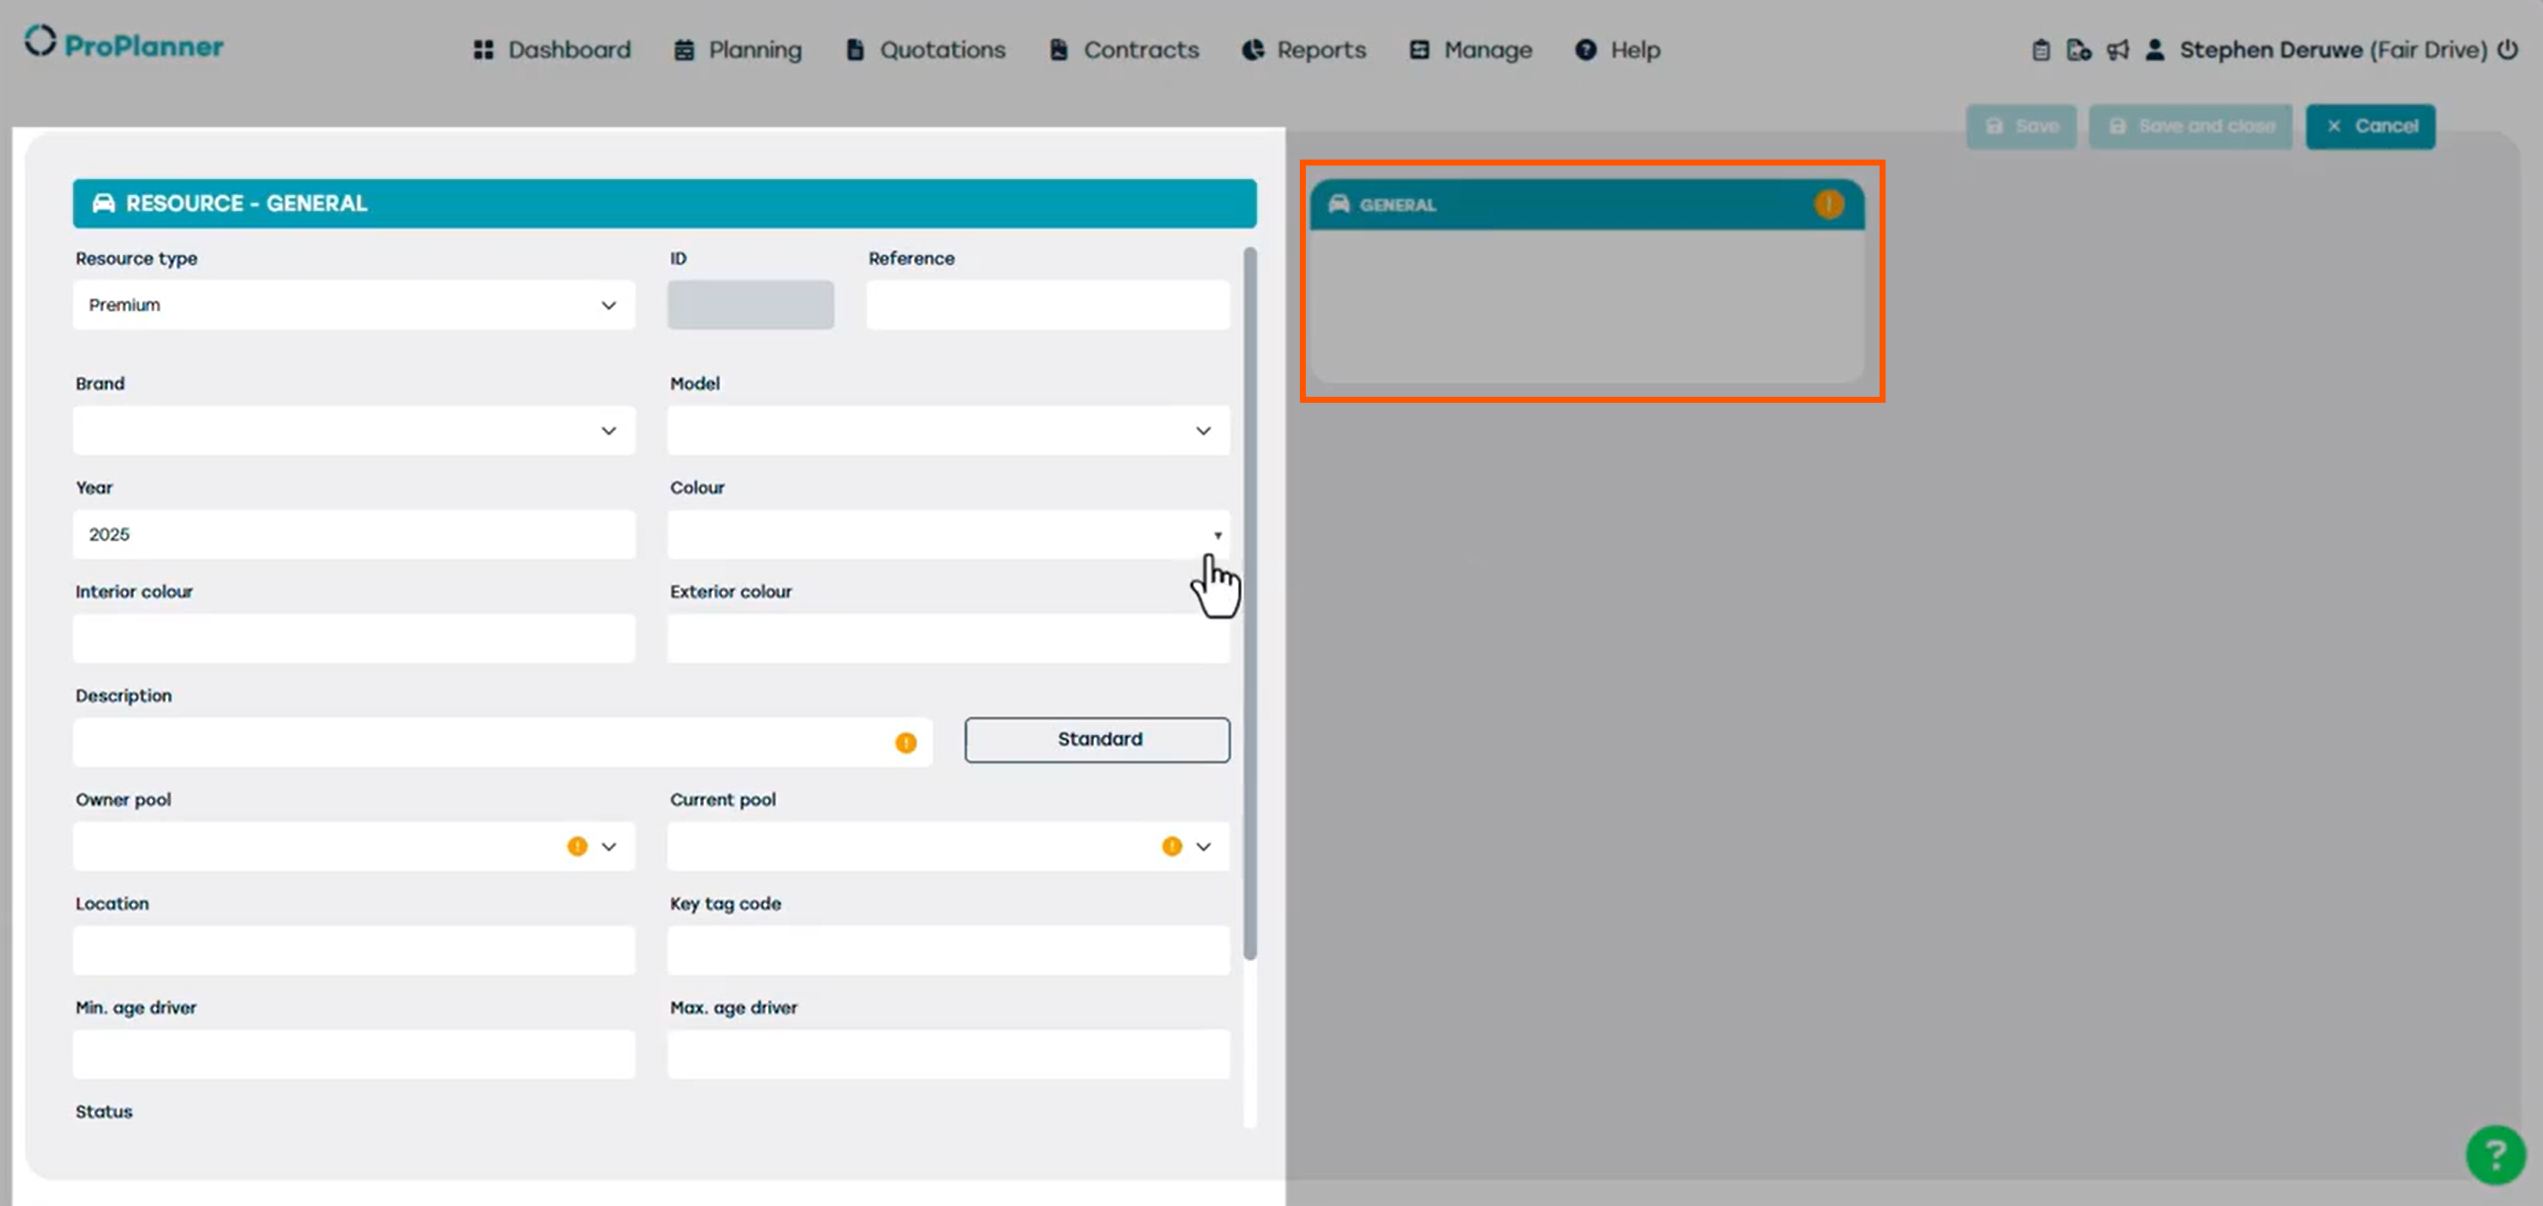
Now, let’s fill in the main details. Some fields are mandatory to create and save the resource.
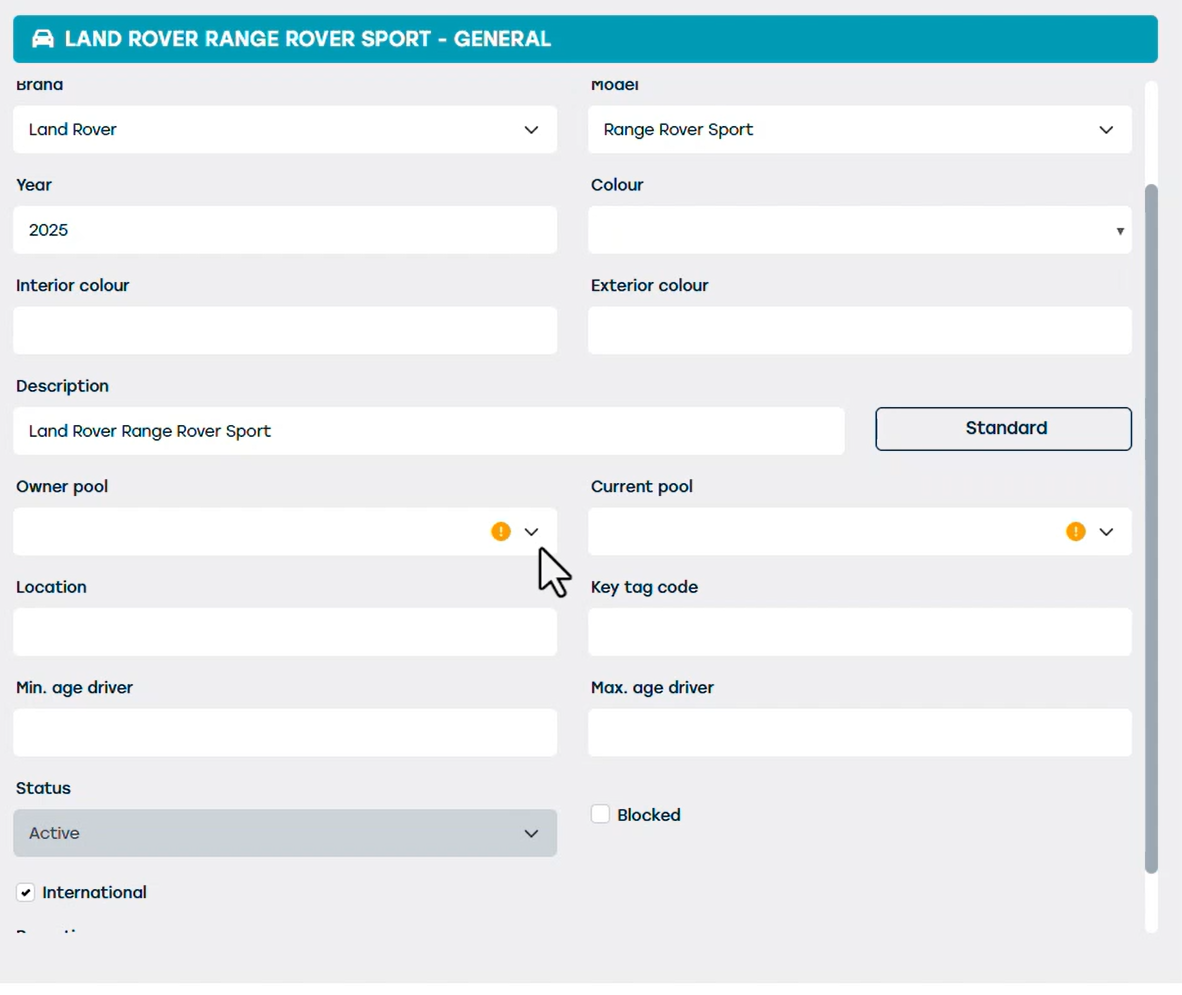
In our example we’re adding a ‘Land Rover Sport’. So, we choose “Land Rover” in the ‘Brand’ field and Range Rover Sport in the ‘Model' field. We can further add details of our vehicle like colour, and year, but in this video, we will go over the essentials to add a resource into ProPlanner.
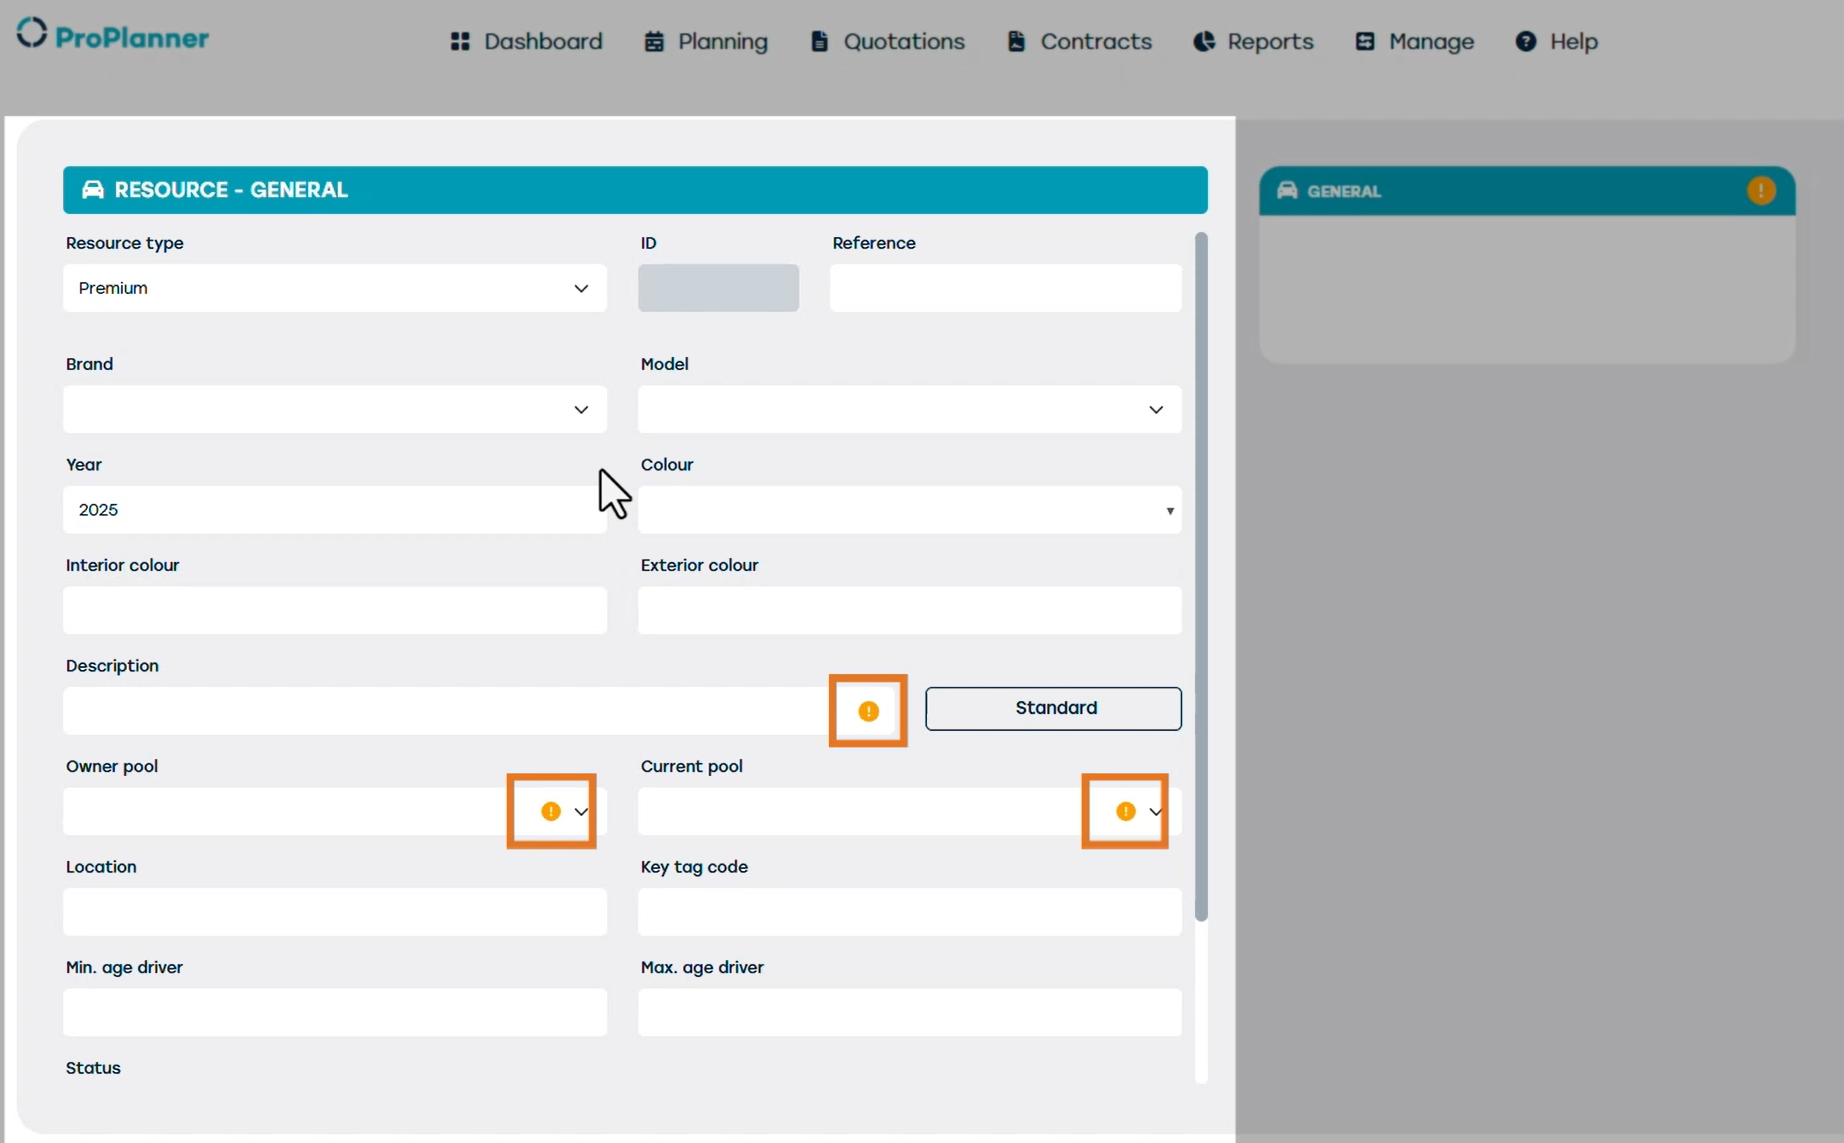
Next, we need to write a short description of the resource that will be shown when you create a contract on the resource. You can also click on Standard to automatically copy the Brand and Model fields that we added earlier.
The owner pool is the pool that will be owning this resource.
Next is the current pool: assign the current pool based on the type of resource you’ve added. In this example, we’ll use the resource for booking demos, so we’ll add it to the Demo Pool. In most cases, this is the same as the Owner Pool.
Now that you’ve selected the Owner Pool, additional tiles will appear on the right.
Let’s go through them one by one.
Let's start with the Detail tile, where we will be adding more information about our resource. Here, you will find further details such as the VIN number, license plate, transmission type, fuel, primary energy type, and number of seats. If the resource was imported through Vista or another DMS, most of this information will already be prefilled.
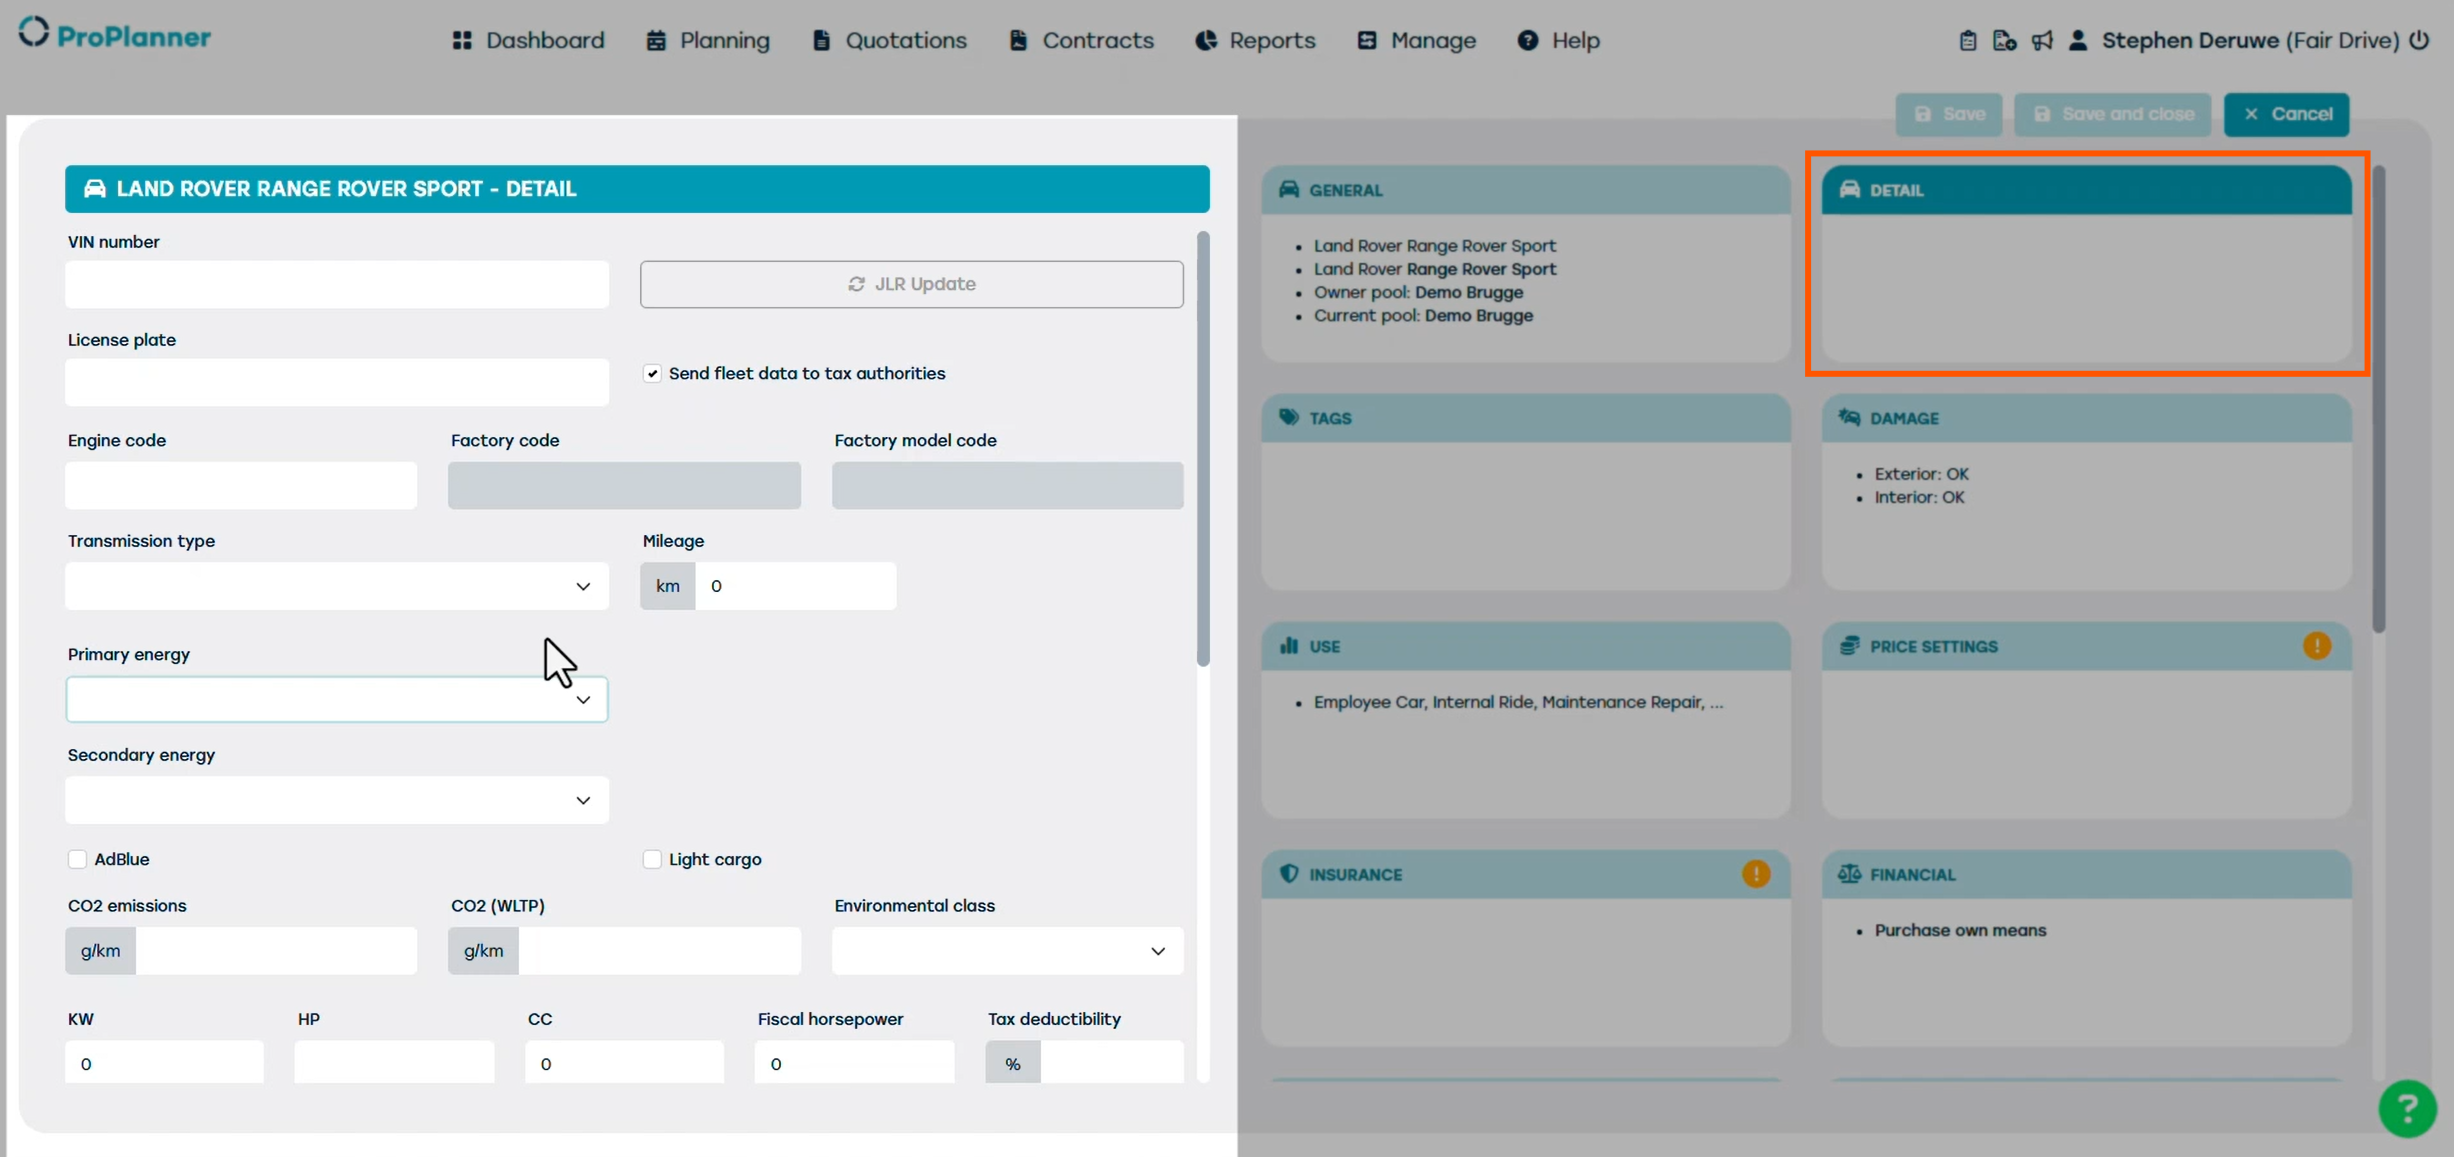
Make sure to fill in the maximum fuel level and/or battery capacity, as this information is used when checking a resource in or out with the tablet application.

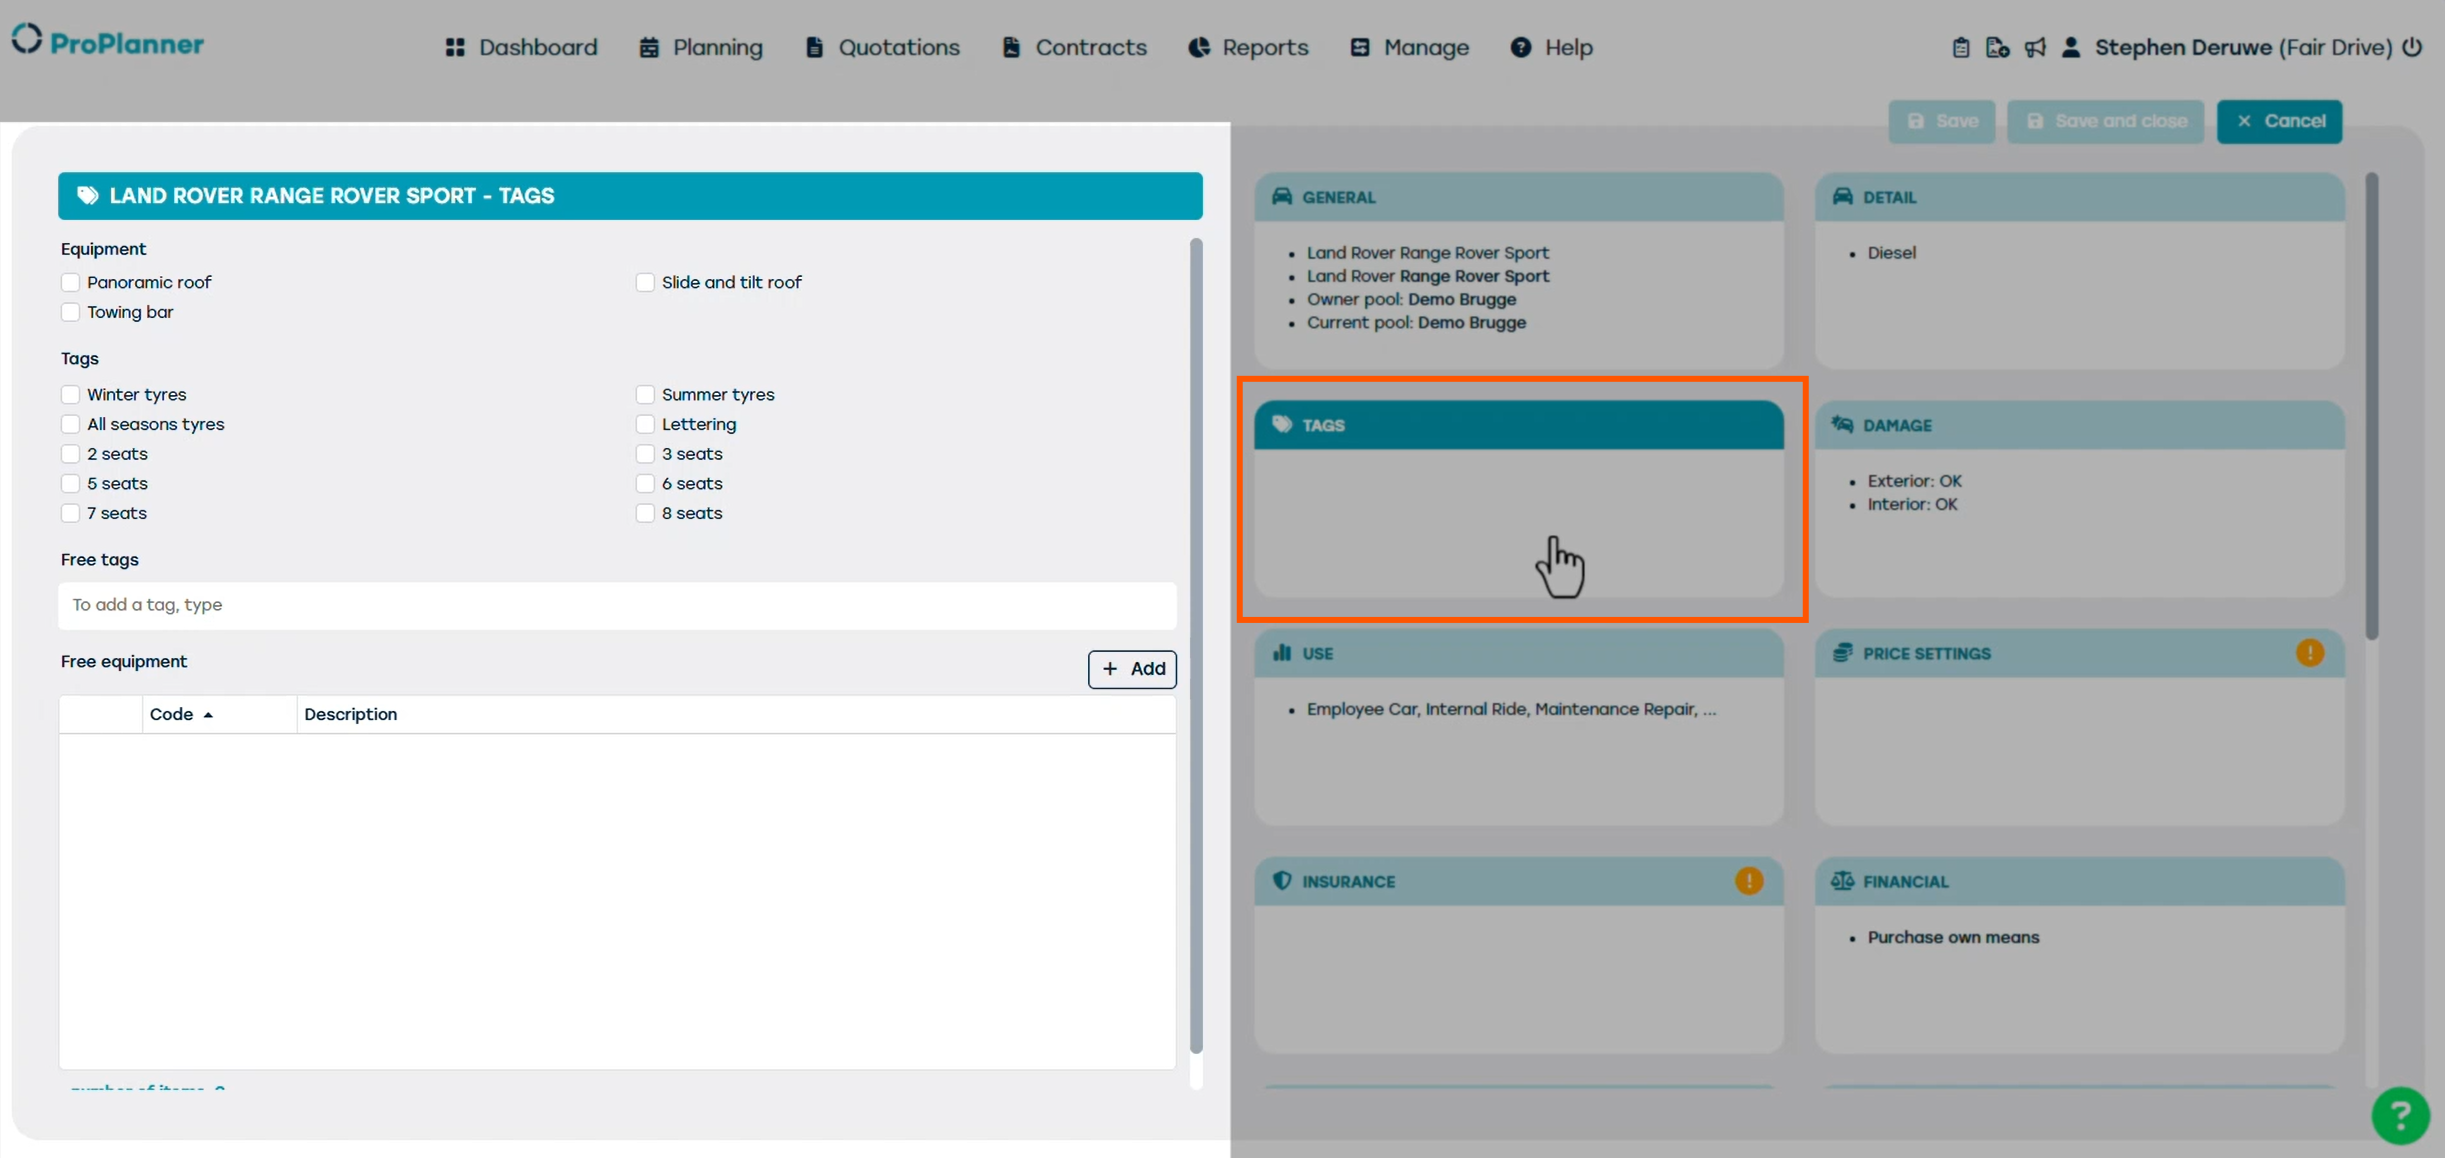
Next, let’s open the Tags tile. Here, you can add equipment and other options of the car. These tags are helpful when a customer requests a vehicle with specific options. You can later find and use these tags in the Planning view. There, you can easily filter and find resources based on the tags you’ve assigned, for example, to display only vehicles with a certain equipment type or option.
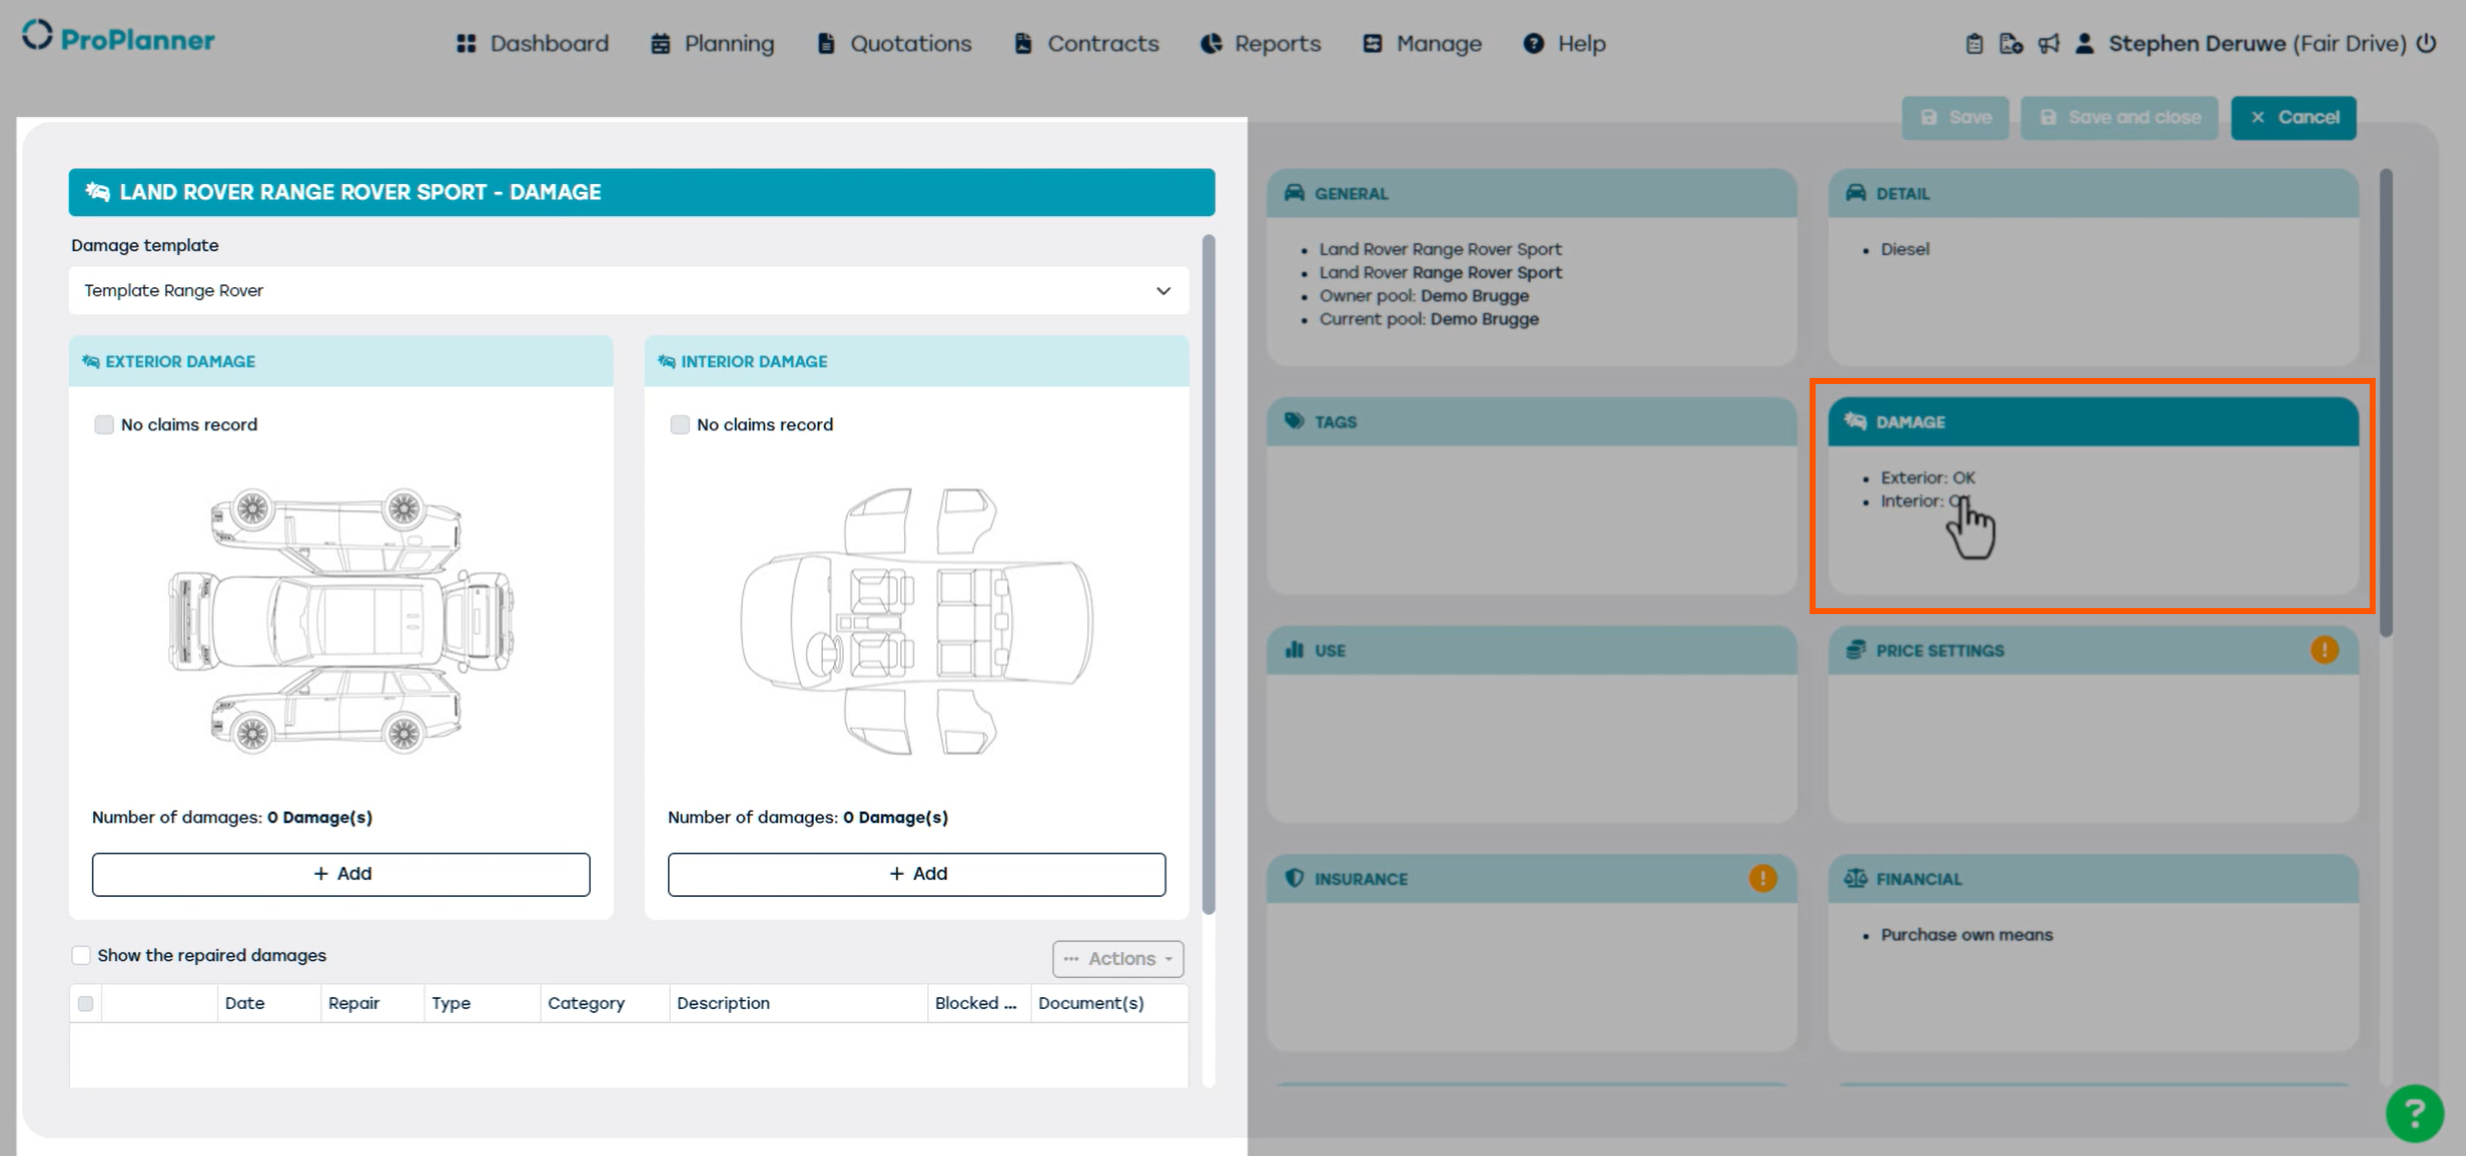
Moving on to the Damage tile, this is where you register any existing exterior or interior damage. You can easily do this using the ProPlanner tablet application.
In the Use tile we will be choosing what the resource will be used for.
In our case, the vehicle will be mainly used for demo bookings, internal rides, and as a replacement vehicle. ProPlanner recommends to assign as many rental types as possible so the vehicle can be used for multiple purposes.
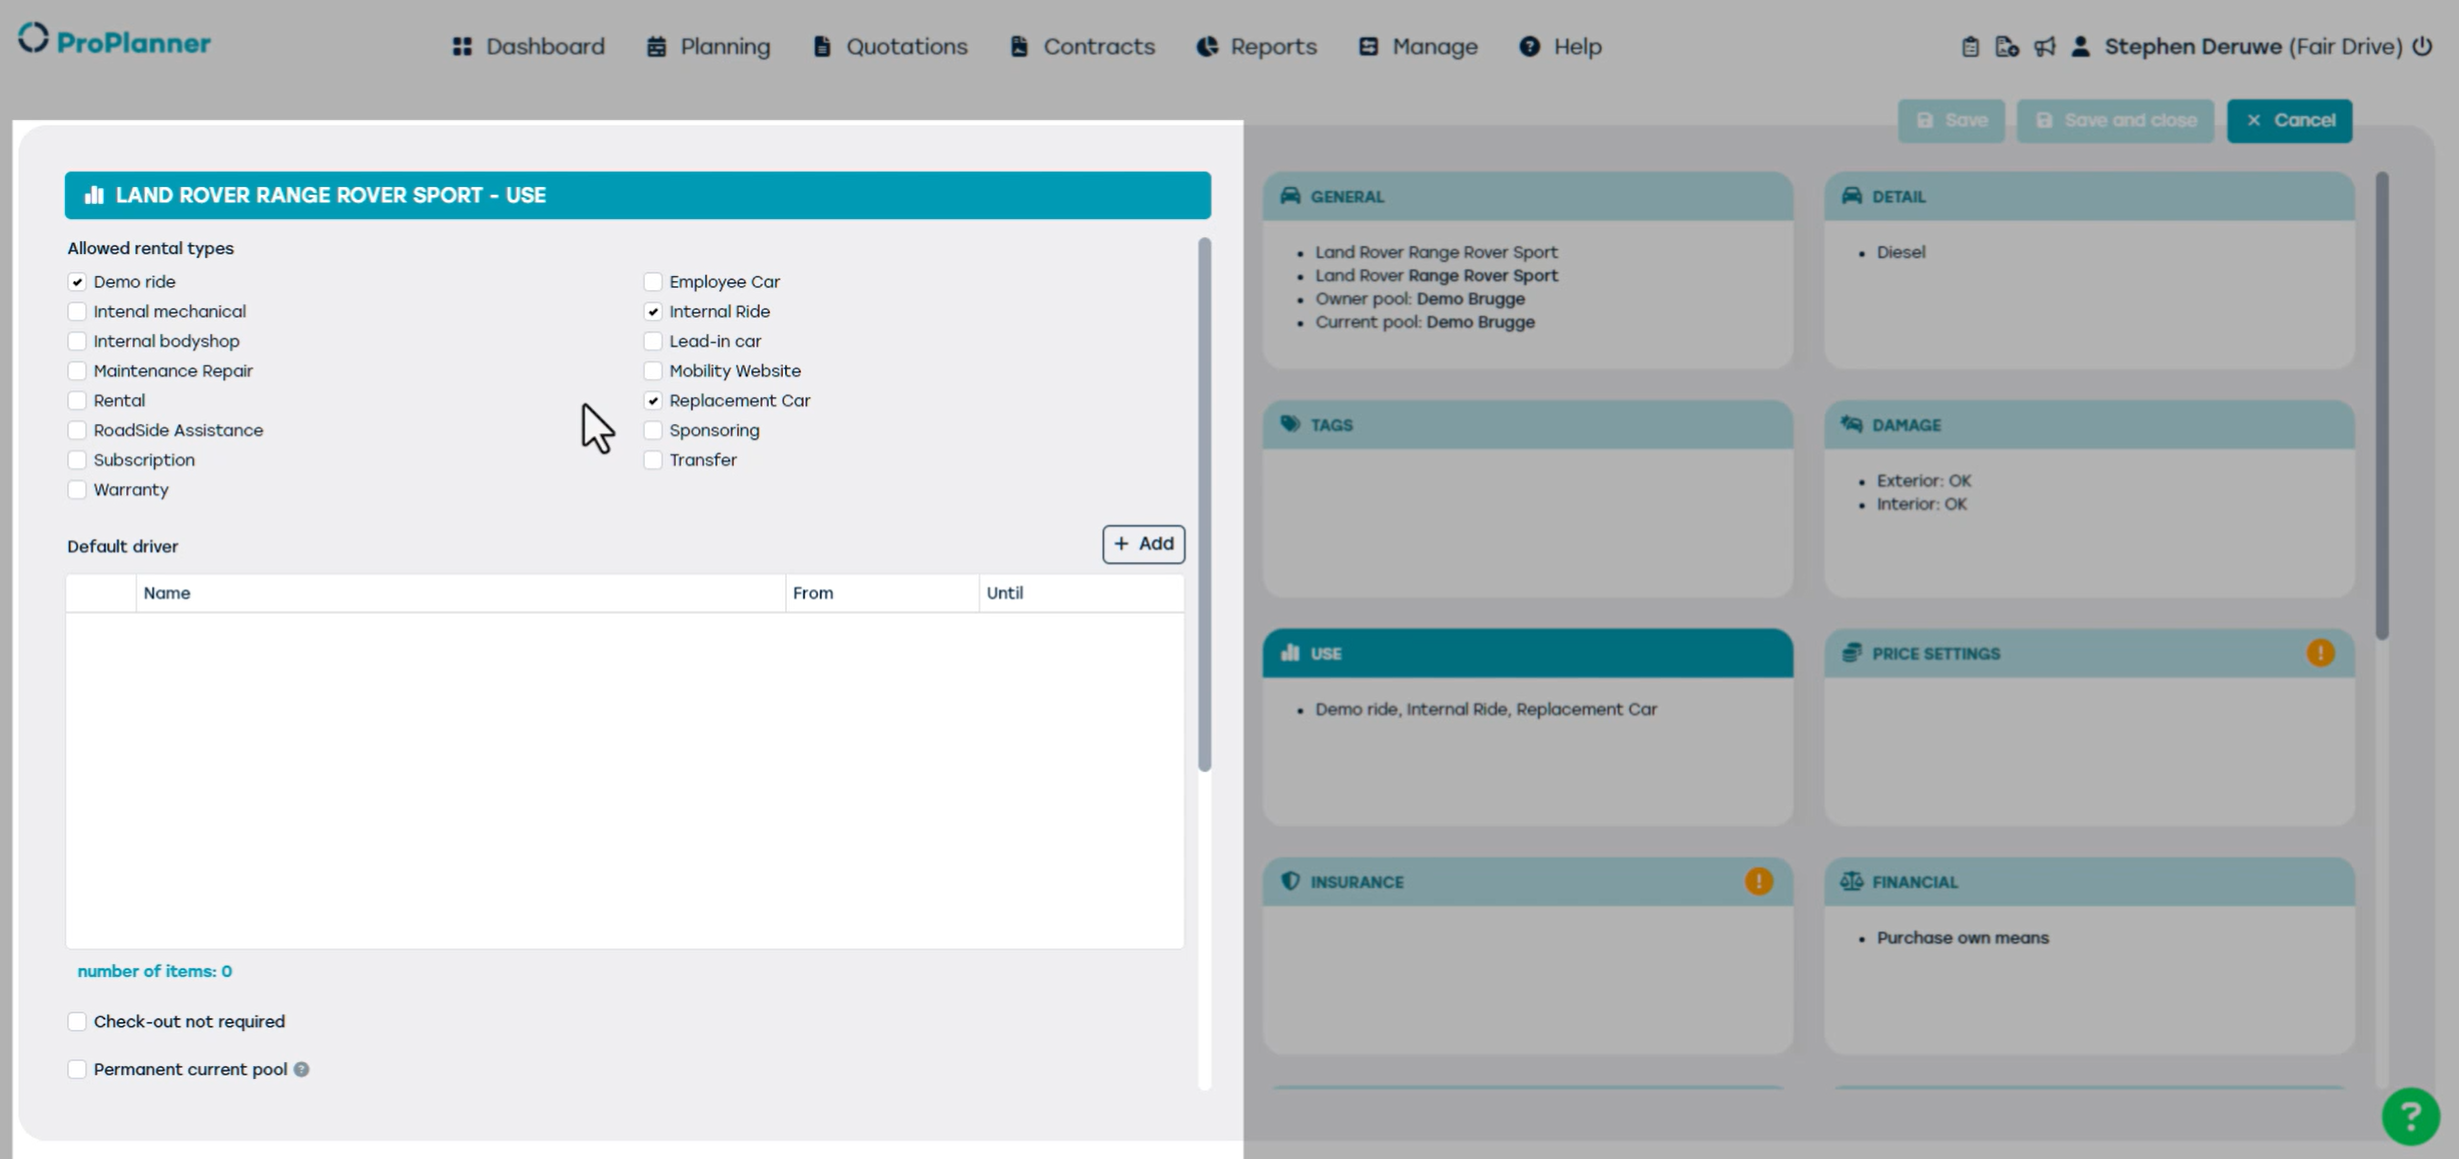
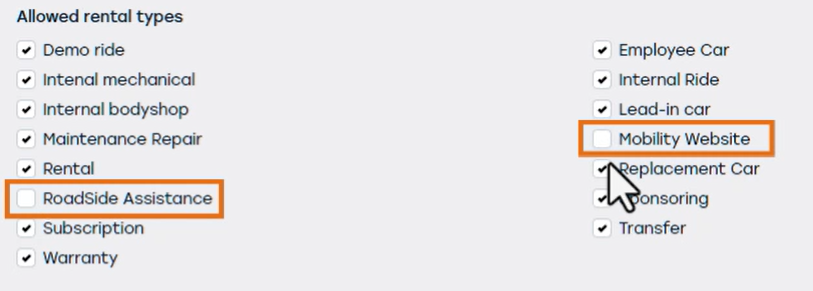
There are two rental types that are important to consider. Which is the "mobility website" to make the vehicle visible on the website and the RSA if you want to have this car visible for road side assistance. In our example we want the vehicle to be visible on the website, so we enable that option.
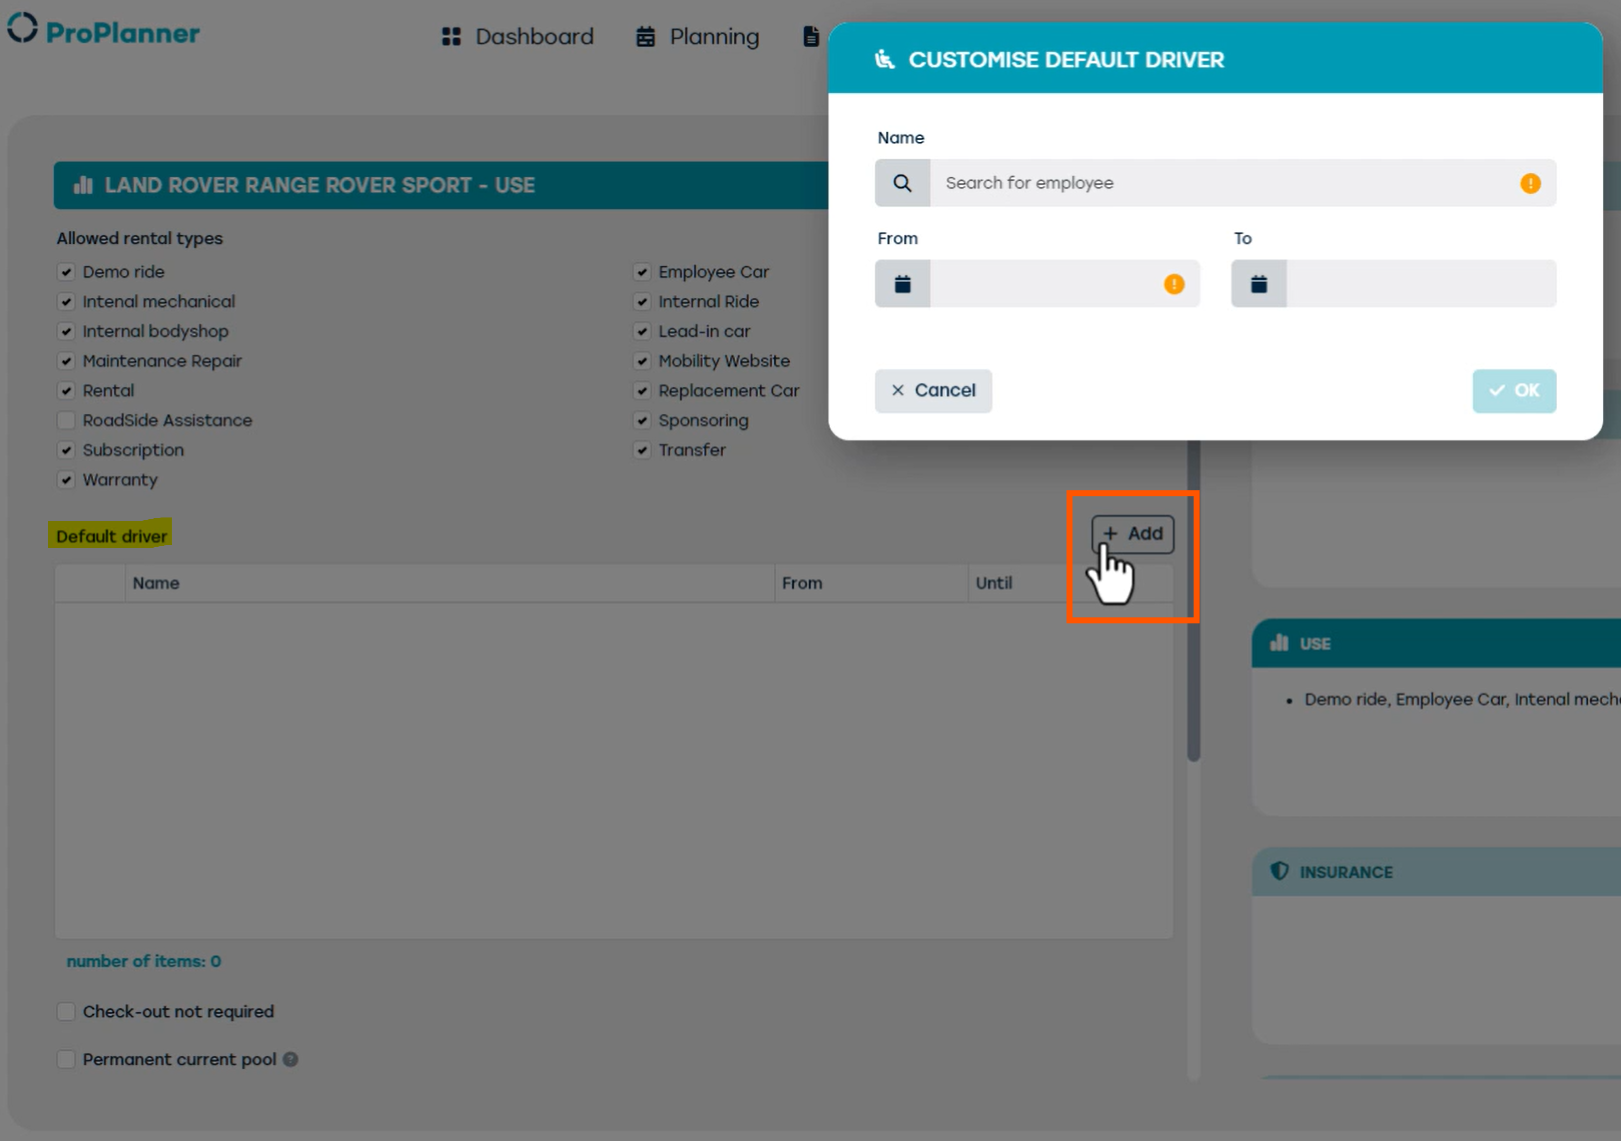
Additionally, we assign a default driver, typically this will be internal person such as a employee who will be using the vehicle most often. the driver must first be created as a customer and assigned to the Internal customer group.
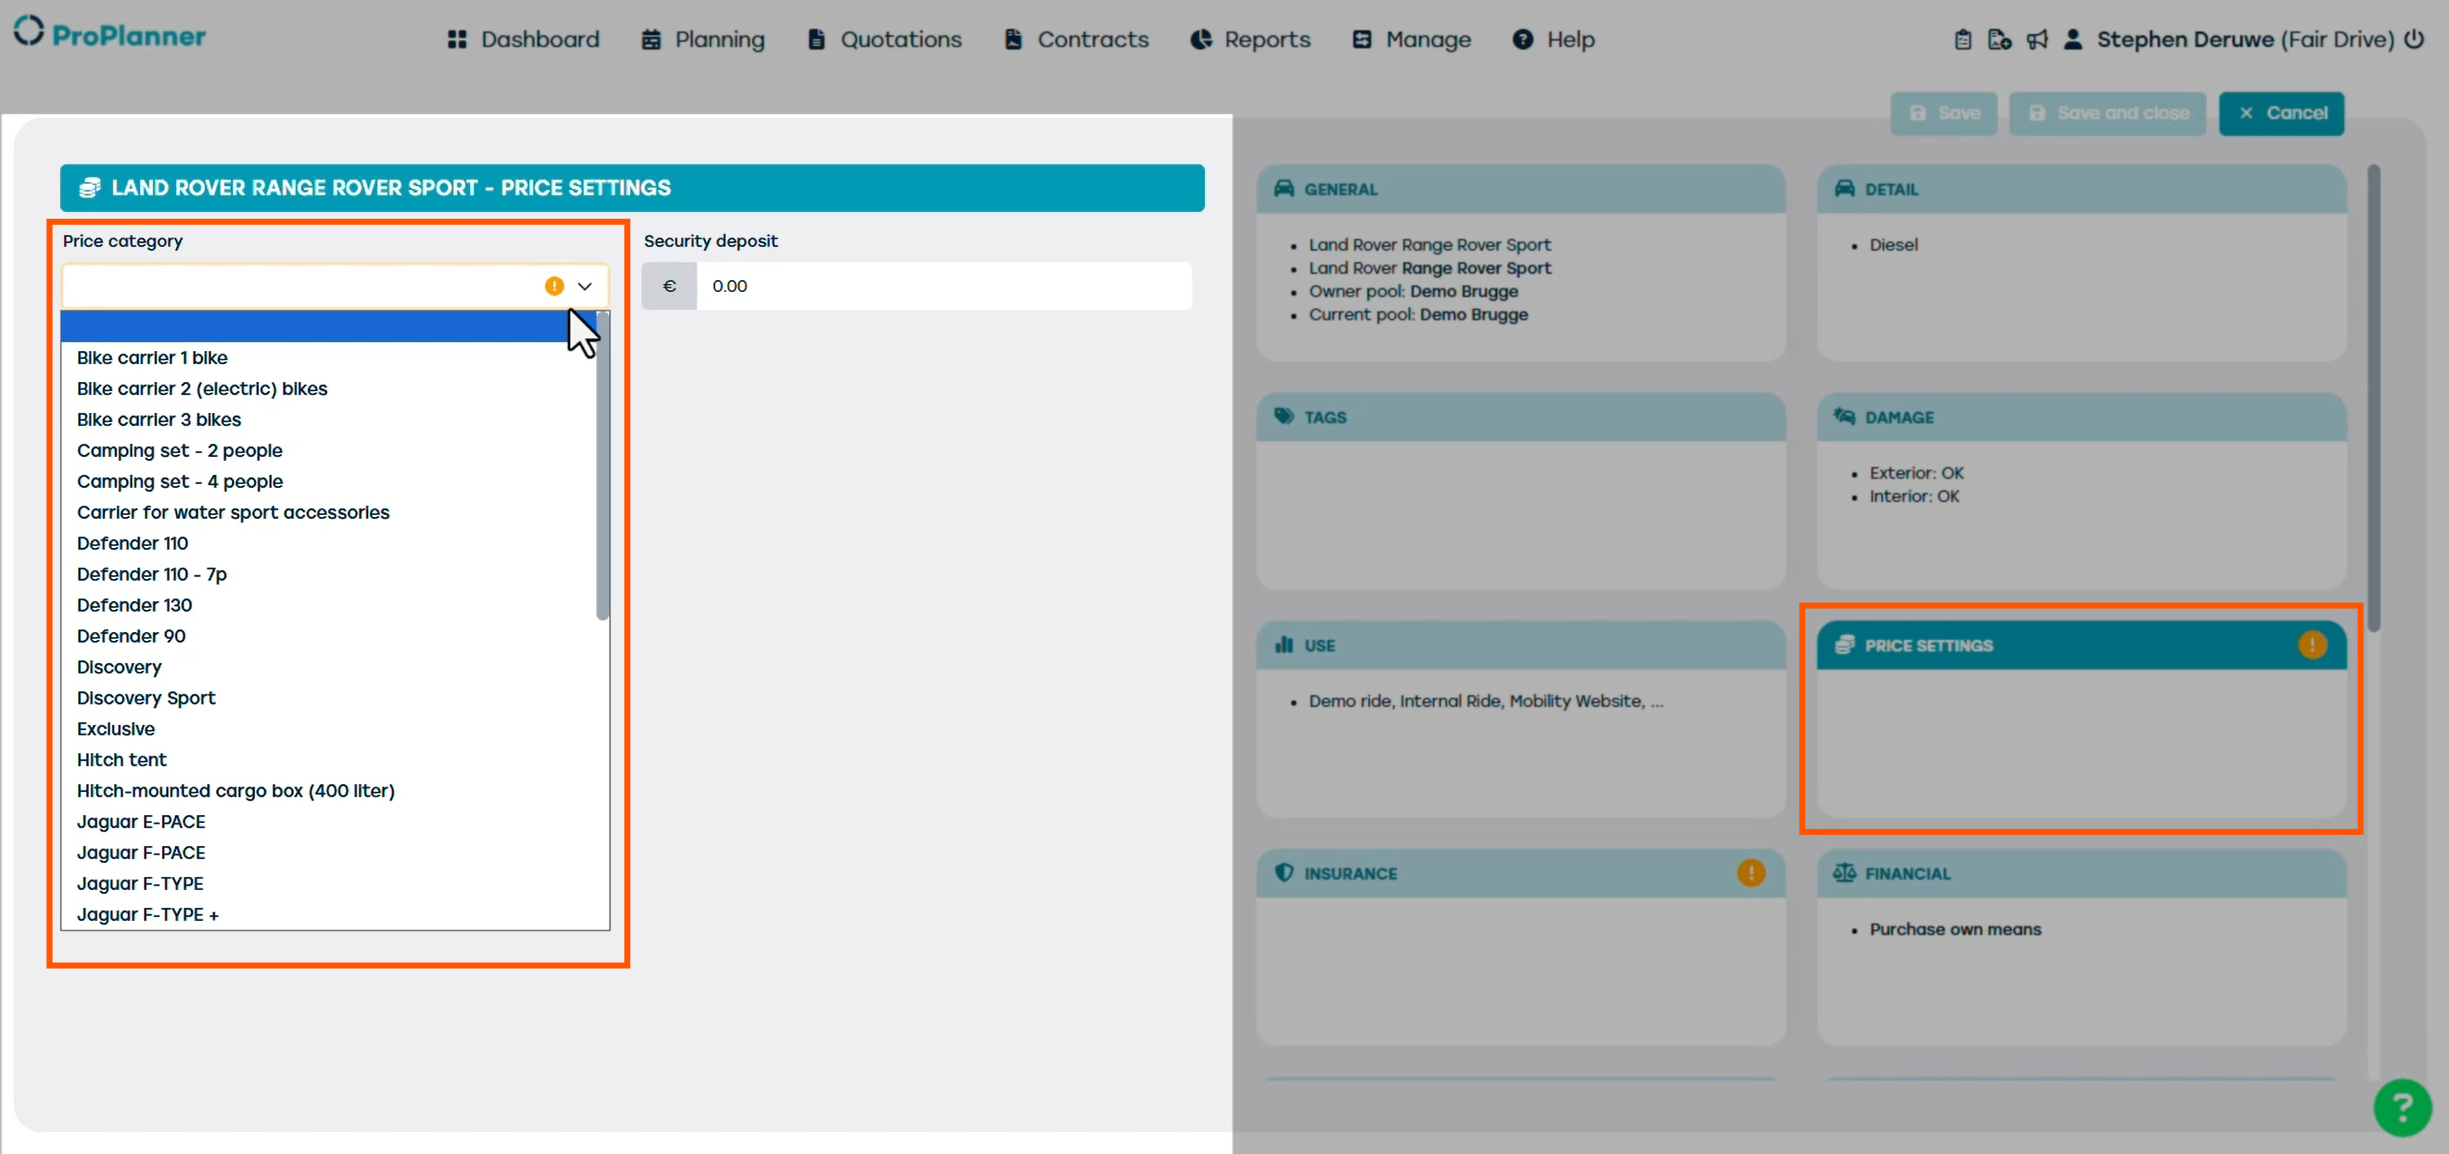
The Price Settings tile lets you assign a price category to the resource. For our Range Rover Sport, we select the appropriate pricing and set the current rates. You can also define the required security deposit here.
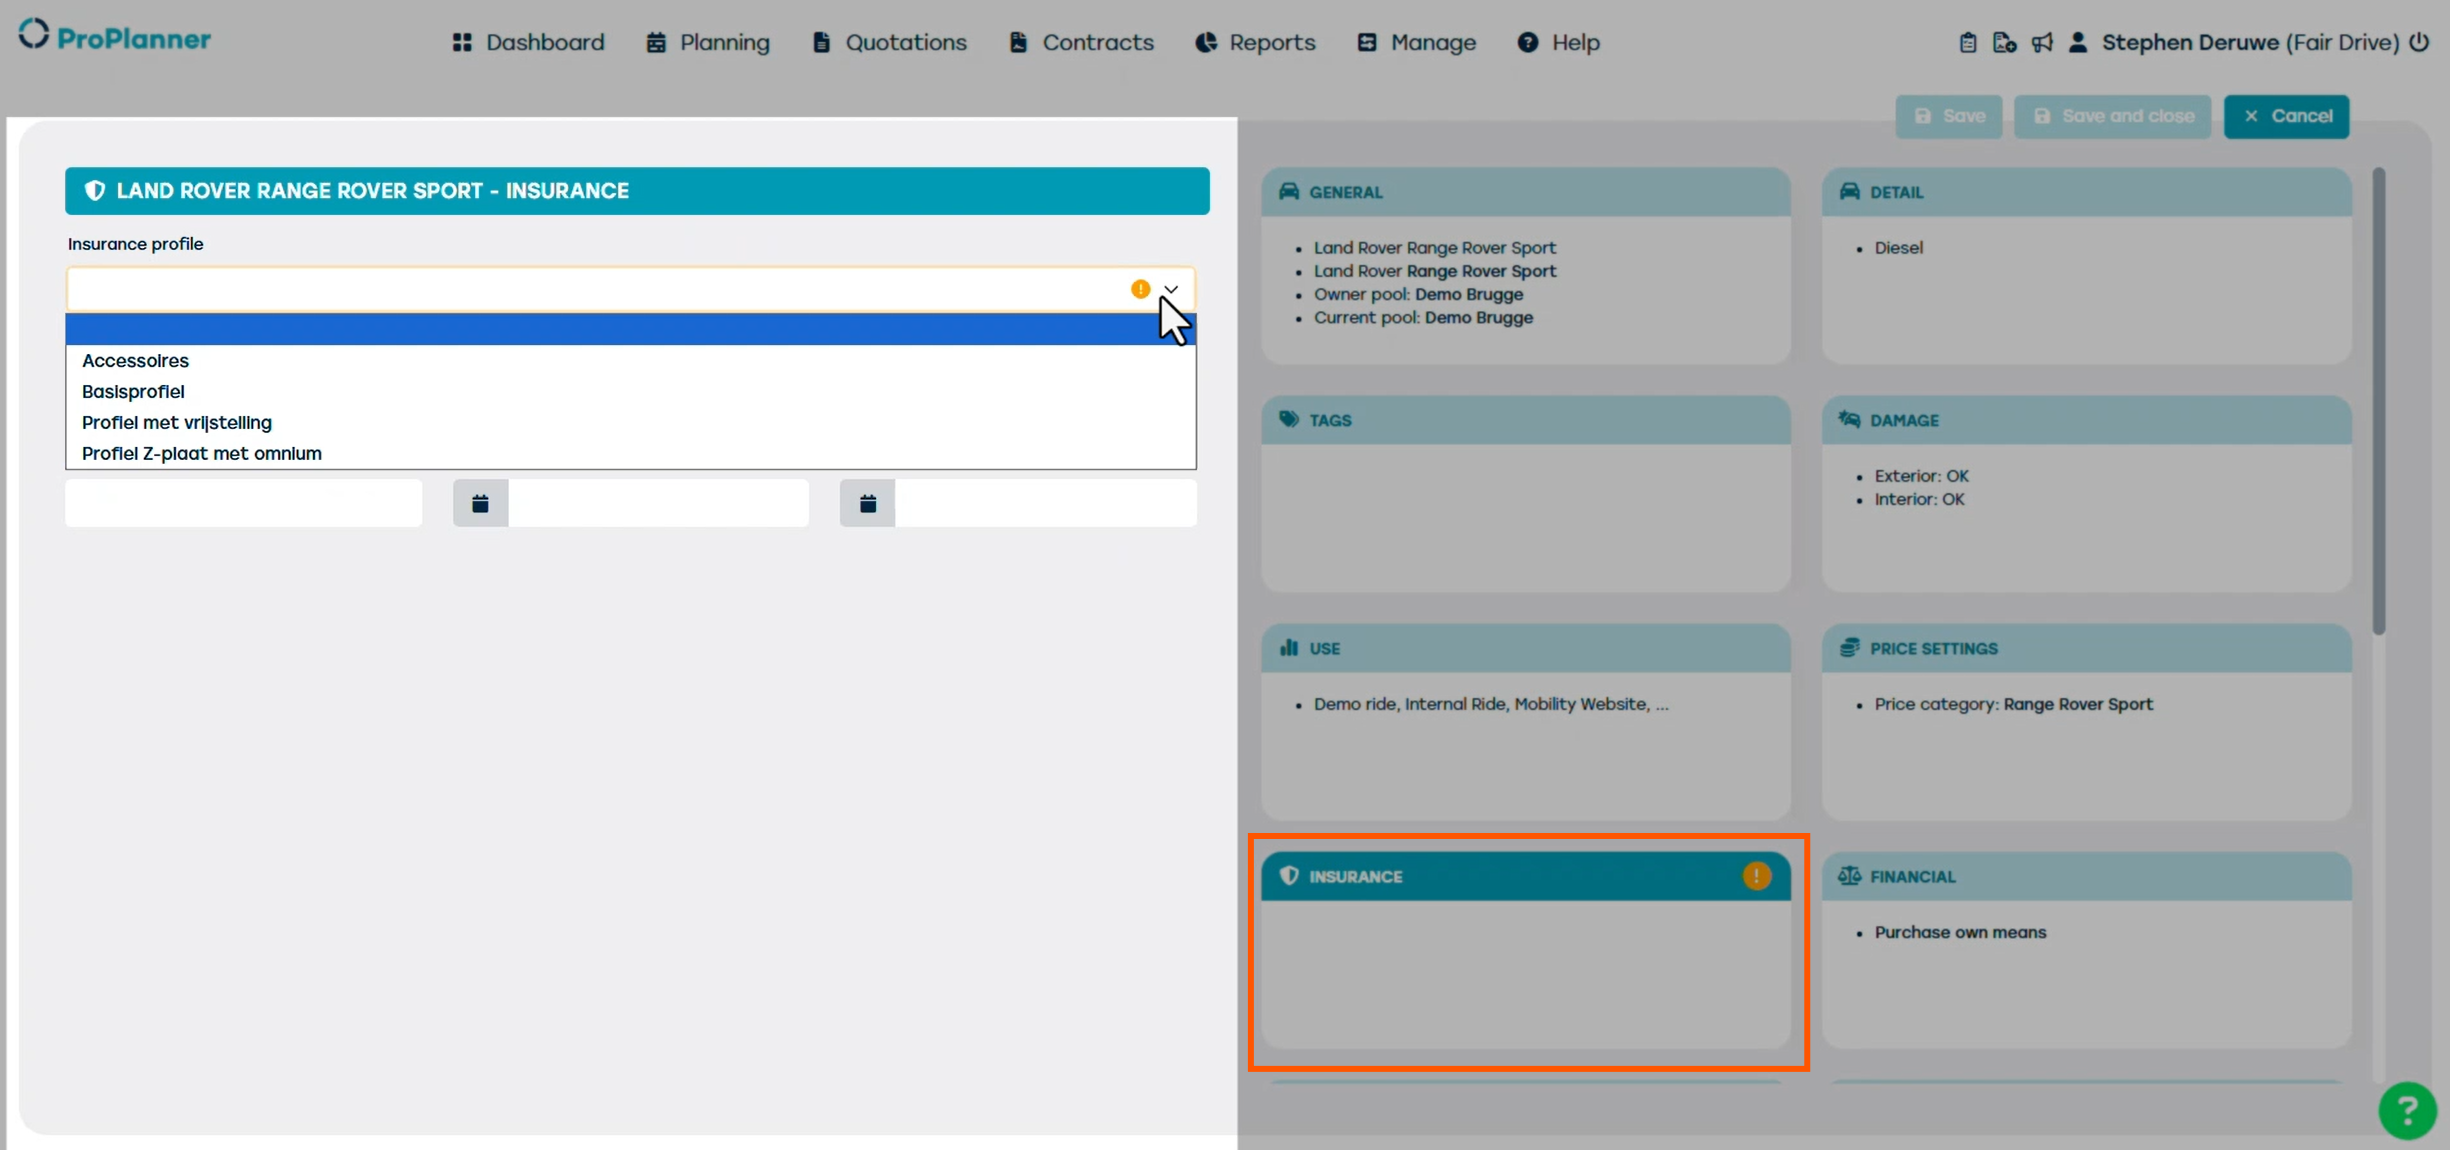
In the Insurance tile, you can link the correct insurance profile to the vehicle. If you want to link an insurance company, make sure it’s been created in the customer database and marked as a supplier.
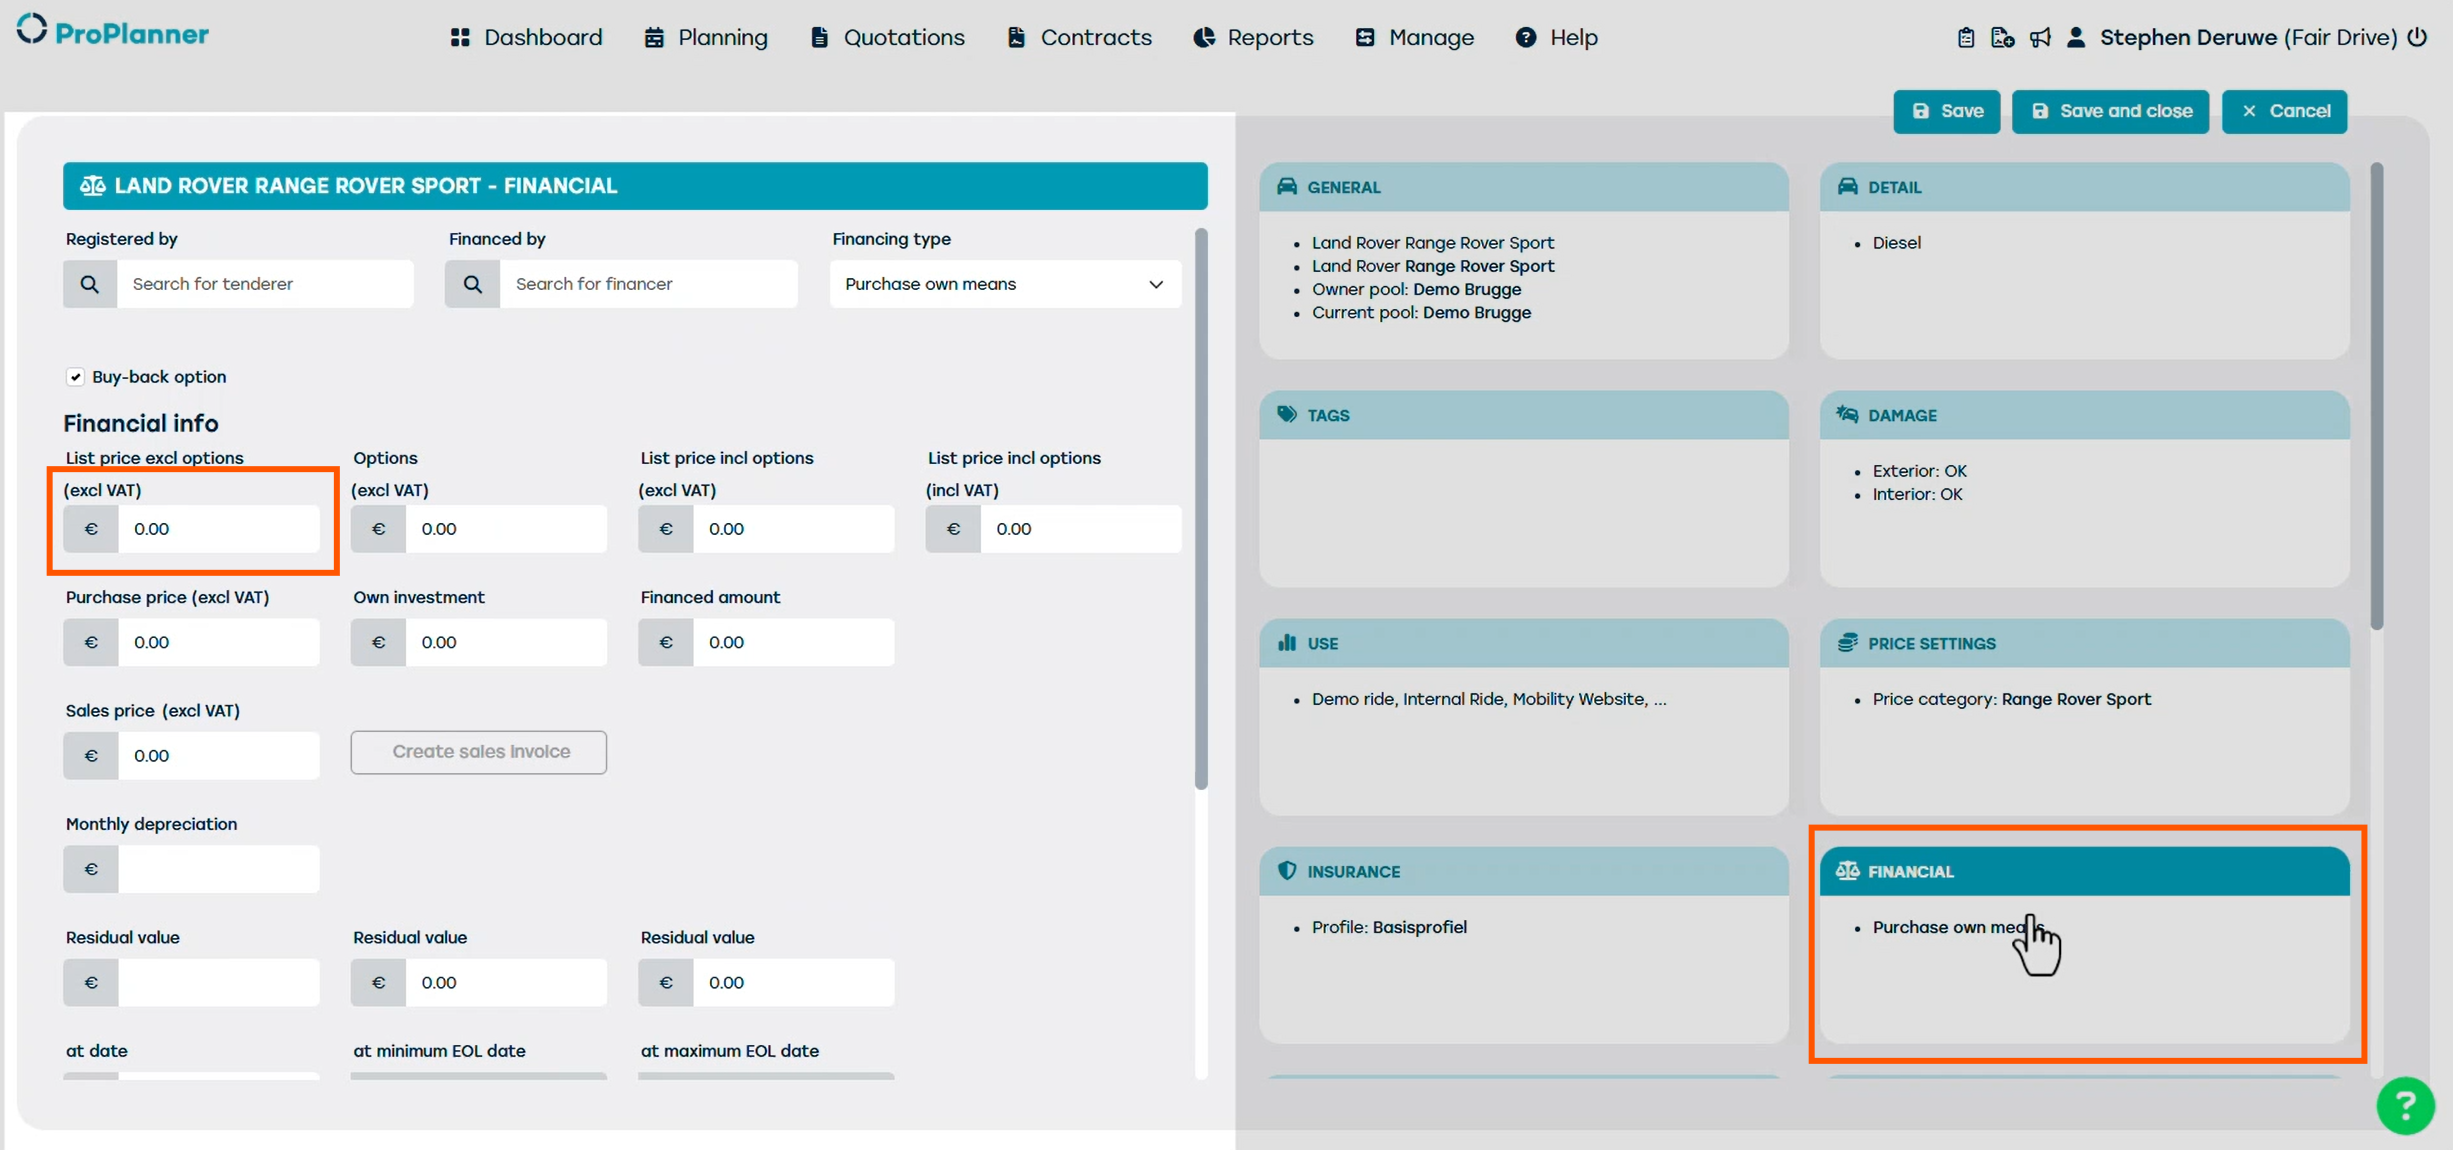
The Financial tile allows you to enter detailed financial information. If you’re working with percentage-based insurance, it’s important to fill in the value of the resource. If the vehicle is leased, you can enter the contract details here. This also enables automatic alerts when the lease is about to expire.
Next, we have TCO, short for Total Cost of Ownership. This section is used to calculate the overall cost of the resource and is mainly intended for reporting purposes.
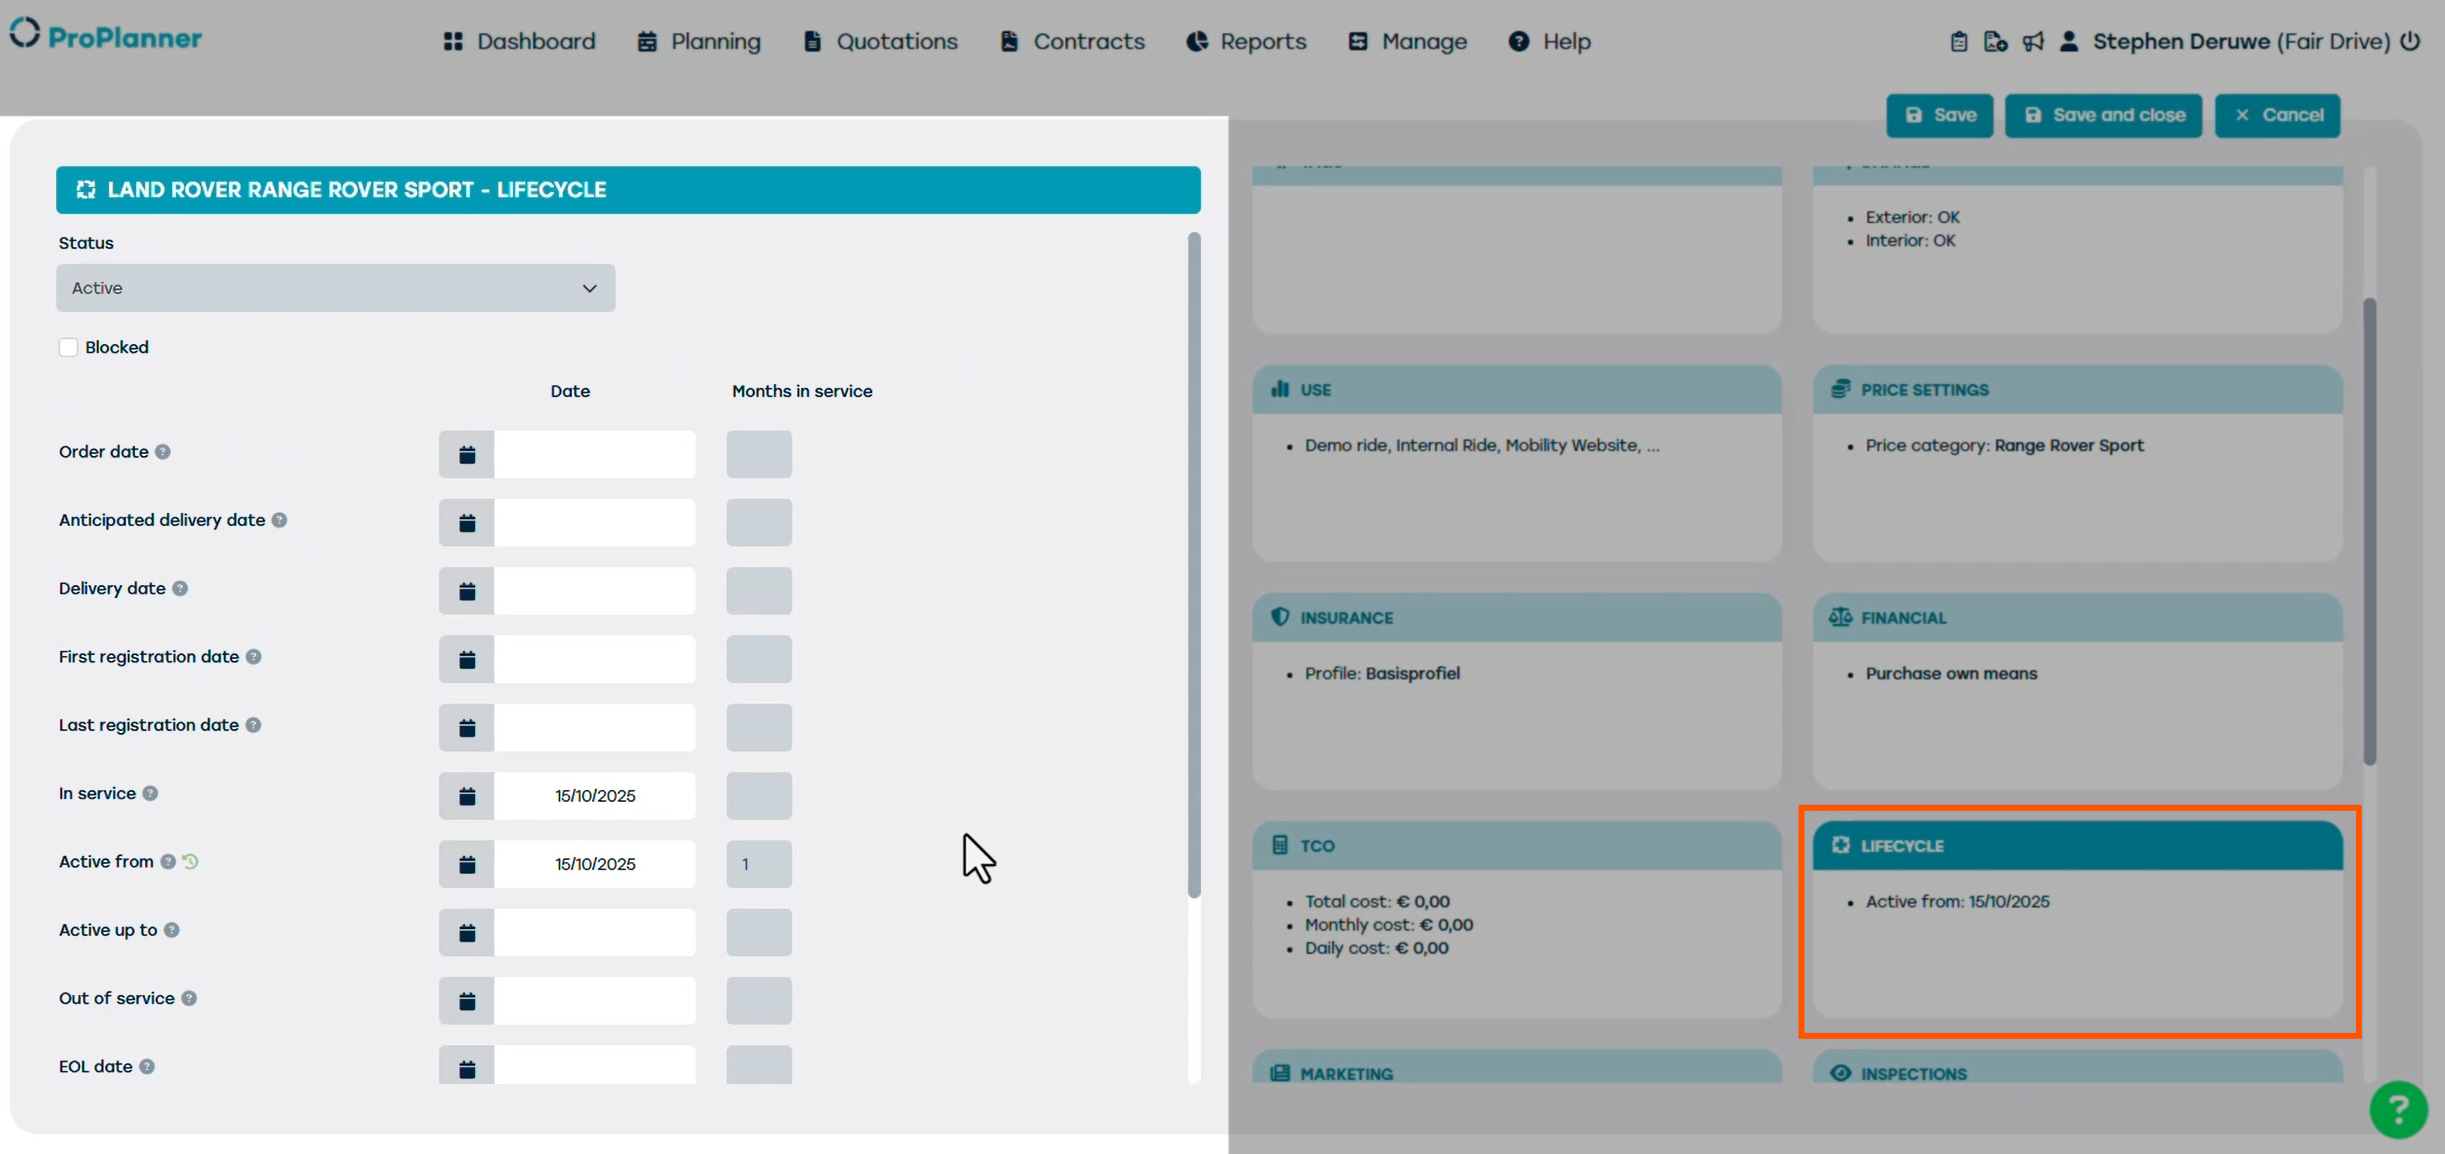
Now let’s look at the Lifecycle tile. This is a key section, as it’s where we activate or deactivate a resource.
To make the resource available for bookings, you need to enter the ‘Active from date’.
You can also enter the ‘Active Up To’ date. This marks the final day the resource will be visible in the planning. After this date, it will no longer be available to make any bookings on this resource.

This is the correct way to de-activate a vehicle from active use, often referred to as defleeting.
It’s important to note that resources are never deleted from the ProPlanner system, so that the full history of the resource remains accessible.
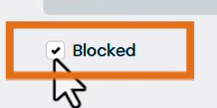
If you want to prevent any new contracts from being created for this resource, you can block it by selecting the appropriate option.
Once blocked, the resource will still appear in ProPlanner, but it can no longer be used when creating new reservations, as you can see here on the planning screen.

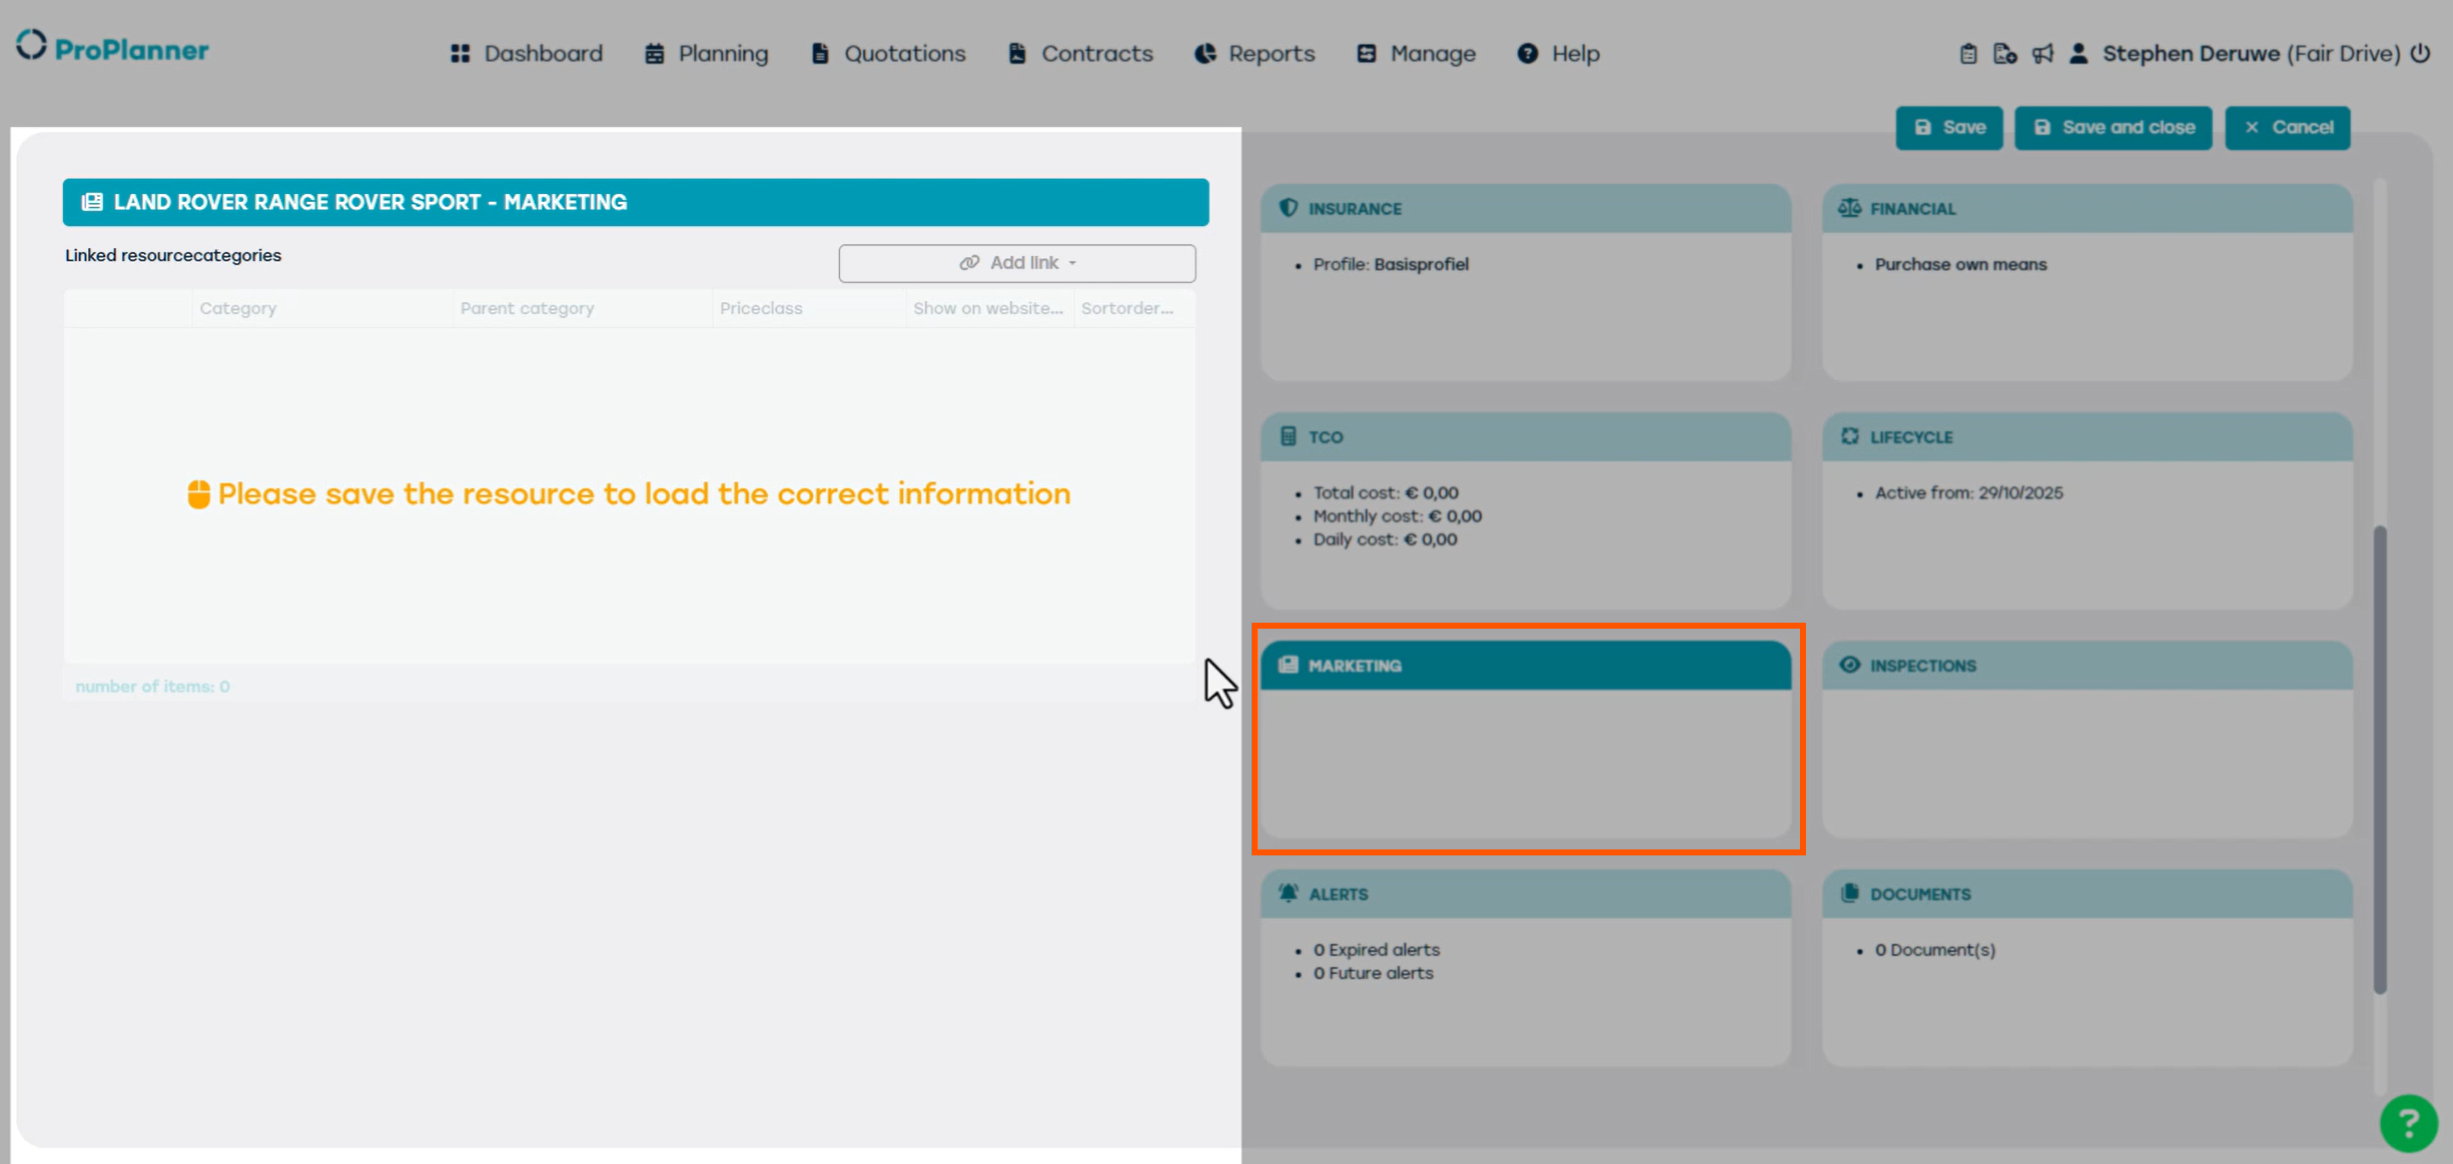
Now let’s move on to the Marketing tile. Earlier, we selected that the vehicle will be available on the website. Once we save the vehicle, it will automatically be linked to a resource category, which will be displayed here.
Inspections tile will show the latest inspections that were made via the tablet application in our case this is a new vehicle so this will be empty.
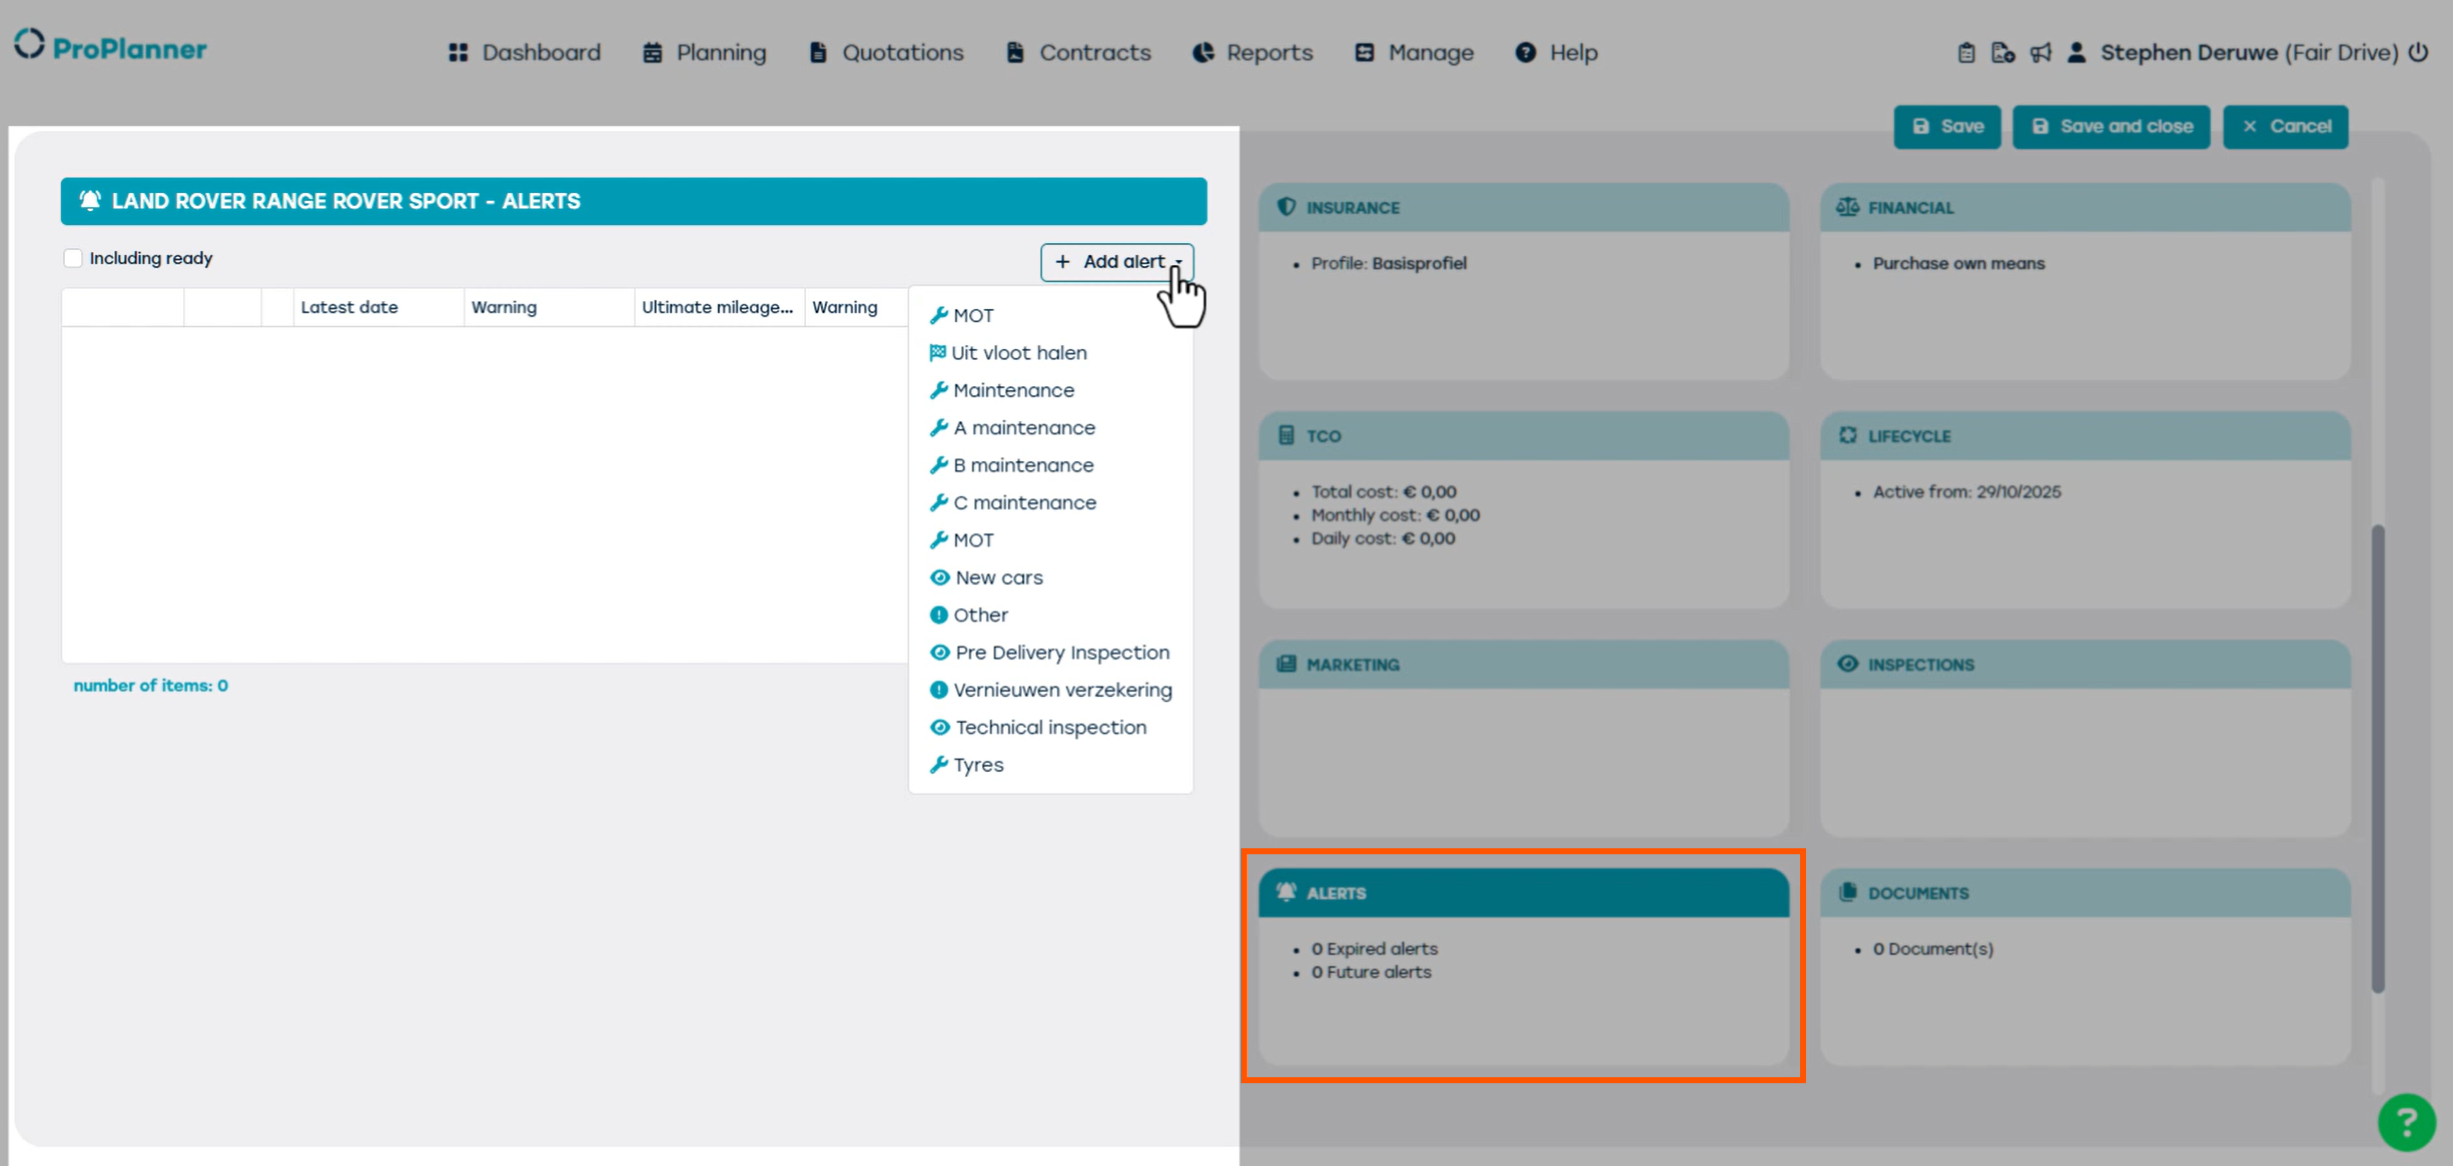
The Alert tile is used to create alerts that will be visible in both the planning view and the dashboard. These alerts can be used to inform staff that a resource requires maintenance or a technical MOT/inspection. In this example, we’ll create an alert for our Range Rover Sport.
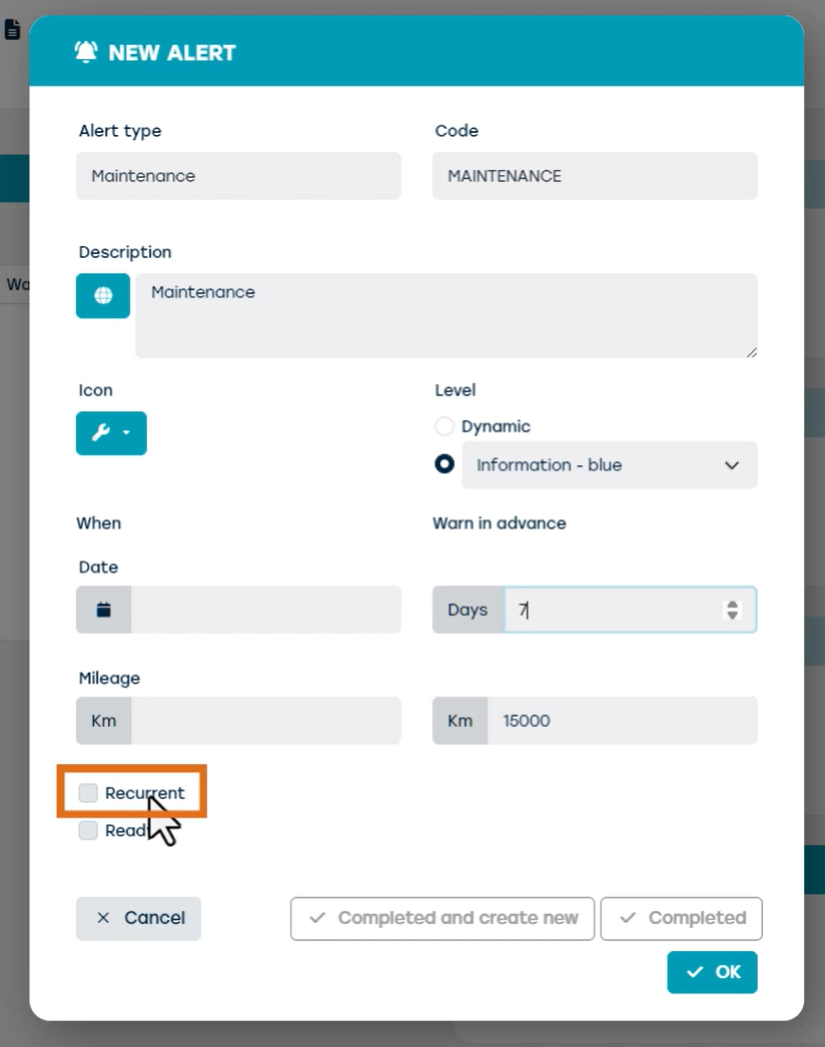
We want to set a maintenance alert after 15,000 km, so we enter the mileage and configure the alert to notify us 7 days in advance. It’s also possible to make the alert recurring, so it will automatically be repeated at a certain interval when the current alert is deactivated.
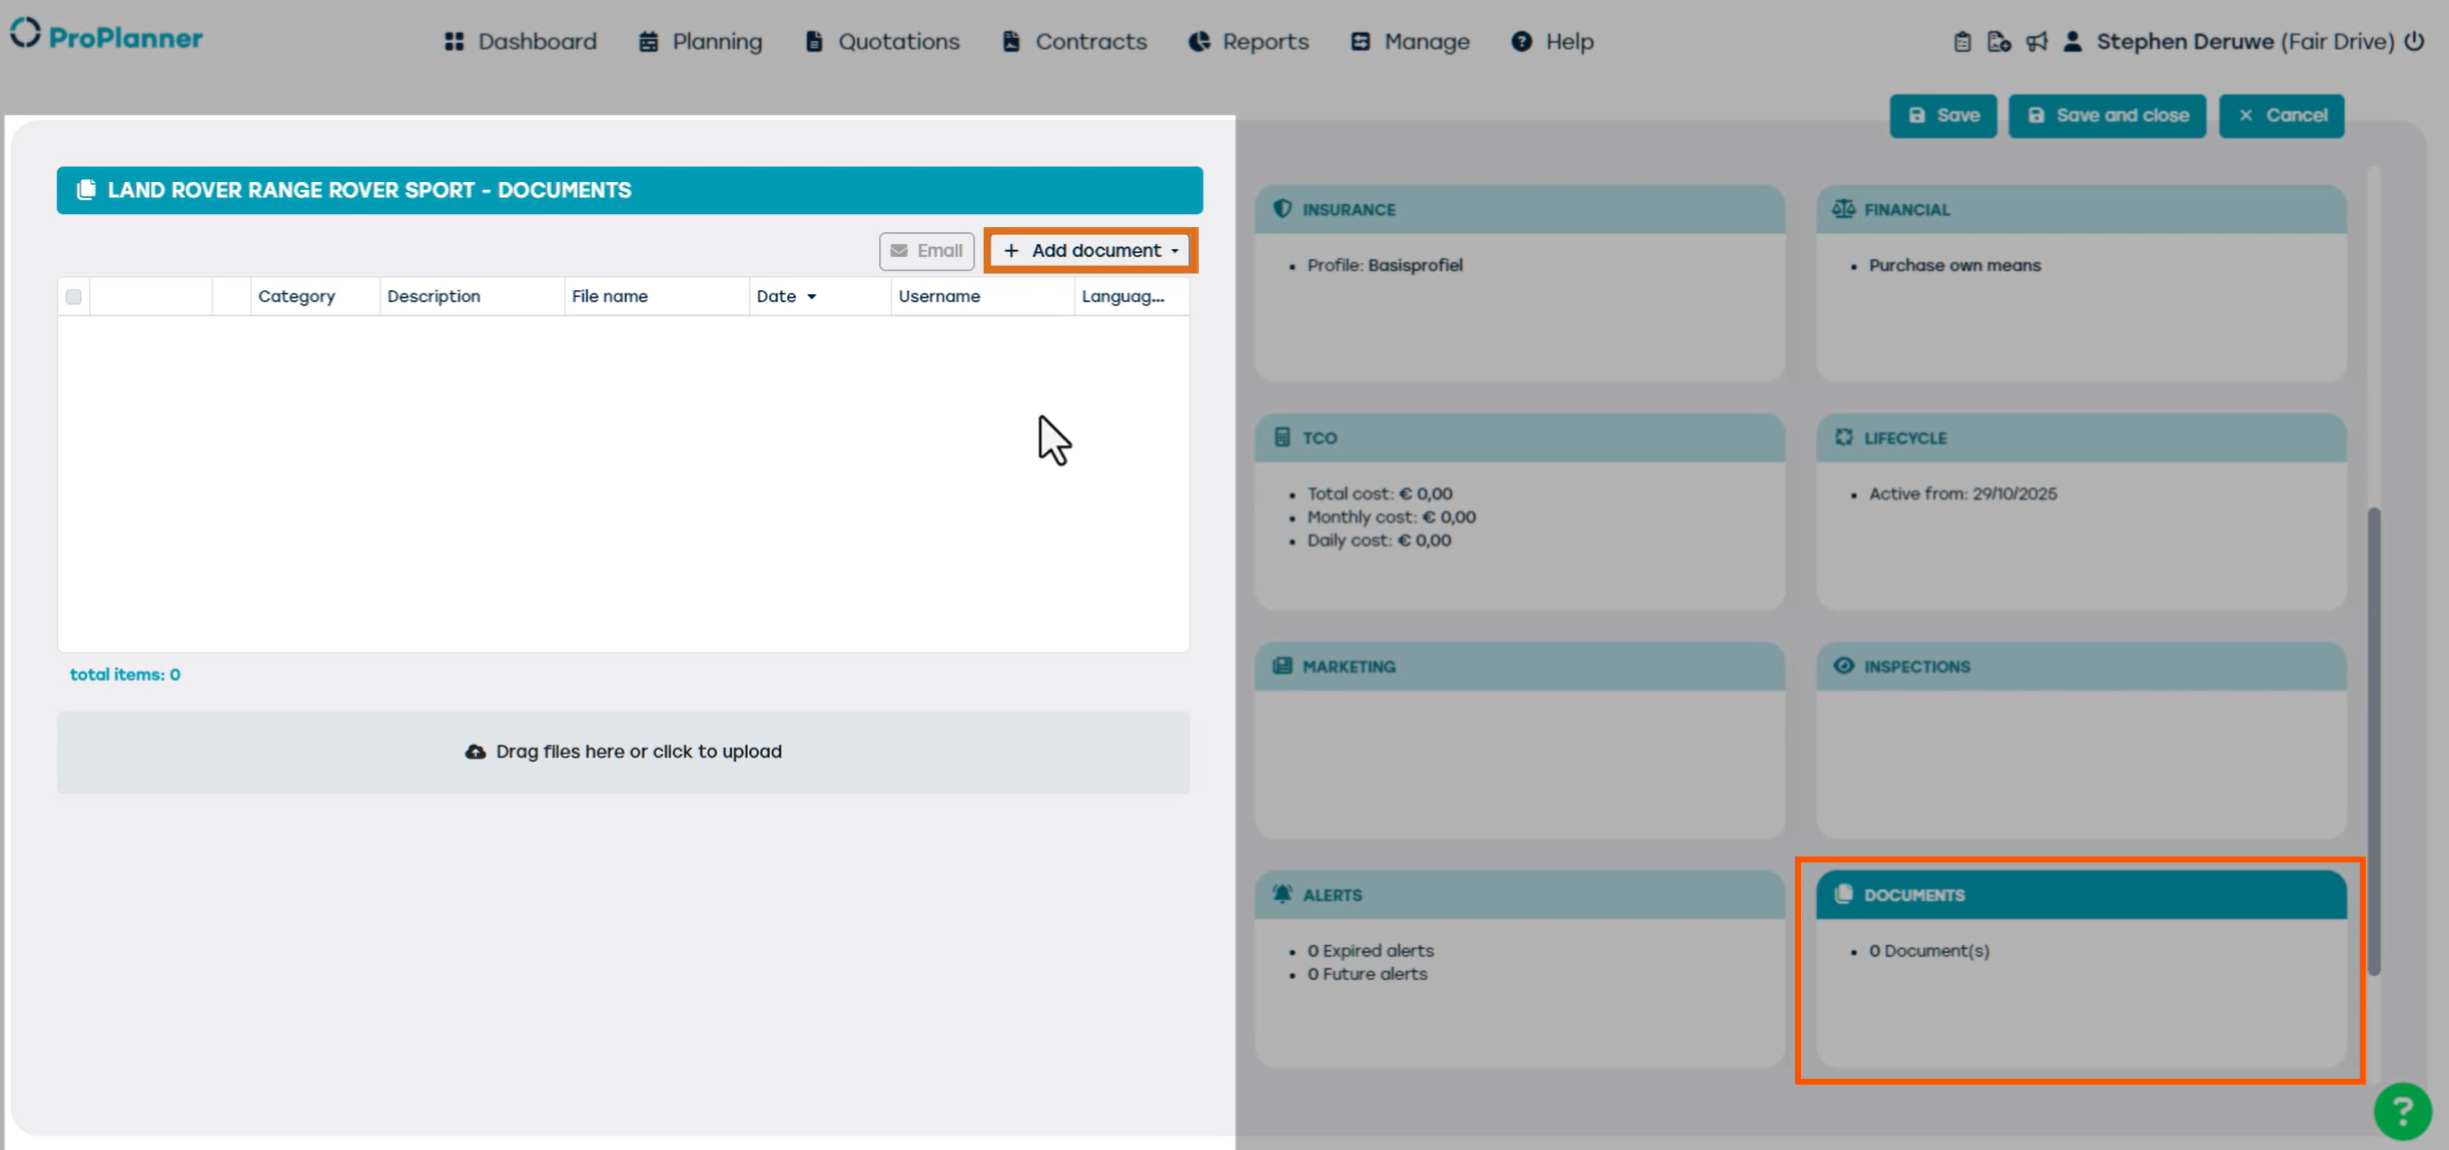
The Documents tile allows you to upload files that are relevant to the resource, such as insurance documents, certificate of conformity, or technical inspection reports. This can be very useful when a customer calls and requests specific documents, you can then easily retrieve them here and send them directly via email.
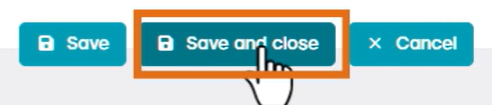
Finally, click Save and Close to save your resource. You have now succesfully created and activated the resource in ProPlanner. The resource can now be used to make reservations.