In this video:
We will go over Invoicing as this is an essential part of any business. Within ProPlanner, you can easily create one or more invoices based on a contract, ensuring that the associated costs are correctly charged to the customer. ProPlanner offers the flexibility to generate invoices at any time, this can be before the contract starts, during its term, or afterwards if it turns out that certain costs have not yet been billed.
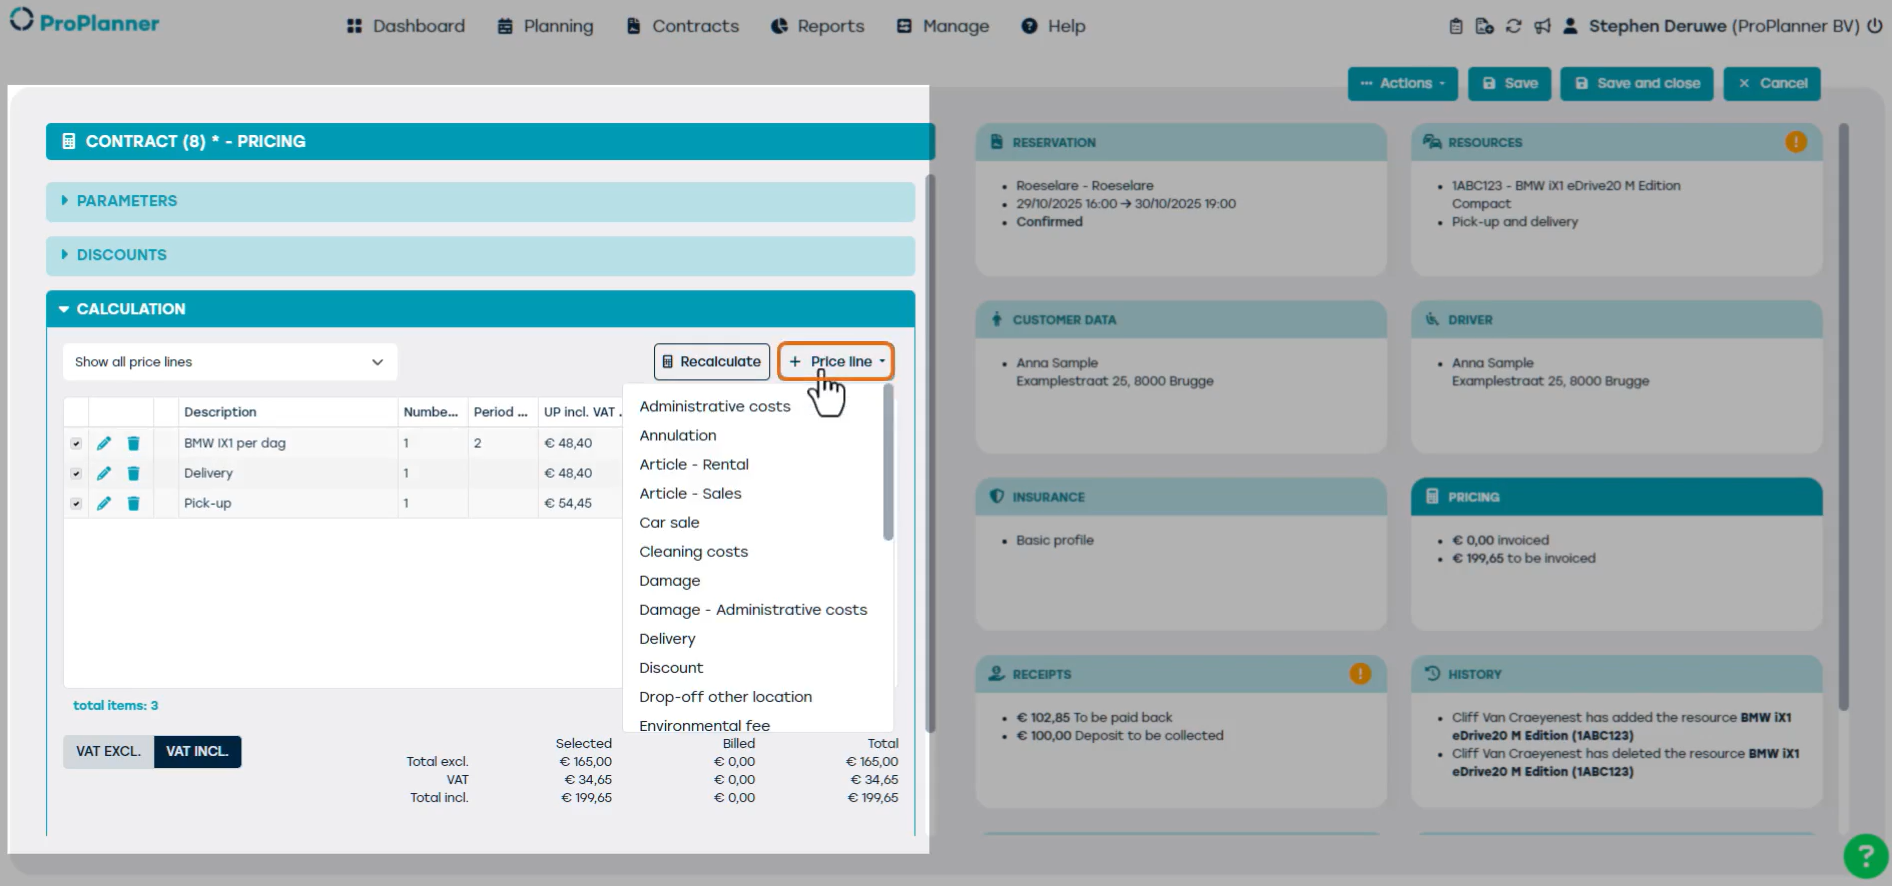
To create an invoice in ProPlanner, price lines are essential. These lines provide a detailed overview of the costs being charged to the customer. You can find them by clicking on the ‘Pricing’ tile within a contract.
Price lines can be generated based on predefined parameters, but it’s also possible to manually add additional lines. You can do this via the + Price Line button, where you can then select a price line type, such as damage, administrative fee, fines, and so on.
When adding a price line, the following fields can be adjusted: Description Units VAT rate, Discount, Unit price.
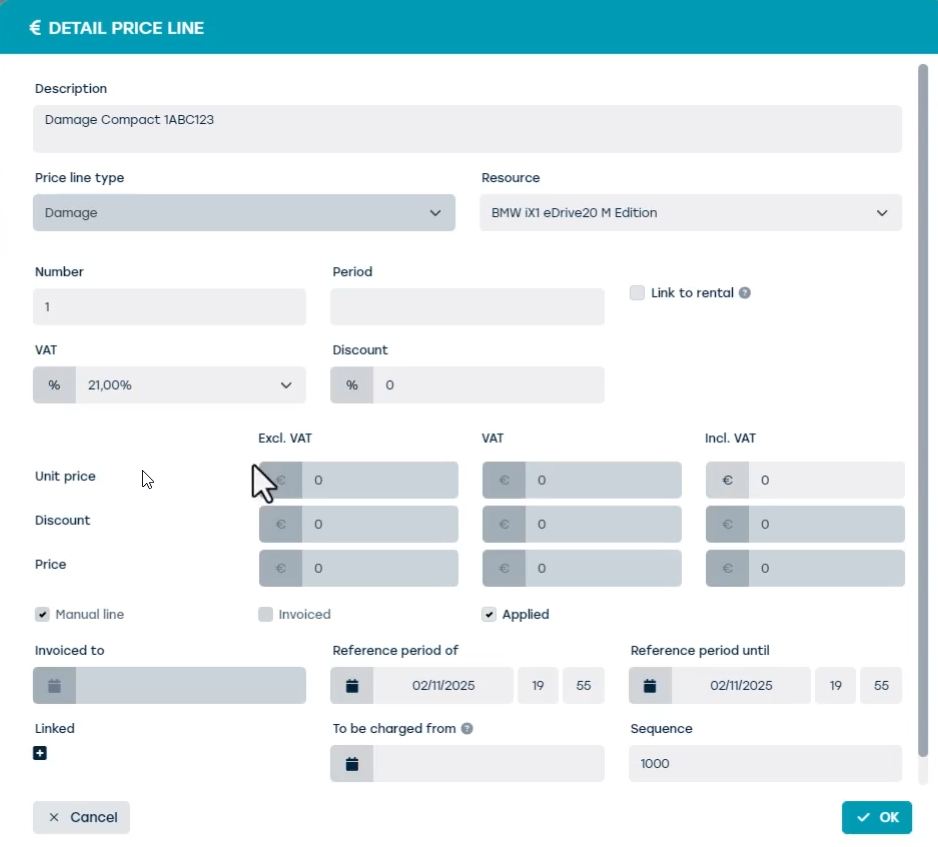
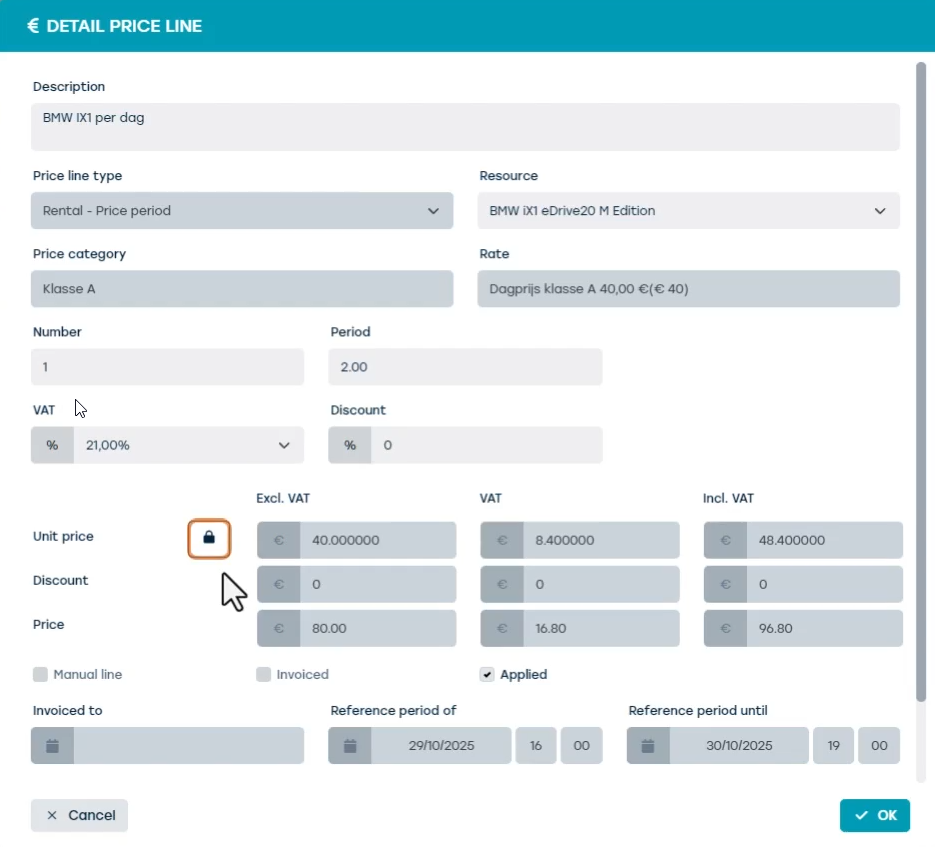
Each price line contains information about the nature of the cost, the quantity, and the unit price. By clicking the pencil icon to the left of a price line, you can view the details and, if needed, adjust the unit price.
Only the unit price can be manually adjusted, using the lock icon on the left-hand side. ProPlanner continuously performs automatic recalculations. As a result, other changes may be overwritten.
Once all price lines have been reviewed, you’ll find the ‘+ Invoice’ button at the bottom of the overview. This starts the process of creating an invoice for the relevant contract.
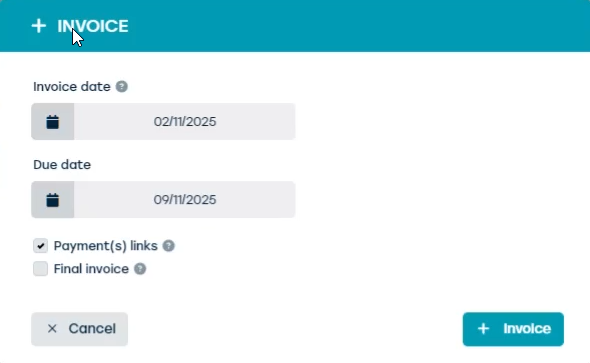
Before the invoice is actually generated, ProPlanner will ask for a few important details:
- Invoice date: this is Automatically filled in as the date the invoice is created.
- Due date: will automatically calculated based on the payment terms set in the customer file.
- Final invoice: If this box is checked, it indicates that this is the last invoice for the contract. In that case, ProPlanner can automatically settle the security deposit. This field is automatically checked when: All resources and items have been checked in or All price lines have been invoiced.
- Link payments: If this box is checked, it indicates that all payments not yet linked to another invoice may be associated with the invoice being created. This field is automatically checked when there are outstanding payments that haven’t yet been linked to an invoice.
It is important to know that an invoice is always created in the business unit responsible for the contract. You can find out which business unit this is by checking the top left corner of the contract, under the ‘reservation’ tile. This may differ from the business unit you are logged into as a user.
To maintain accurate records, ProPlanner assigns a distinct invoice number range to each business unit.
Once the invoice date and due date are filled in and the ‘+ Invoice’ button is clicked, ProPlanner will generate a Pro Forma invoice. This is a preliminary invoice that is not yet final and is assigned a unique ‘TMP’ number.
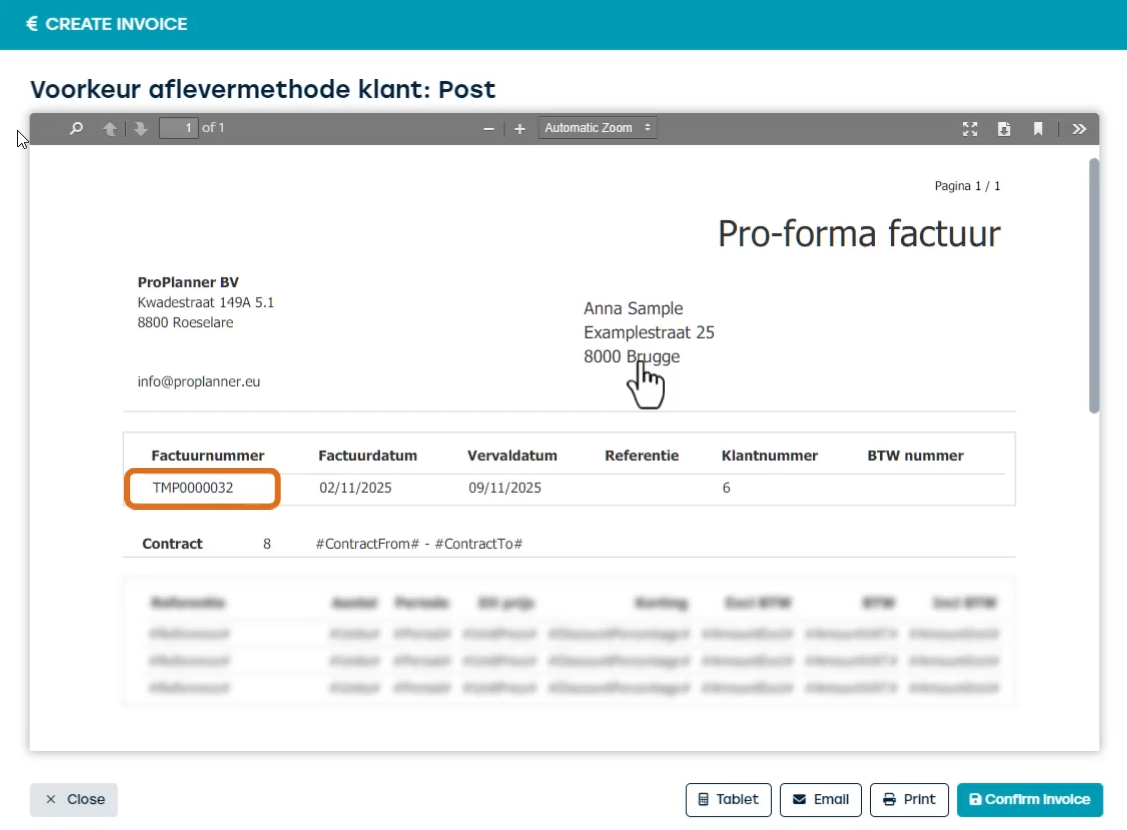
Unlike a real invoice, a Pro Forma invoice can be deleted. It gives the user the opportunity to thoroughly review all details before finalizing. This way, you can ensure that all necessary information is present and entered correctly.
This step is crucial to avoid errors and to ensure that the final invoice meets all requirements.
When you confirm the Pro Forma invoice, the final invoice is generated. It is delivered according to the customer’s preferences, as indicated at the top of the screen this could be via email, post, or another digital platform. If you do not wish to confirm the invoice yet, you can close the screen using the ‘x Close’ button. The Pro Forma invoice will then be saved but not yet converted into a final invoice.
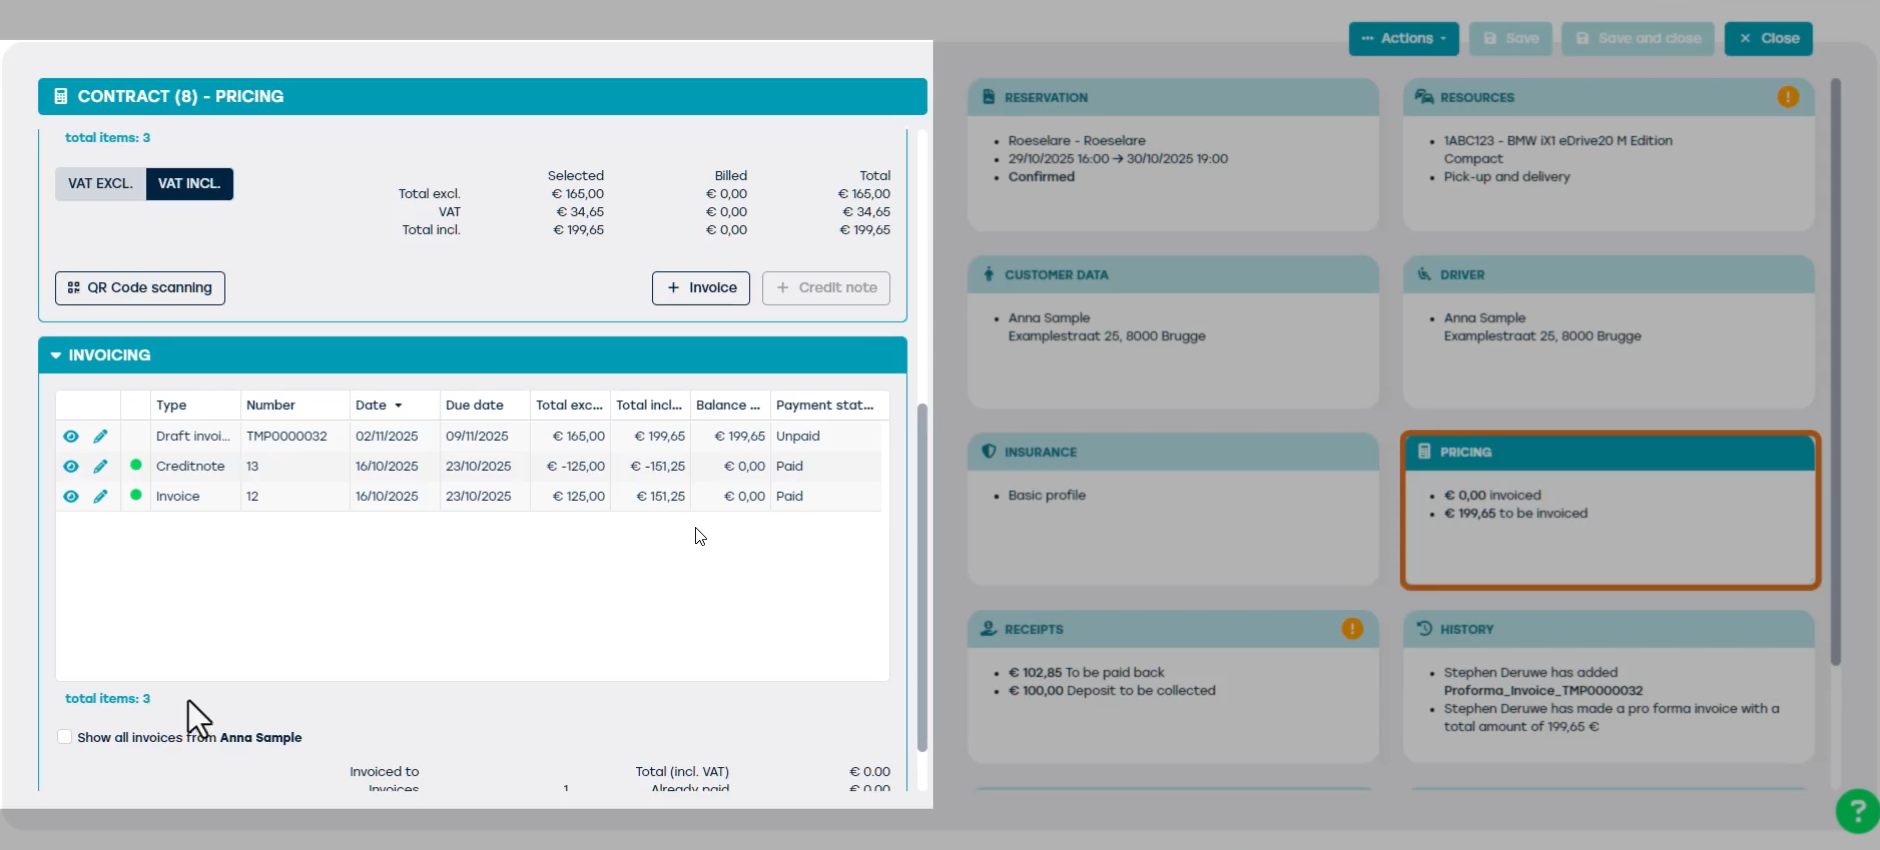
You can find invoices in two different places:
Directly via the contract by clicking on the ‘Pricing’ tile.
And then expand the ‘Invoices’ section to view all created invoices.
Or by going to Manage > Financial > Invoices.
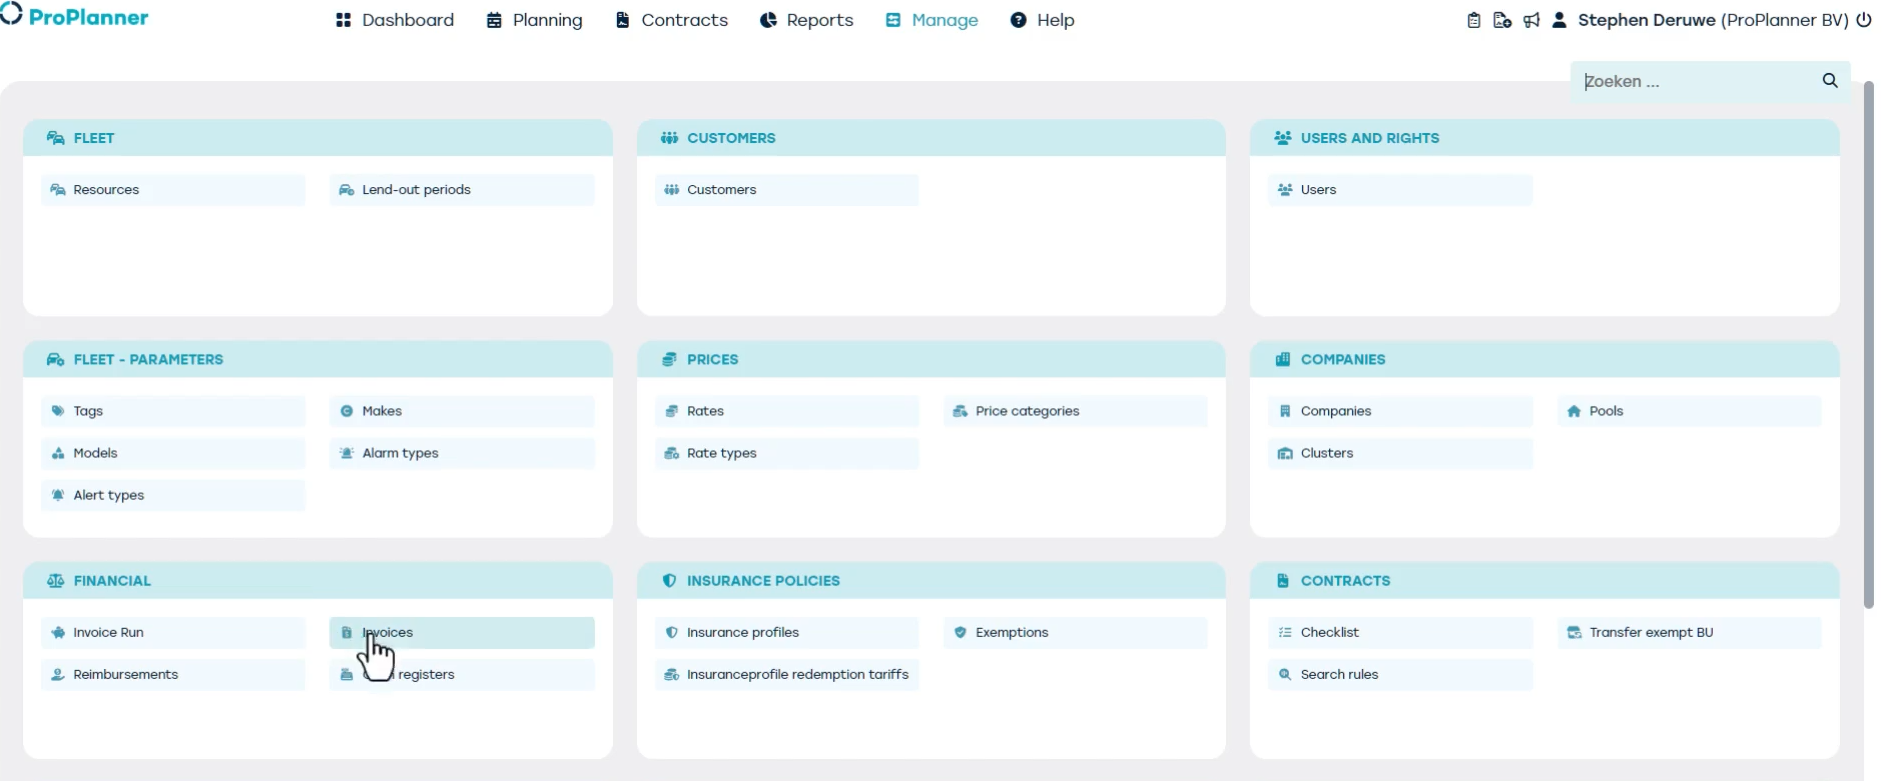
Here you’ll see a complete overview of all invoices, depending on the filters applied.
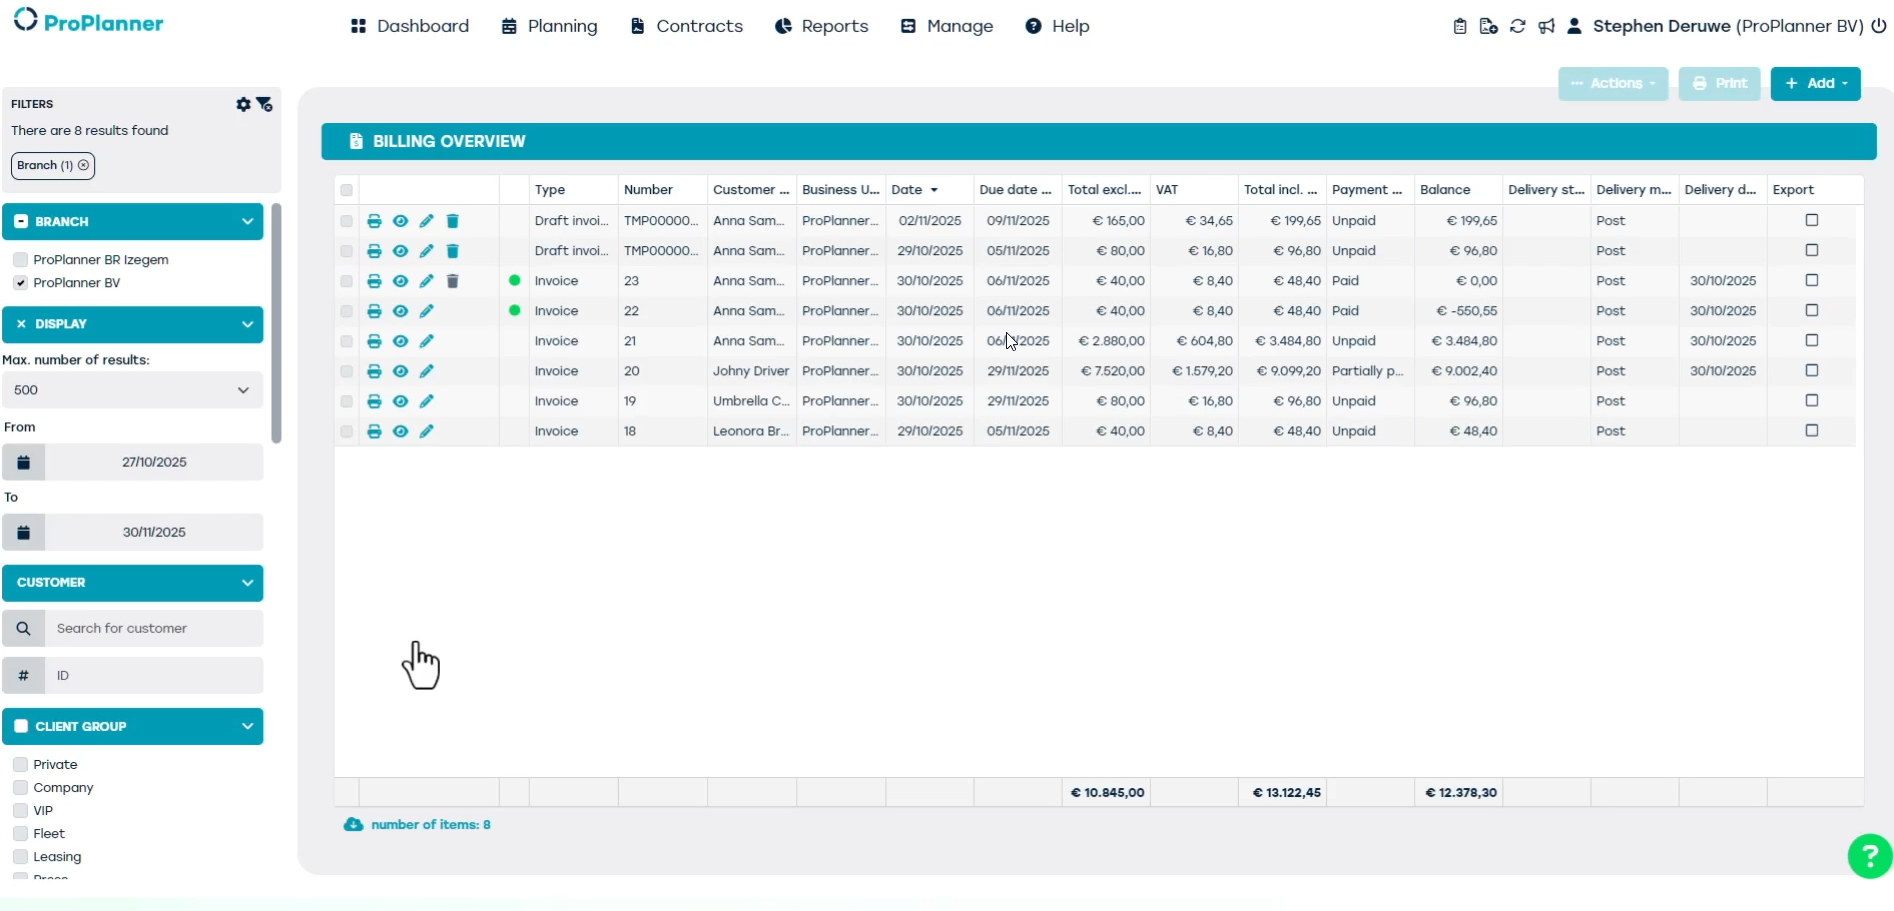
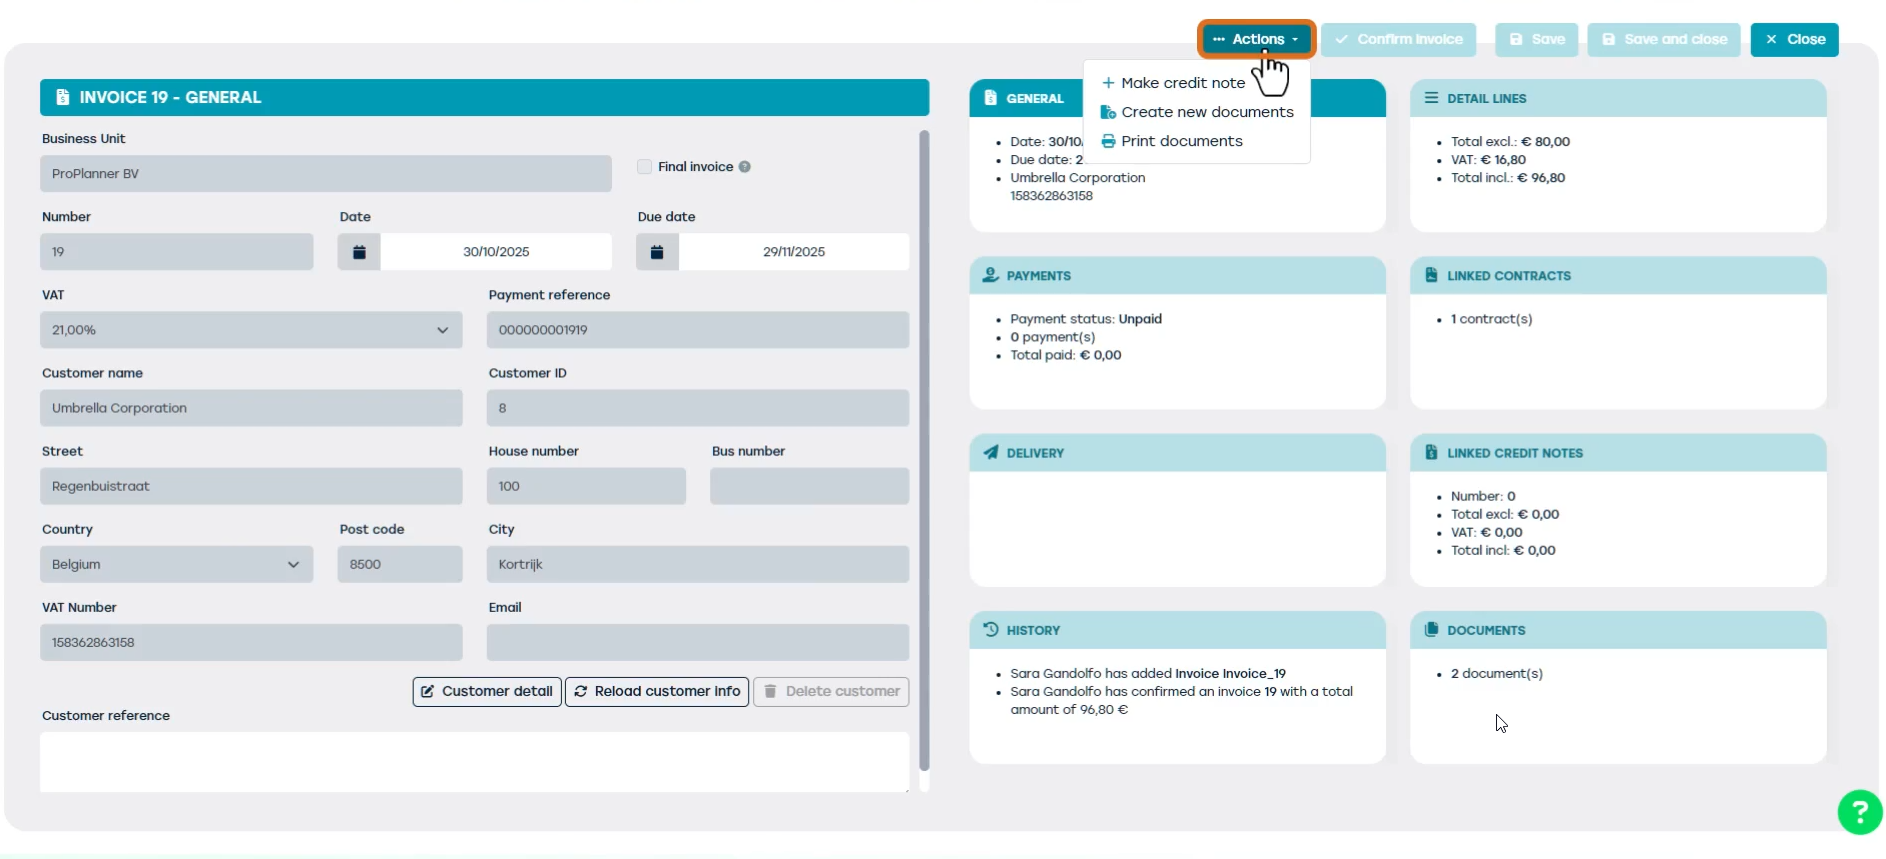
The invoice status can be manually adjusted by the user, for example to indicate whether it has been fully or partially paid. If needed, you can create a credit note for the invoice using the ‘+ Actions’ button at the top right of the screen.